The Adobe programs are nothing to fear. Like all things, they seem complicated at first, but after practice, reading online, and just exploring yourself, you’ll learn they are easy to use. For a couple of my article covers, I’ve used my own images made in Adobe Illustrator. It’s not a painting program like Photoshop, but you can make some exceptionally detailed images in them. The pen tool is the ultimate piece to use and it does take some skill to get used to. Here’s a quick guide to the Adobe Illustrator tools and a demonstration video on what they can do.
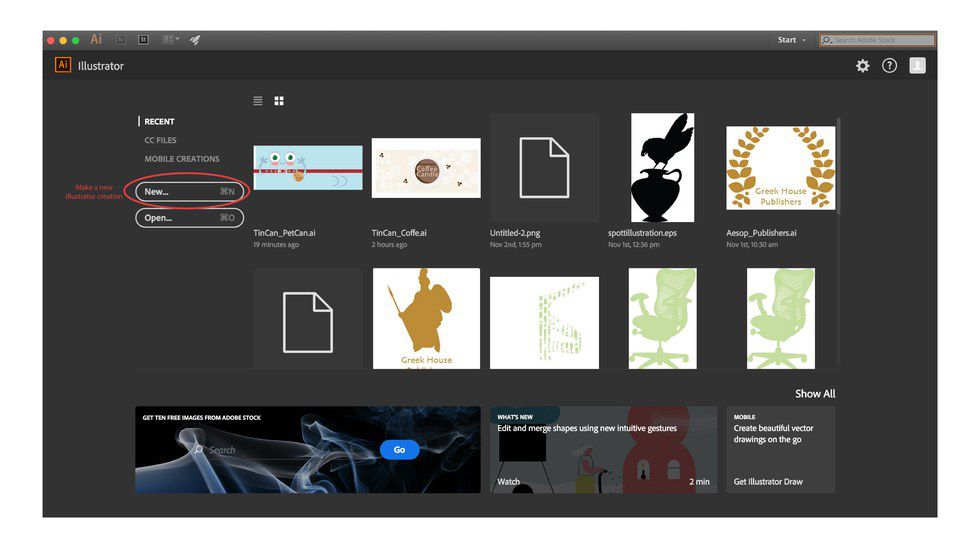
Opening Illustrator, this is the first thing you should see. The preview pieces you see are the previous files you've worked on and have quick button to open them.
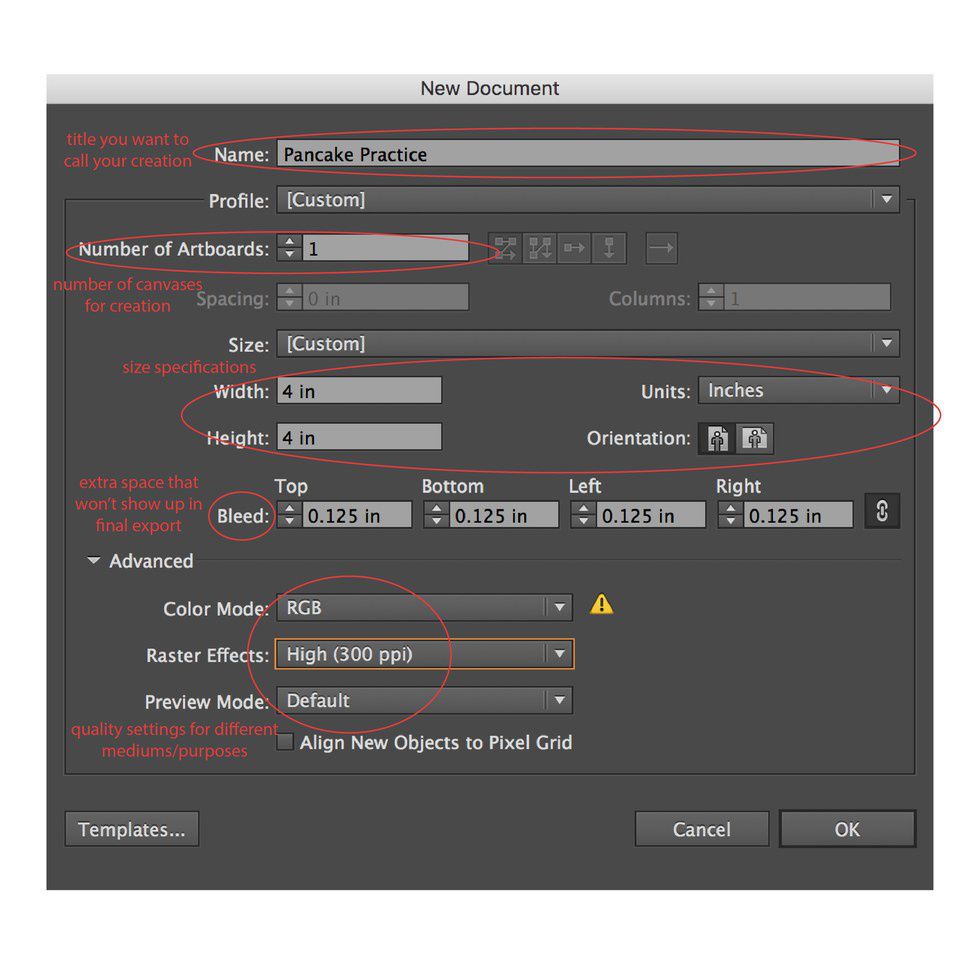
The "New Document Window" allows for you to make preliminary settings to your new creation. These can be easily edited and changed when you are working too. Above, I've highlighted and explained the most important parts. Profile specifies the type of media your file will be for, such as print, web, computer, phone etc. The Color Modes and Raster Effects. RGB and 72 ppi are the standards for digital publications; CMYK and 300 ppi are used for print. For digital, however, sometimes the highest Raster Effect setting is the best to use.
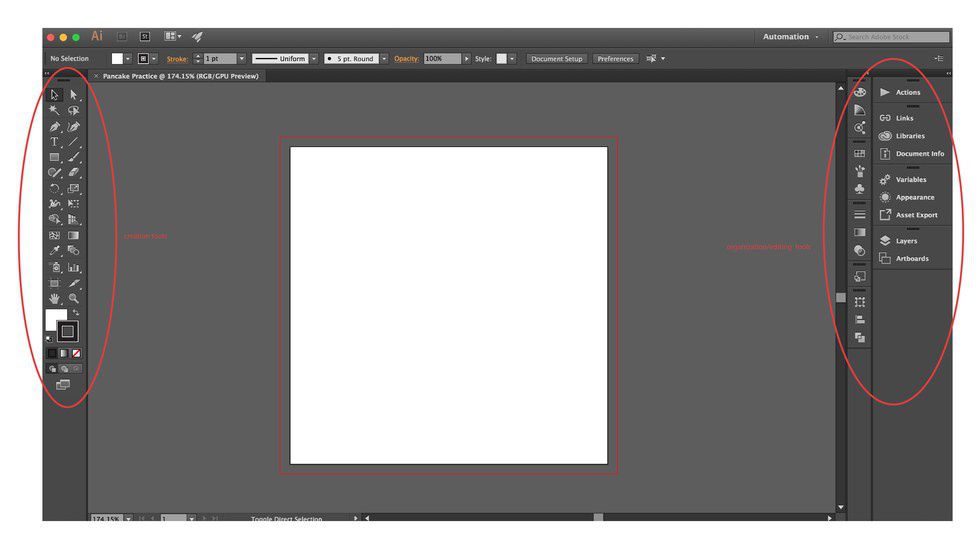
When you OK your settings, you should have a new canvas like this. To the left and right are your main tools. Some tools have extra options or qualities that can be edited; these options show up at the top bar.
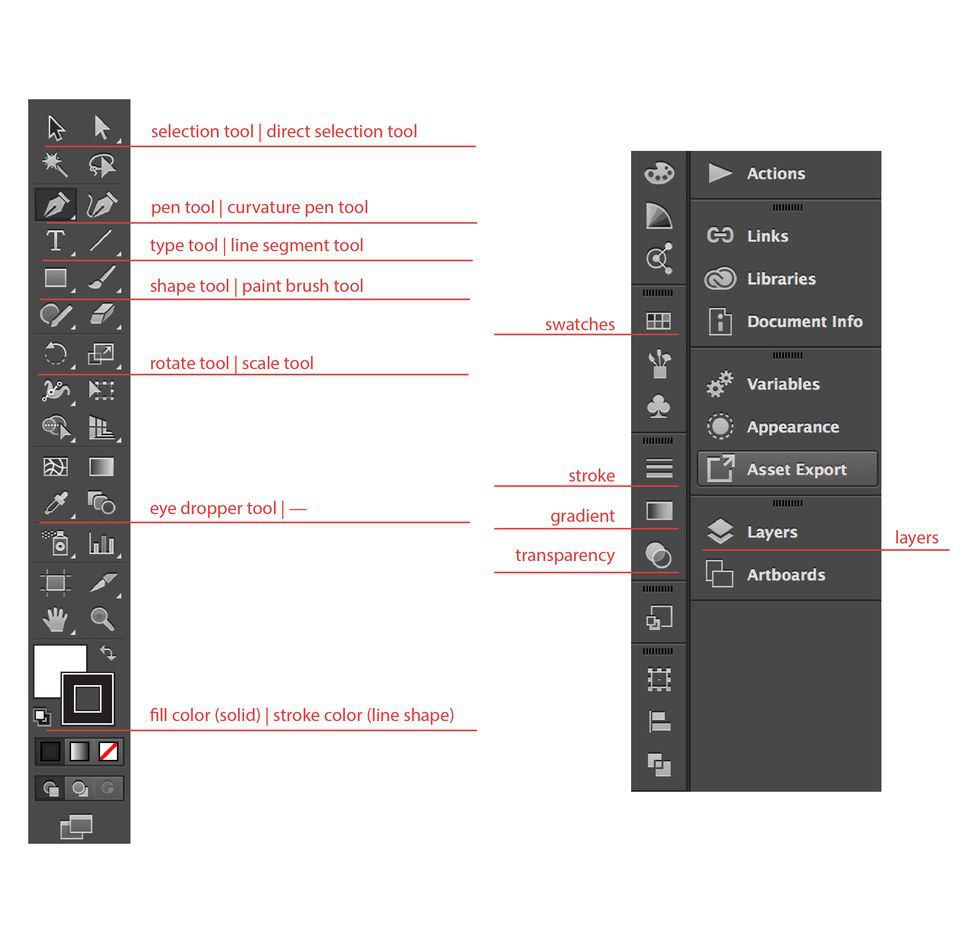
The Selection Tool selects entire figures or shapes, and the Direct Selection Tool allows you to edit vector points within those shapes. The Pen Tool is the ultimate tool in Illustrator. It creates very nice, clean, lines and figures that the other Adobe programs lack. The Shape Tool is excellent for making stylized images that are very geometric, but not so much realism; editing shapes are harder, and it's better to make them with the Pen Tool if you can. The Eye Dropper is the next best; it can grab color and copy certain shape specifications onto another. Swatches are your color palettes that are easy to access and reuse. Stroke is the outline of a shape, and can be customized to have different widths and line variety. The Gradient tool is a good use for either realism or stylized, but it's finicky in Illustrator.
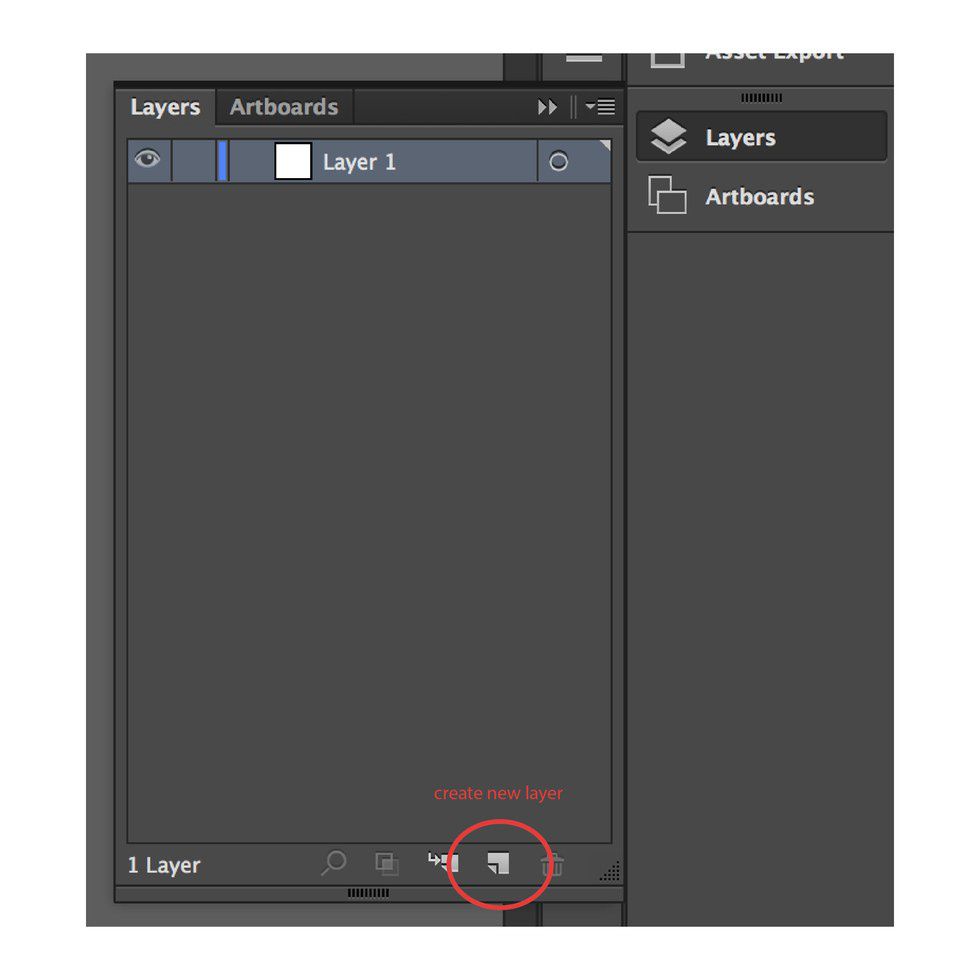
Layers are extremely important to use. They help an artist be organized, and in general, create less of a hassle. The user can make specific selections (by clicking the empty circle next to a certain layer or item) and additionally hide these selections to see compositional options.
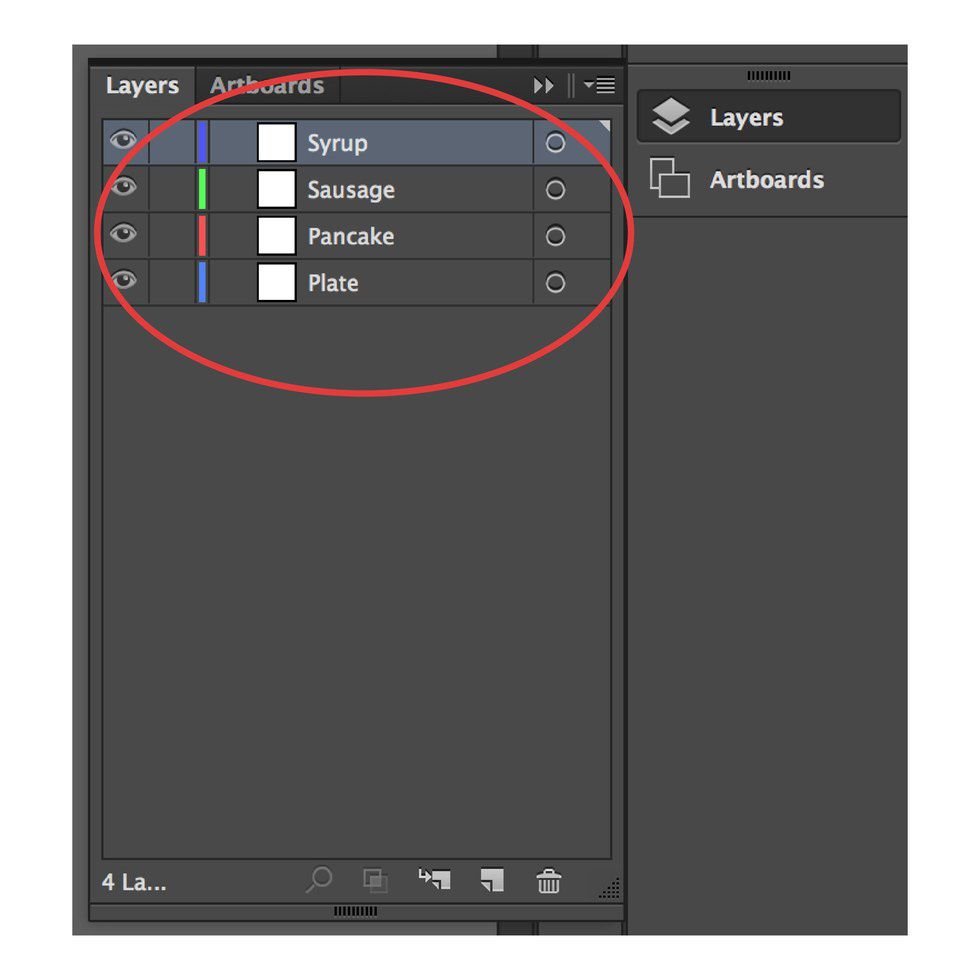
Always name your layers to keep organized! It seems like a hassle at first, but in the end it's worth it when you are looking for that one object and need to delete it. Name your layers by double clicking the layer and then typing in a new name.
Here are some last final tips:
Constantly Save: you never know when your program could crash; it's happen many time for me.
Play Around: play around with some of the tools I didn't mention or search techniques to try
Watch Your Layers: Illustrator will begin to run slow if you have too many shapes and layers. If you are going to have a background that is extremely detailed, make it in a separate file and then place the image into your final piece.
Take Breaks: using the program can be frustrating at first, for your mind and back, so remember to step away from the screen and make a cup of tea.
Exporting: File — Save As — JPG (for digital).
I hope to make this a series of videos and tutorials, so stay tuned!
Music: Golden Days by Panic! At The Disco
OSX: MacBook Pro, Adobe Illustrator CC 2015.3
Recording: QuickTime Screen Recording


