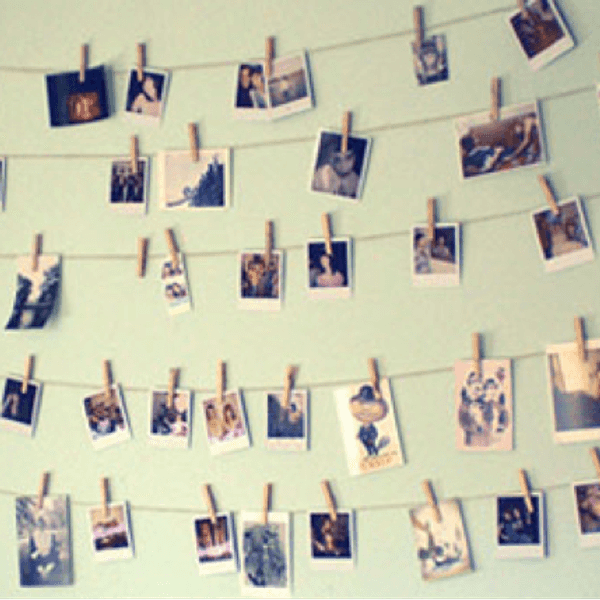

If you're like me, your dorm room freshman year was (for lack of a better word) a s**t show. My room was overstuffed with items that I didn't need and wasn't organized in a very functional or aesthetically pleasing way. This may sound trivial for those who haven't lived away from home, but it's very important to have a space (dorm room) that you feel comfortable in, especially if it's your first year away from home.
A space you feel comfortable in that reflects your style will help ease the transition away from your old home, to your new home. Without this, it's much harder to transition and it will take a toll on you emotionally. I experienced this first hand myself last year, where for most of my first semester I would avoid being in my own dorm room. This year I am determined for that not to happen and have begun working on some DIY projects that are both functional (will keep my room from not being a human trash can) and aesthetically pleasing so I feel comfortable in my space.
The first project I'm doing is a DIY storage/decor display plate set. The reason I refer to it as storage and decor is because because of the design, you have a place for whatever you're storing (I'll personally be using this for my beauty products) and it will also be nicely displayed. I also refer to it as a "display plate set" because I don't think it has an official name yet.
I did not come up with this idea on my own, so I cannot take credit for it. The following are the steps that I personally took (similar to what you will find on YouTube or Pinterest) and how I decorated it. Feel free to look at similar ideas on YouTube or Pinterest for inspiration. And by all means, alter this however you would like to fit your needs individually.
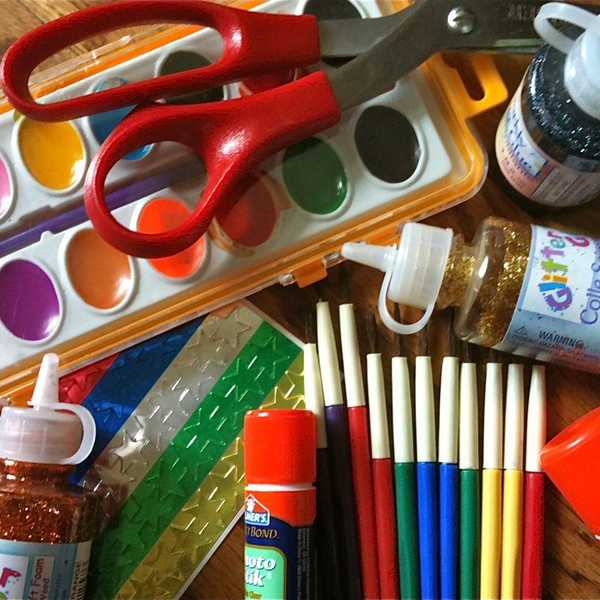
Materials
All of the items I found at the Dollar Store, Michael's, Target, or Walmart.
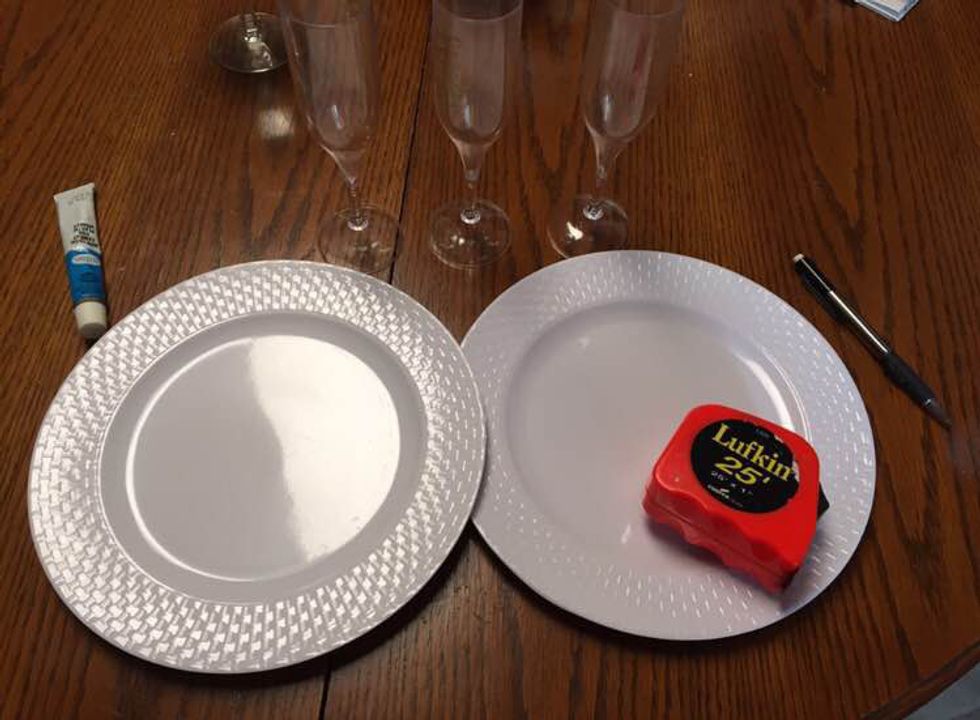
Two plates.
I used plastic plates because my father said that plastic makes a better "mating surface" rather than glass, meaning its easier based on its surface to glue it to other materials, and thus won't fall apart as easy. I purchased mine from the Dollar Store. The two plates should either be the same size (as I did it) or one plate can be bigger, as long as it goes on the bottom.
A cup or candle stick.
I have seen it used with candle sticks, but as my dad mentioned plastic is better for this kind of thing, so I used plastic. At first I was going to use one larger plastic cup (similar in the style to a wine glass), but I ended up deciding on some plastic imitation champagne flutes I got from Target that I had laying around that I had used for my nineteenth birthday. I find that by using multiple, smaller cups, the design will be more stable and you'll be able to place more on your top plate.
Glue.
For this project (since I'm using plastic), I used Testor's Model Plastic Glue. This is one of the best glues on the market specifically designed for plastic. If you're not using plastic, hot glue should work. My dad just happened to have this glue in his garage, but you should be able to find it at Michael's, Walmart, or any other craft/hobby shop.
Tape measure or ruler.
This will be used to measure the center of the plates so you know where to place your cups. My dad had a tape measure I could use.
Pencil.
This will be used to mark the center of the plates.
Spray paint.
I chose to spray paint this with a silver metallic paint, but you can use whatever color you would like. Just make sure that the paint can be used on plastic. This may require you to get acrylic paint, or what I found, Krylon spray paint. I picked this up at Michael's.
Anything you would like to decorate with.
For me personally, I thought the silver spray paint would go great with some pearlized beads, which I purchased at Walmart. I will be attaching them with hot glue.
Procedure
1. Wash your plates and cup(s).
I'm not sure if this step is completely necessary, but I did it anyway. This way there isn't any excess dirt or germs which should make the paint go on easier and keep it more cleanly. I just used a wet paper towel with some soap to clean everything off, but clean however you see fit.
2. Find the center of your plates.
Taking your tape measure, measure across one of your plates horizontally and make a small mark with your pencil at the half way point. Then measure across the plate vertically and make another small mark. You should have made a small "x" with your pencil. Repeat this for your second plate. My plates were 10.5 inches, so I made my marks 5.25 inches in from both directions.
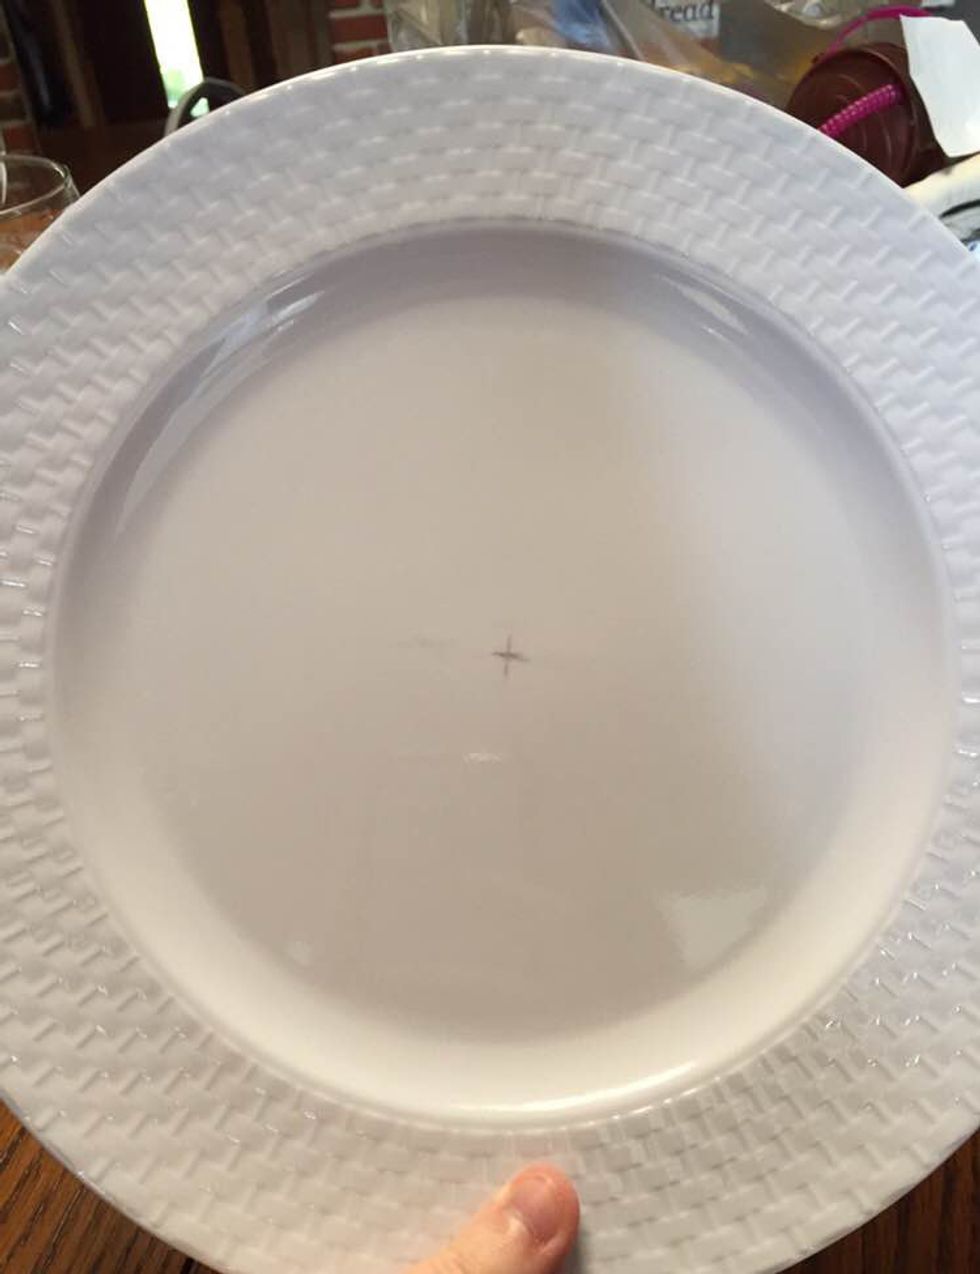 ("X" marks the spot, after all.)
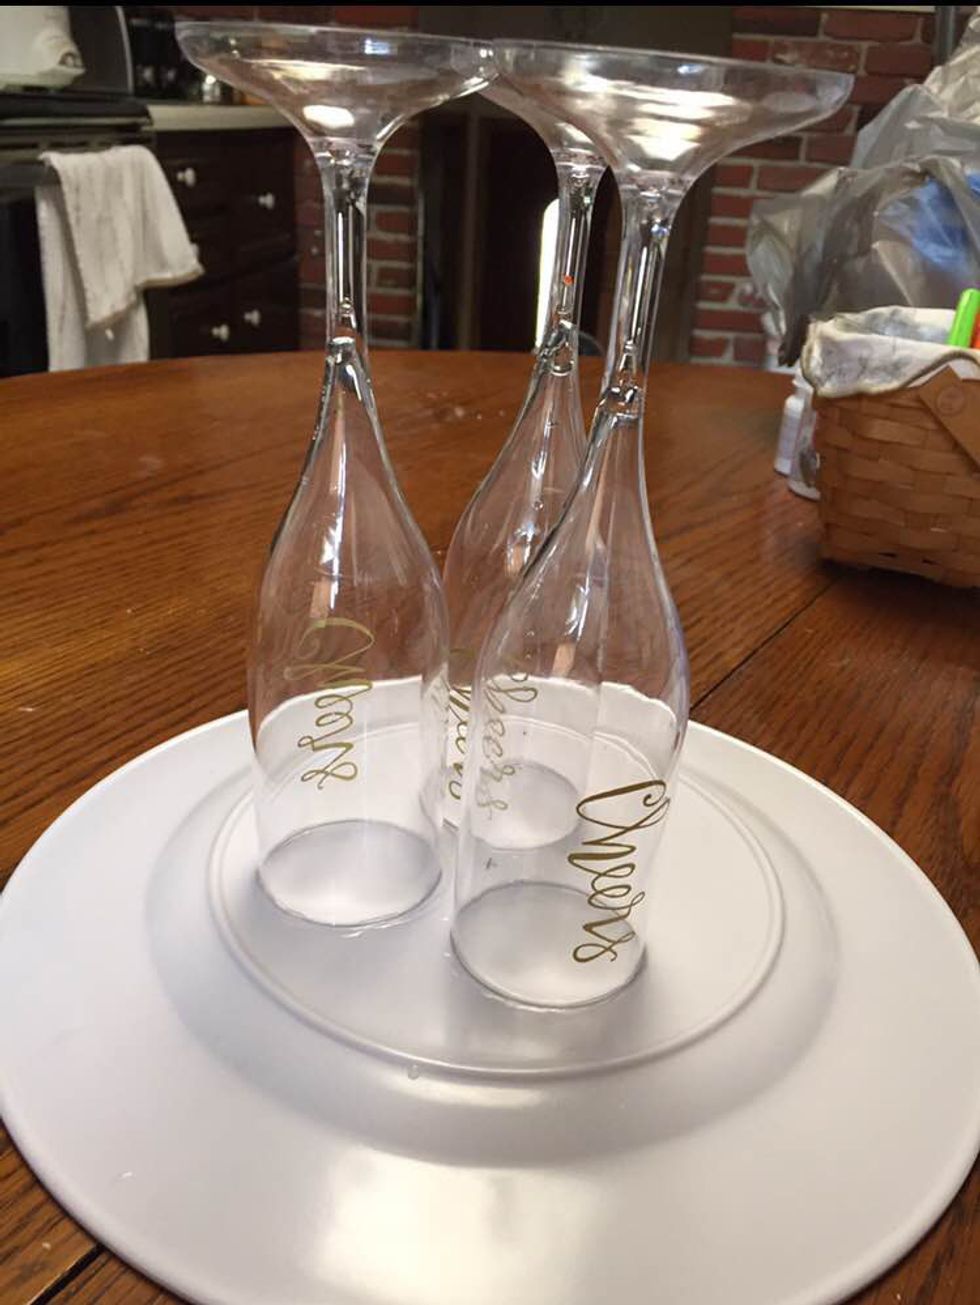
3. Figure out a formation you like.
I decided that since I used three cups, to place the three cups around where the "x" was so that the "x" was in the small space between the three cups.
4. Trace where you want your cups to go.
At this point I just took my pencil and traced around the three glasses on both plates so I knew exactly where I wanted to glue them. Make sure to do this on both plates. For the top plate, just flip over the design you have and trace where the tops of the cups meet the underside of the top plate.
5. Start gluing.
I actually started gluing upside down because my dad recommended it and it made the process much easier. Since you traced where you want the cups to go, this should be relatively easy. Follow the directions for whatever kind of glue you have. According to the Testor's glue I used, you use a small amount of glue. I used a small amount of glue on the entire rim of each cup and placed them down on the outline and held each of them for thirty seconds. If you're using the Testor's glue, it's going to take about four hours for the glue to be the strongest. If the glue is still moving around after a minute or two, never fear, just leave it alone and let it dry for a few hours.
Cups glued upside down, first.
After I waited a few hours for the top to glue, I repeated the same process with the bottom of the cups, placing a small strip of glue around the base of the cups and holding them down on the traced area for 30 seconds each. This will also take a few hours to dry.
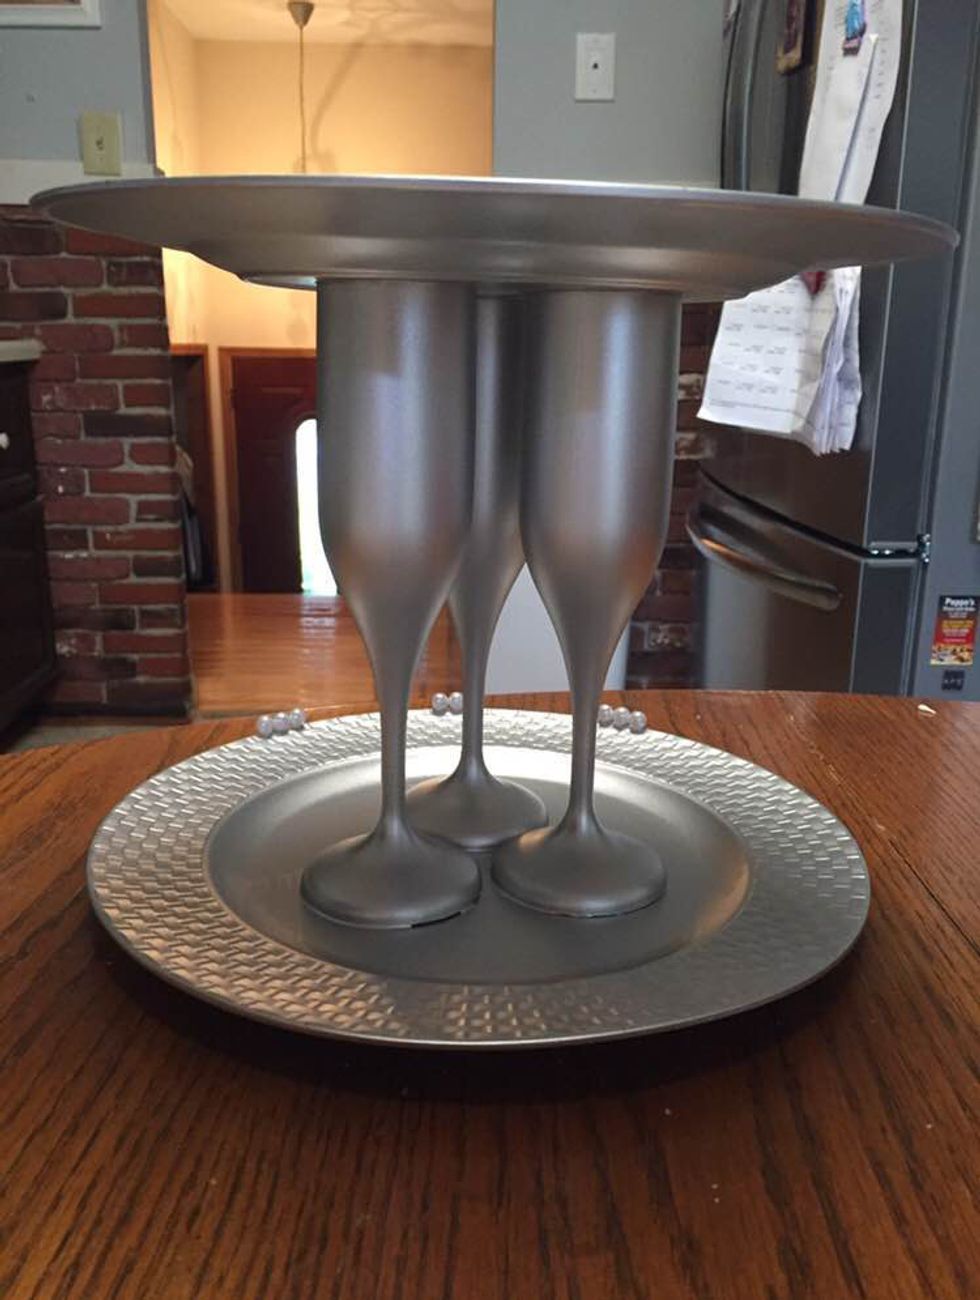
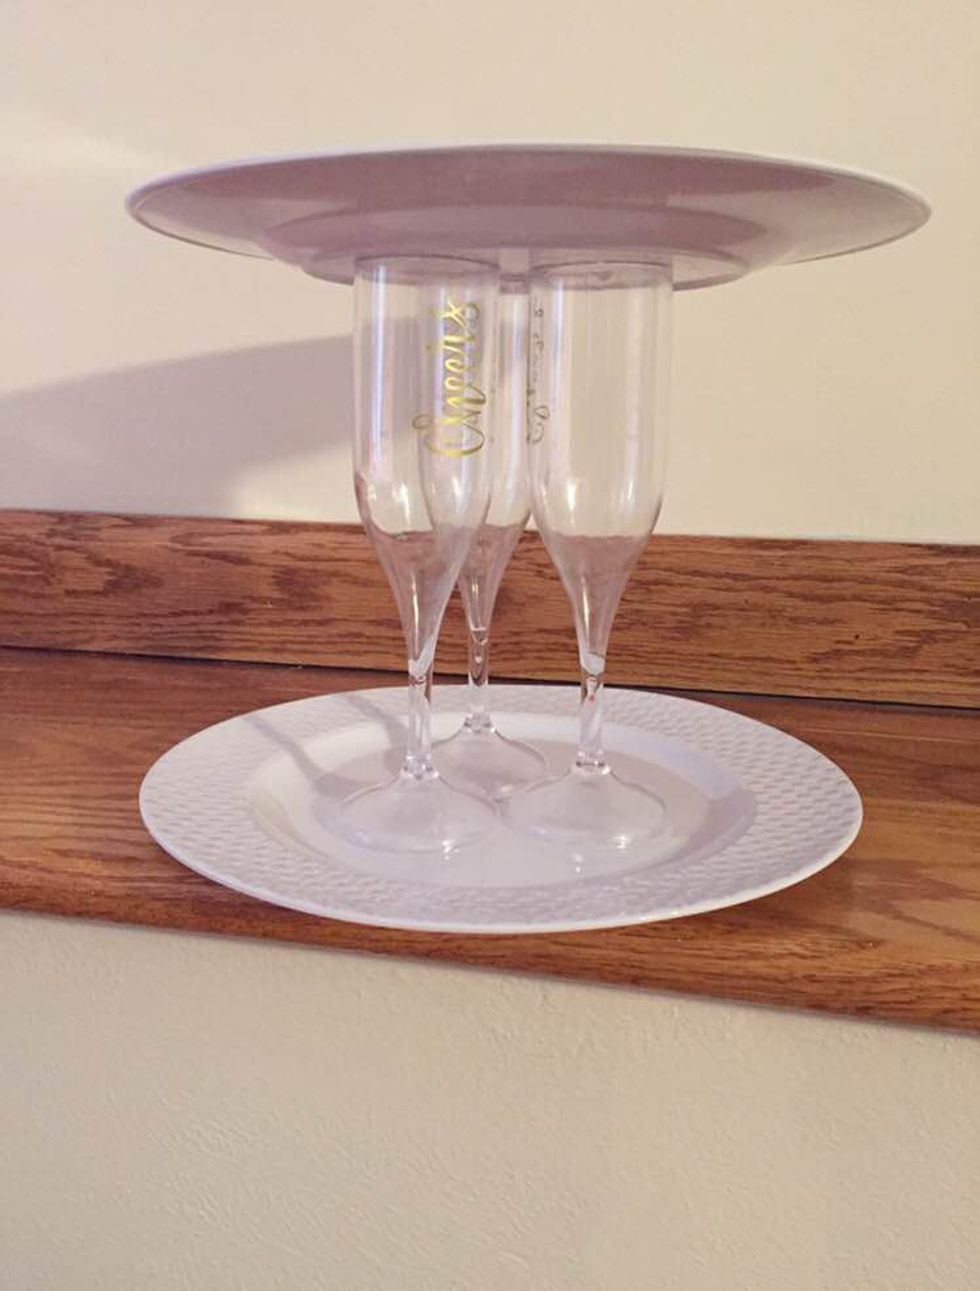 Finished product before spray painting.
6. Spray paint.
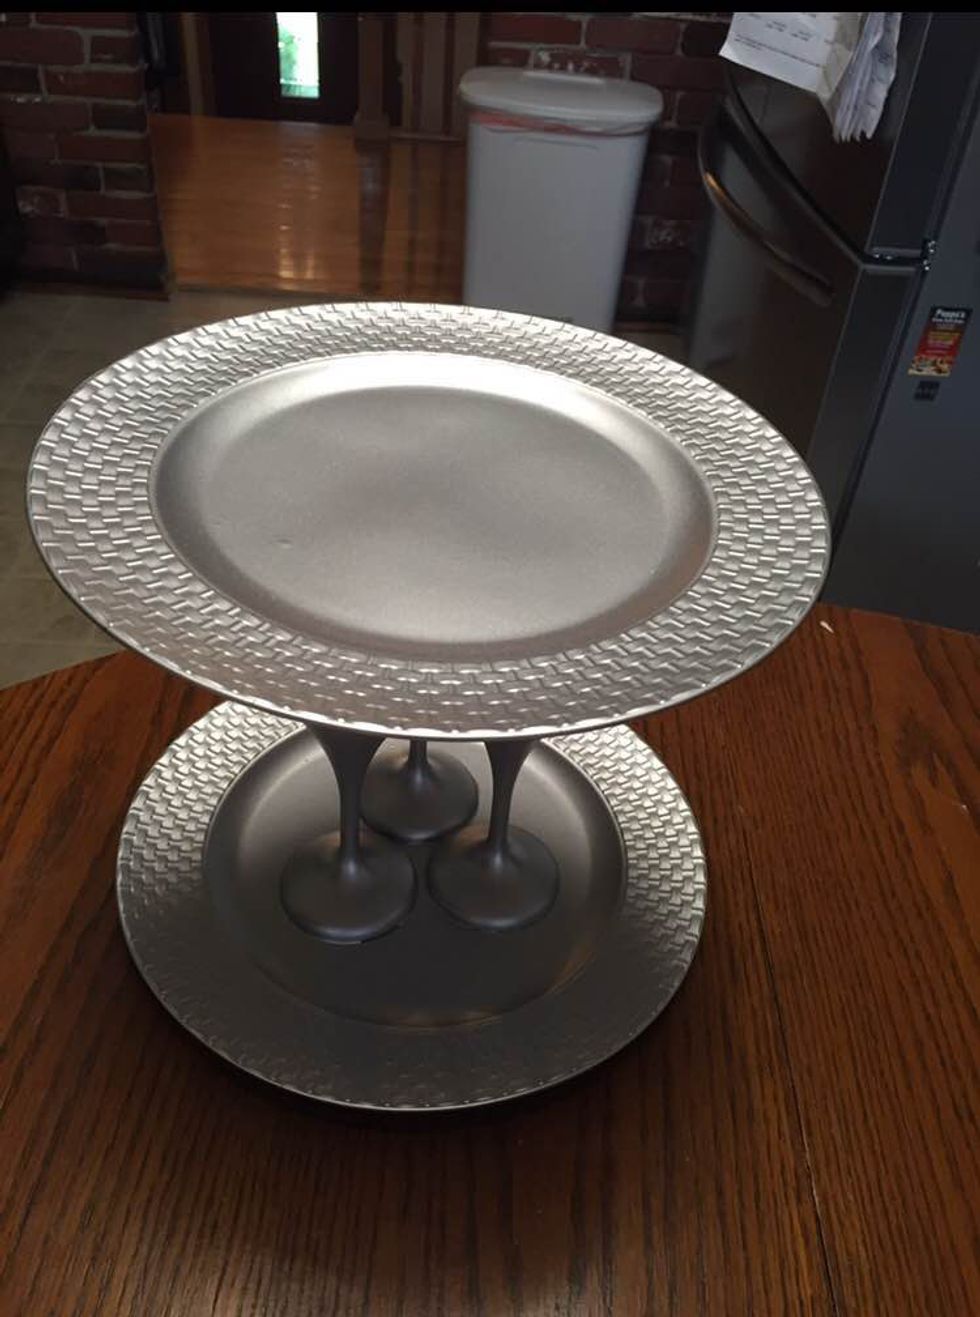
If you’re not very good at using spray paint or have not used it before, I recommend having someone else help you. My dad helped me. Follow the directions for your spray paint. After shaking the can for about a minute or so, my dad painted it in our backyard. It is very important you spray paint in a well-ventilated area, preferably outside. According to my spray paint, this needed two hours to dry. After it was dry, my dad added another coat and let it sit for another two hours. Add as many coats as you see necessary, or even stick with one coat if you like the way it looks.
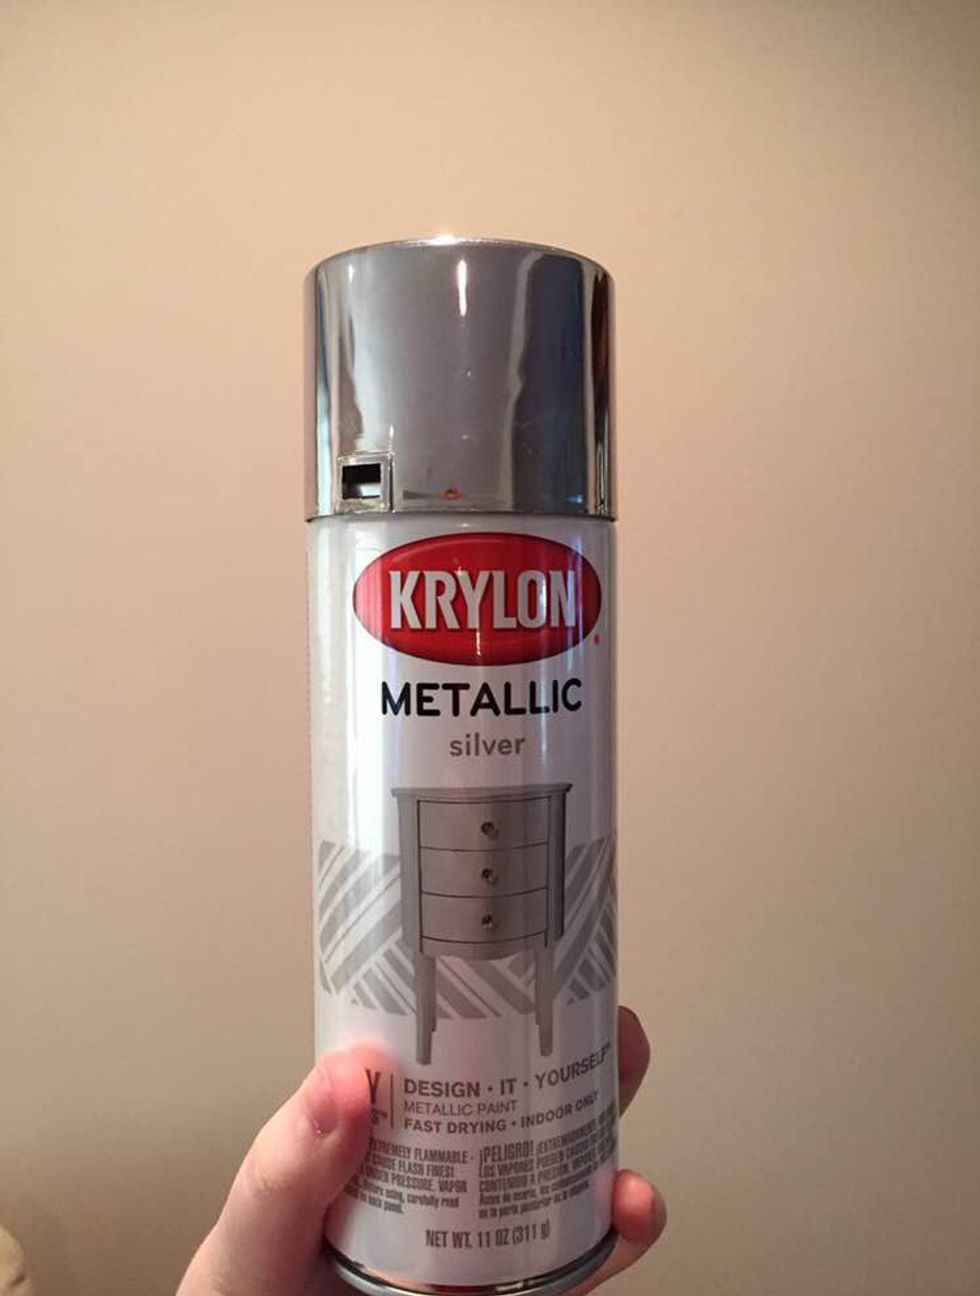 Krylon spray paint in the color Metallic Silver, is what I used.
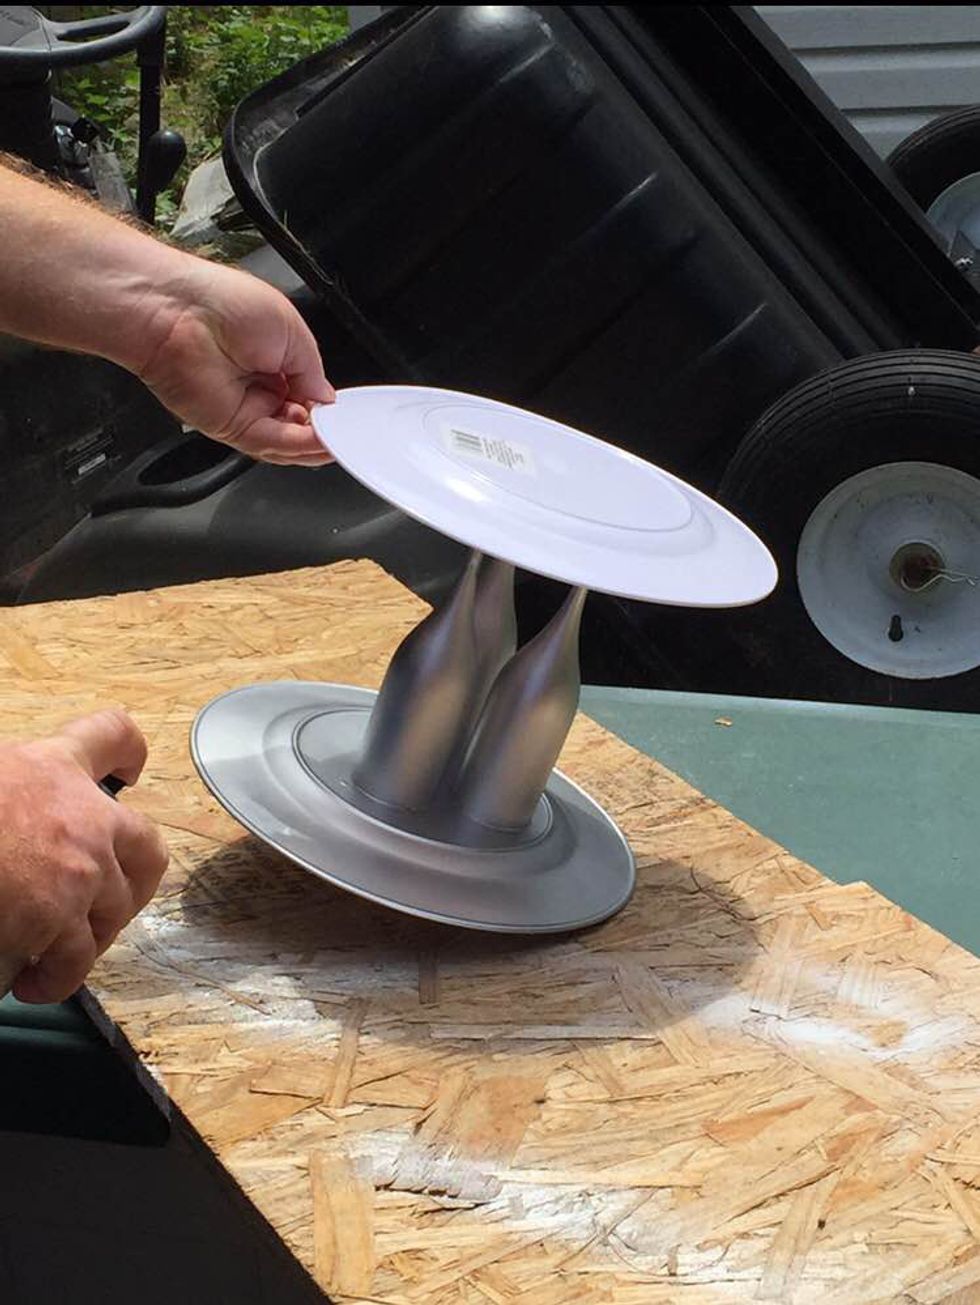 My awesome dad spray painting it for me, outside!
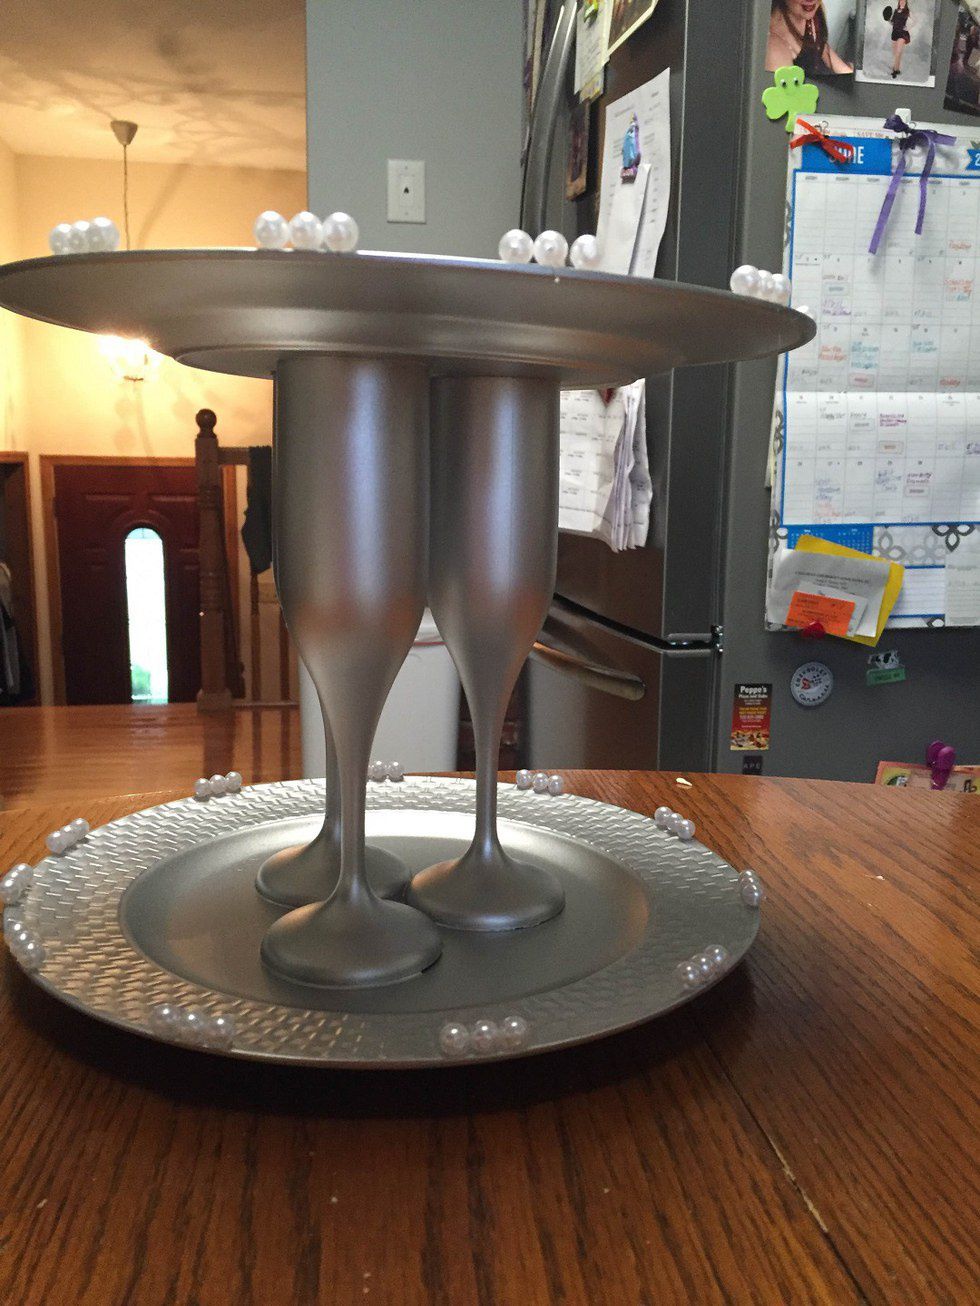
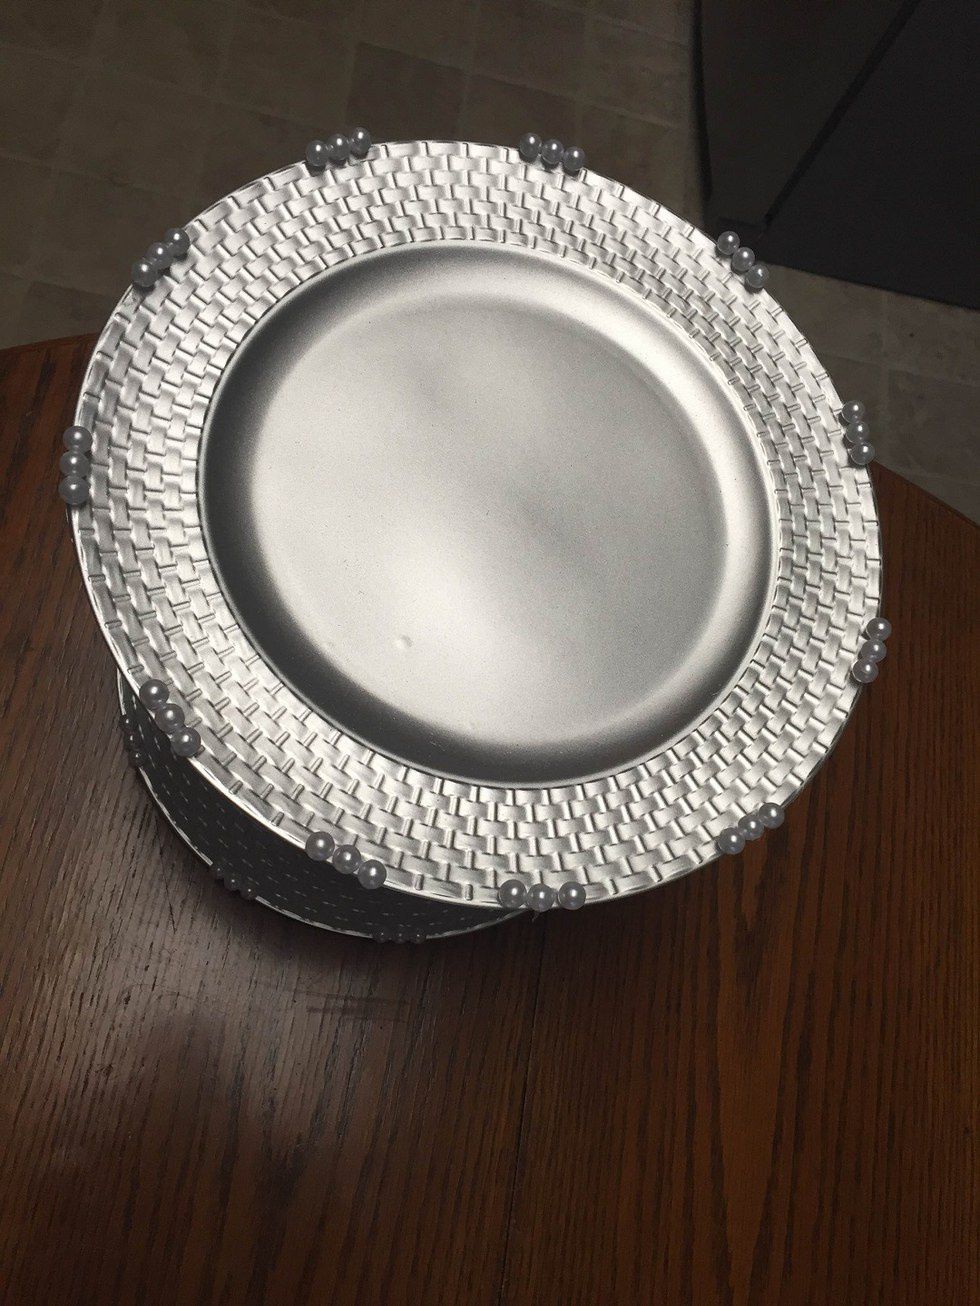
I had started putting pearls on it, but this is what it looks like without designs.I did two coats. From here you can stop, or you could chose to decorate.
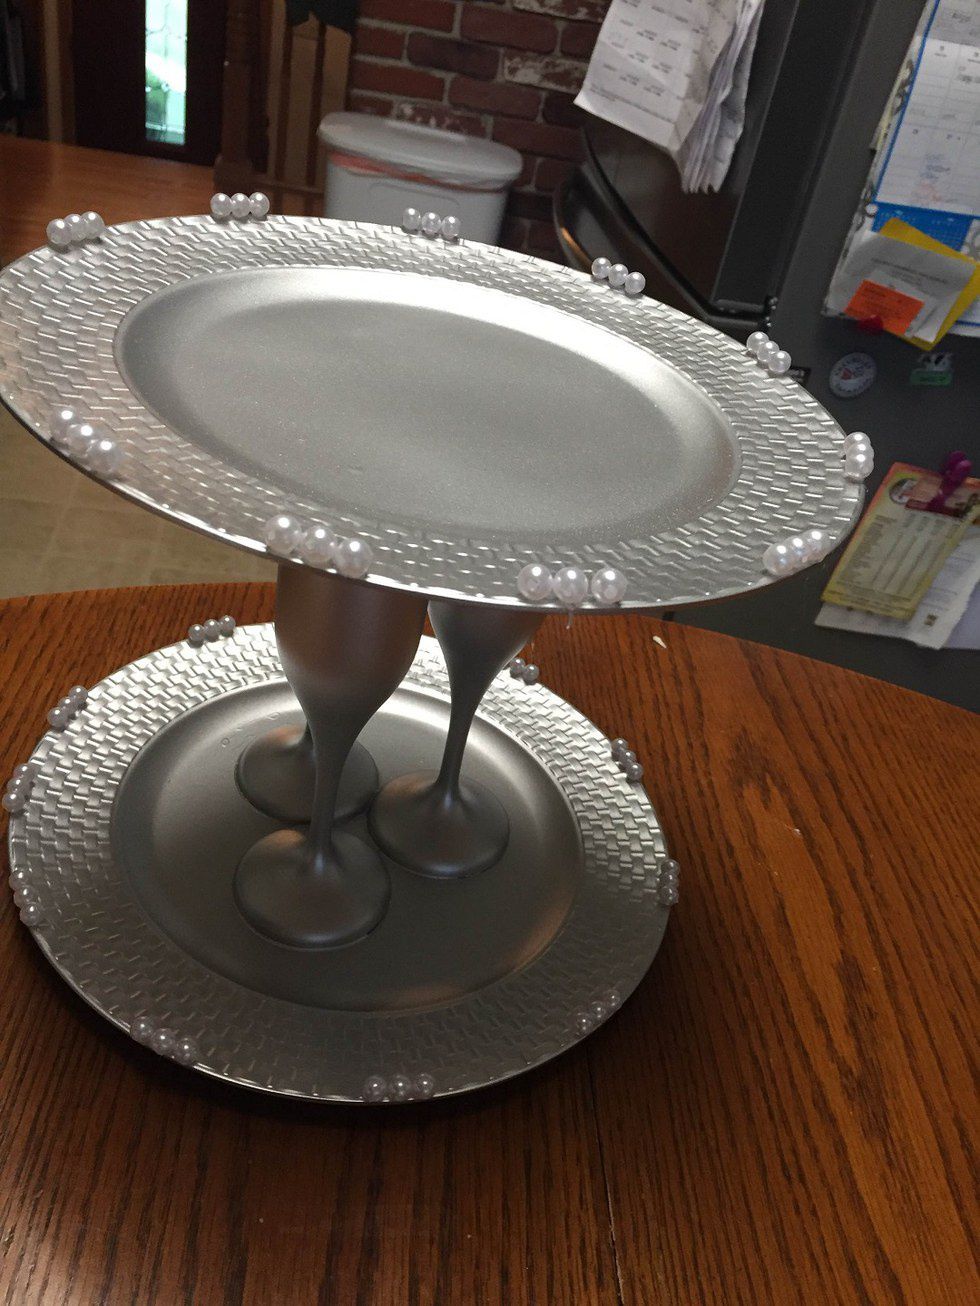
7. Decorate.
I chose to decorate this with pearlized beads I found at Walmart. Taking my ruler and pencil, I made a small mark with my pencil and measured three inches from that mark and repeated the process. This way, the beads will be about three inches apart. From here, once my hot glue gun was ready, by every mark I hot glued three pearlized beads. After doing this on the bottom plate, I repeated this whole process on the top plate as well. And you're finished!
Once everything is dry and cooled, place it wherever you need it and begin to utilize it. I used mine for some of my makeup and beauty products that I use daily. But you can use it for whatever you like.
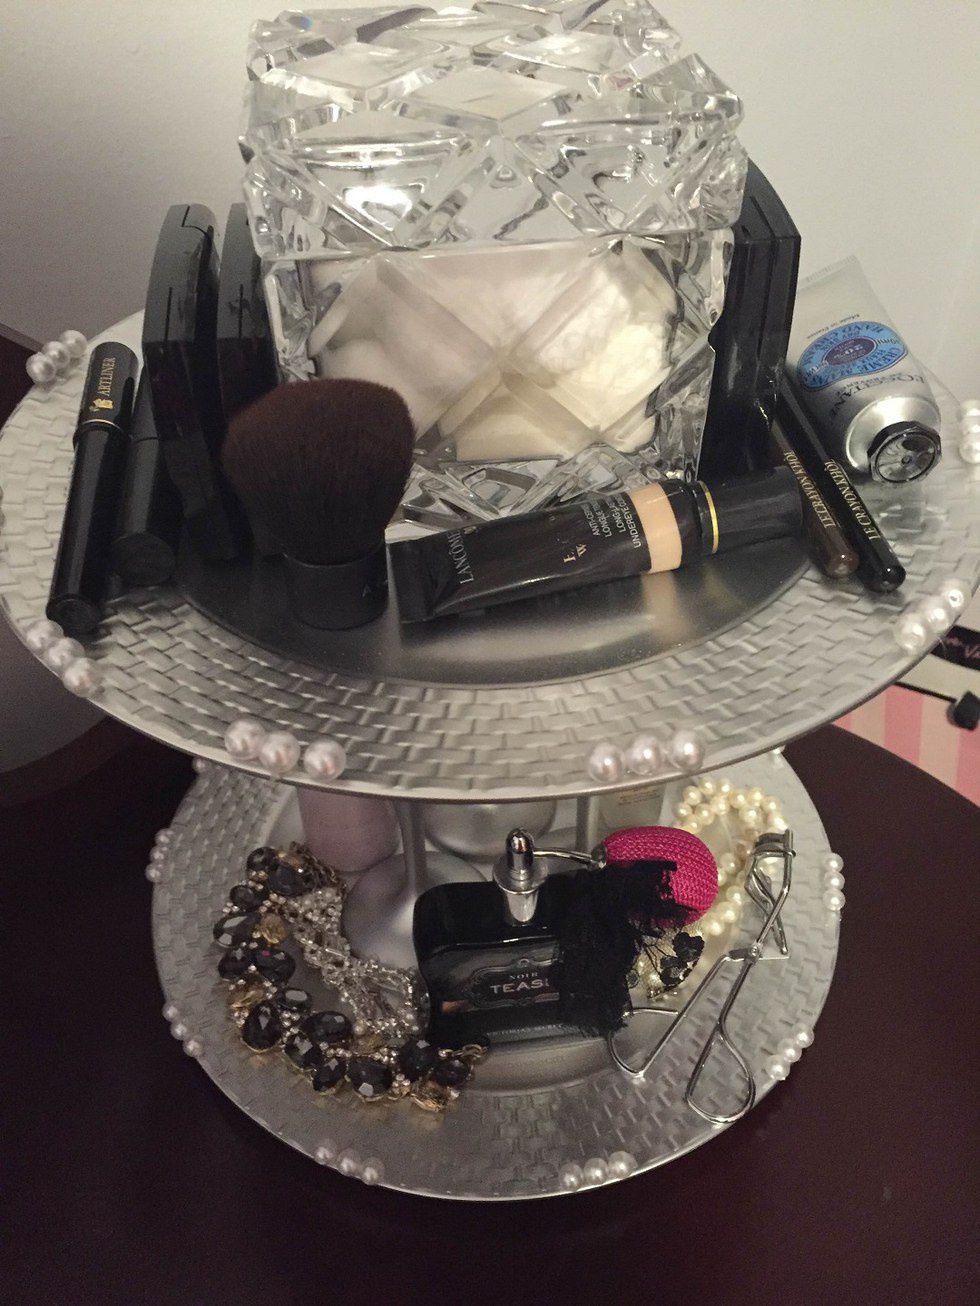
On the top layer I have a glass jar/box with some makeup sponges, cotton swabs, and cotton balls. To the right and left of the jar I have some blush and bronzer palettes, my face powder, liquid and pencil eye liners, my mascara and some hand lotion. In front the jar I have my concealer and a kabuki brush for my powder.
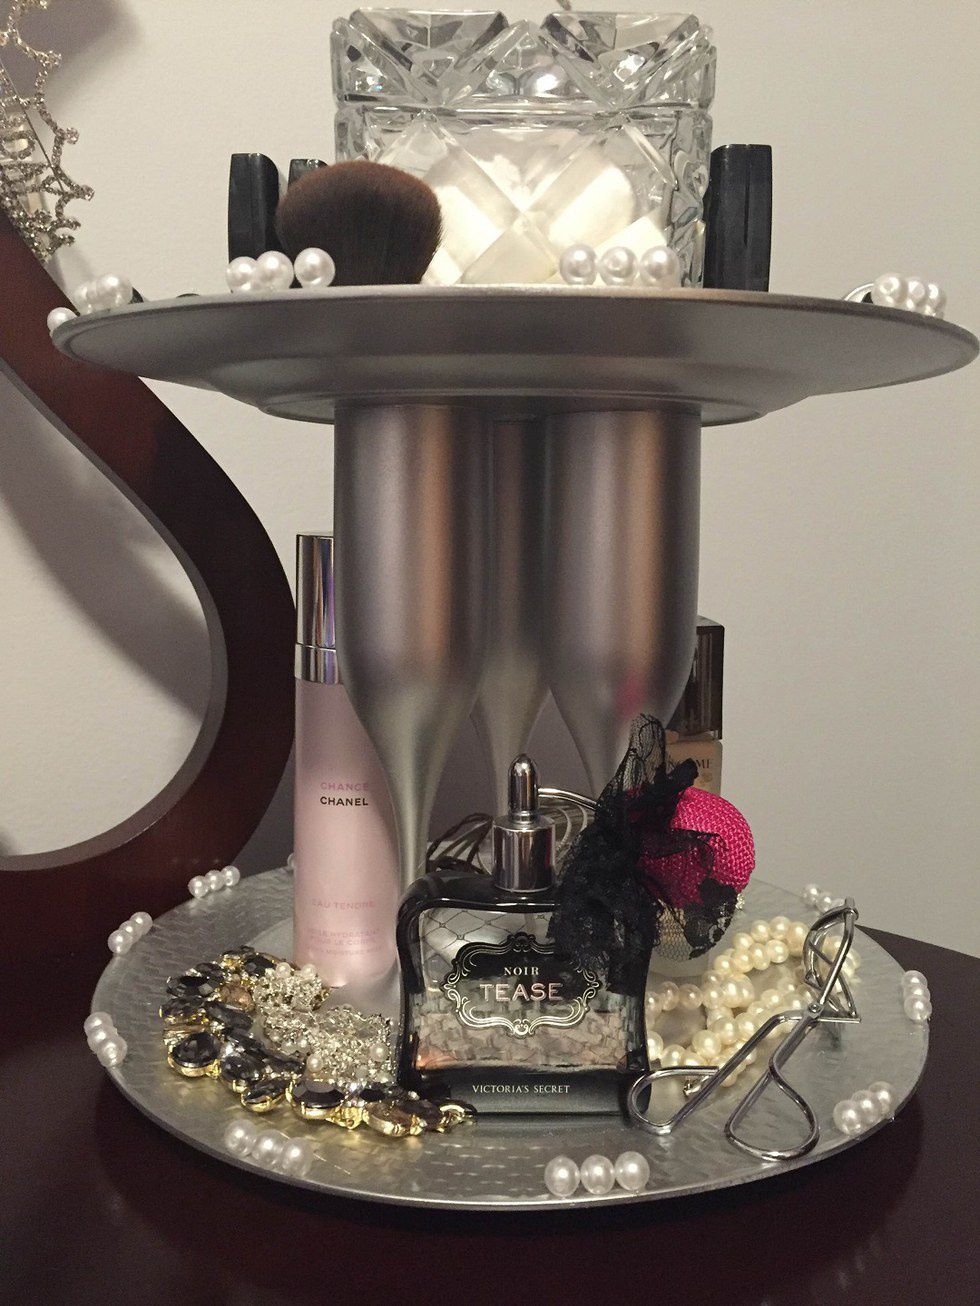
On the bottom, I have two of my perfumes, my foundation, some necklaces and bracelets, and my eyelash curler.
Here is the finished project! Have fun and enjoy!
PS- I was listening to Craft Spells while doing this. They're a great indie pop/psychedelic band that make you feel both creative and chic. Here are some of my favorite songs: After the Moment , Party Talk, You Should Close the Door . Happy listening!)