
So, perhaps you're hosting a big holiday party or you just want to spice up your front door/dorm door. But, the catch is that you don't have a lot of money to spend on a pre-made decoration. Well, you are in luck because I'm here to tell you how to create a DIY (that would be "do it yourself") wreath made out of simply tulle fabric, a Styrofoam ring, and some fake flowers. It's really easy and if you somehow get lost on the way with these directions, you could probably just figure it out on your own, really.
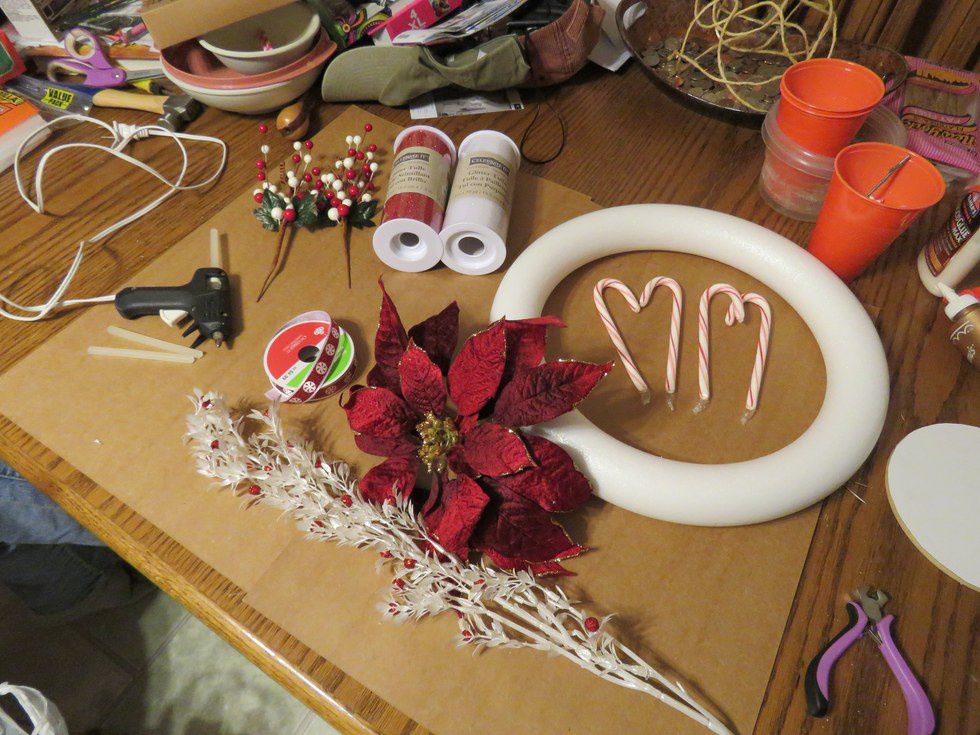
Items You Will Need:
· Styrofoam ring (I used a 14" diameter)
· Fake flowers and other decorations (your choice)
· Tulle (any color of your choice; may need about 20 yards)
· Hot Glue Gun with glue sticks
· Ruler
· Scissors
Step 1:
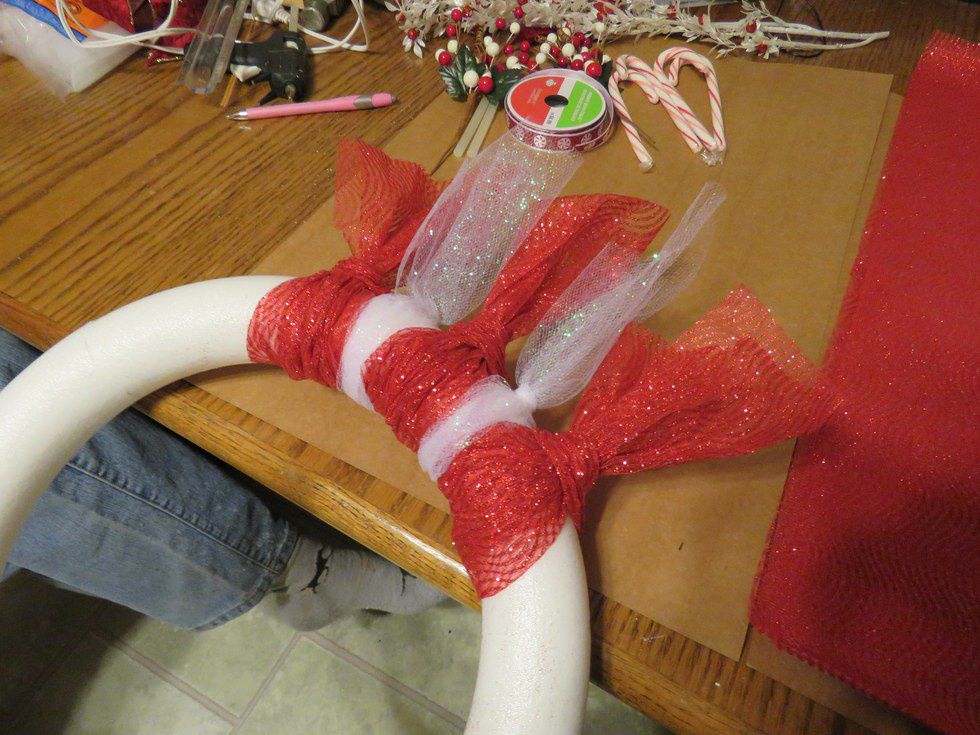
Cut two foot long sections of your colored tulle. If it is sparkly and covered in glitter, by the end of this, you will be too.
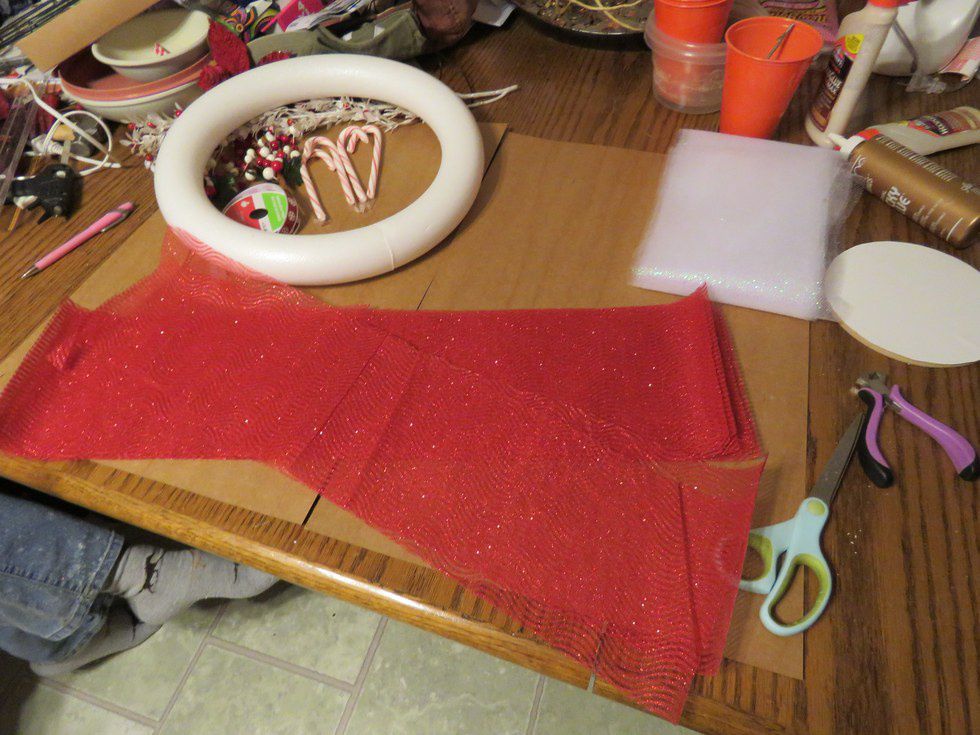

Step 2:
Add the tulle on by folding it in half lengthwise then widthwise. Place the Styrofoam ring in the middle of your tulle strip and draw the loose ends of the tulle through the loop on the other end of the tulle. It's really easy and if you don't know what I'm talking about, look up a lark's head knot. That's what it's called. I Googled it.
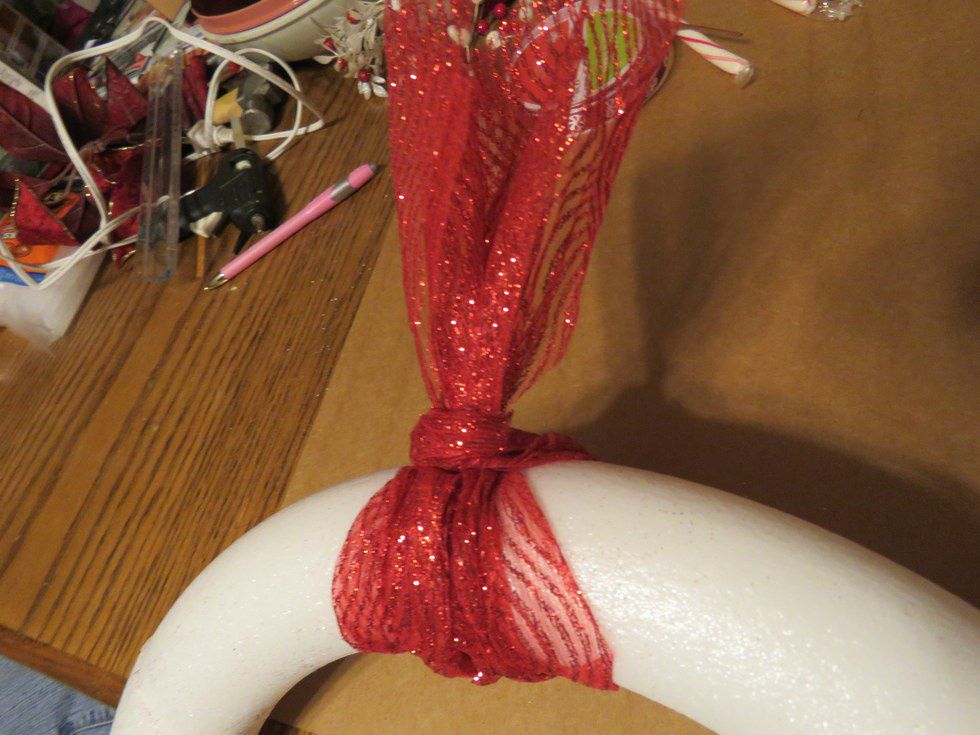
Step 3:
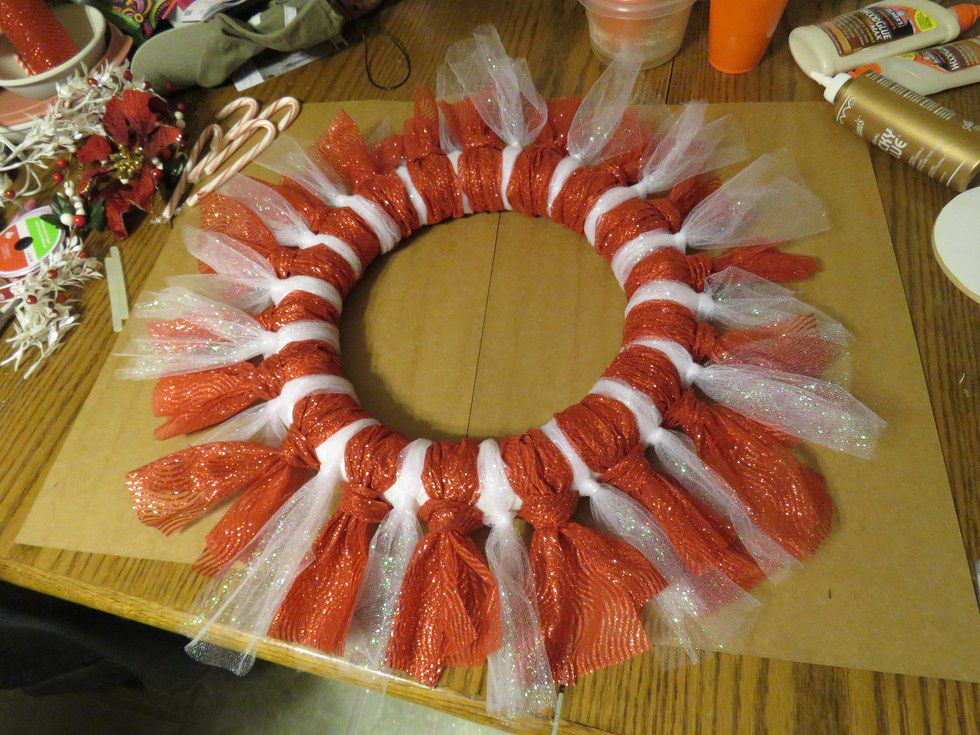
Continue adding your tulle around the Styrofoam ring until every possible inch is covered. It will take a while so be patient. Also, it might be a good idea to have a helper so they can hold the ring while you make the lark's head knots over and over and over and over and over again. Also be careful because as you are pulling the tulle through the loop it is possible to sustain some slight injuries in the form of scratches. It happened to me while I was making this wreath. It stung like a paper cut, but you'll survive. Trust me.
Step 4:
Once you are done adding on the tulle, your helper's arm might be tired or your hands might be all scratched up. Take a break and come back to it later. It will still be there when you come back. Go pet some dogs, eat some food, complete some actual homework, or take a nap.

Step 5:
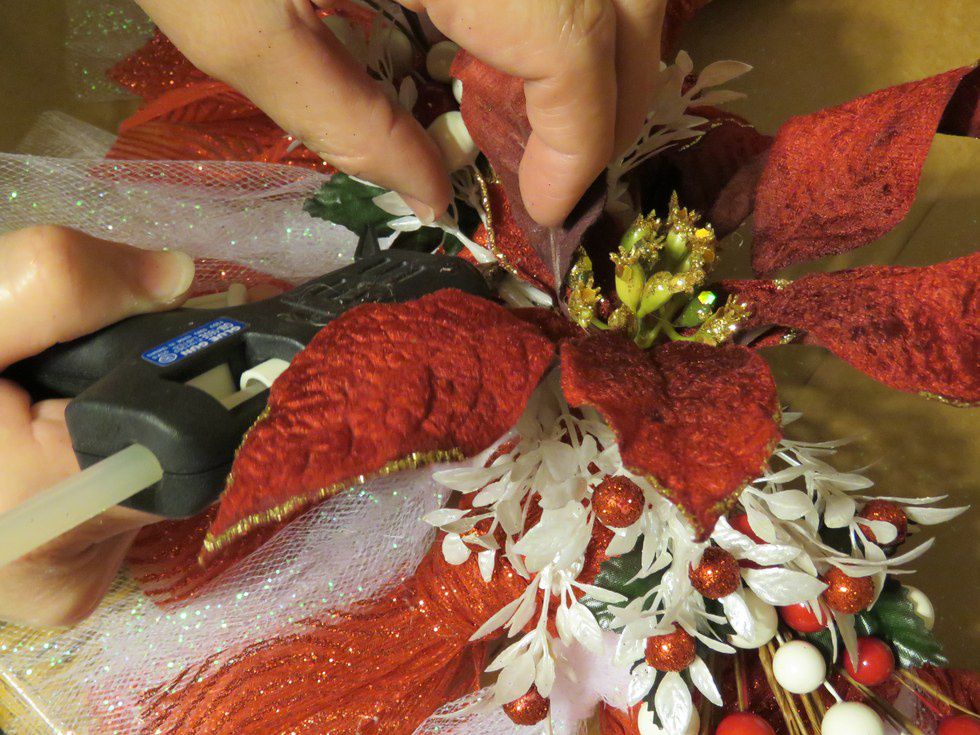
Now that you are well-rested and fed, you can return to making your wreath. Arrange the fake flowers and your decorations on the wreath before you begin hot gluing them on. Pre-arranging them will give you a better idea how you want the final wreath to look and it might save you some hassle later if you don't like the placement of a flower or two or all of them. Once you are satisfied, start gluing them on with your hot glue gun. Just be careful not to burn yourself or accidentally burn your helper. Hot glue is very hot and it hurts when the metal tip of the gun touches your skin. If you did burn yourself, put the gun down and run the burned area under some cold water for several minutes. Again, your masterpiece will stay right where it is. You are adding on fake flowers, not functional limbs. It will not get up and walk away.
Step 6:
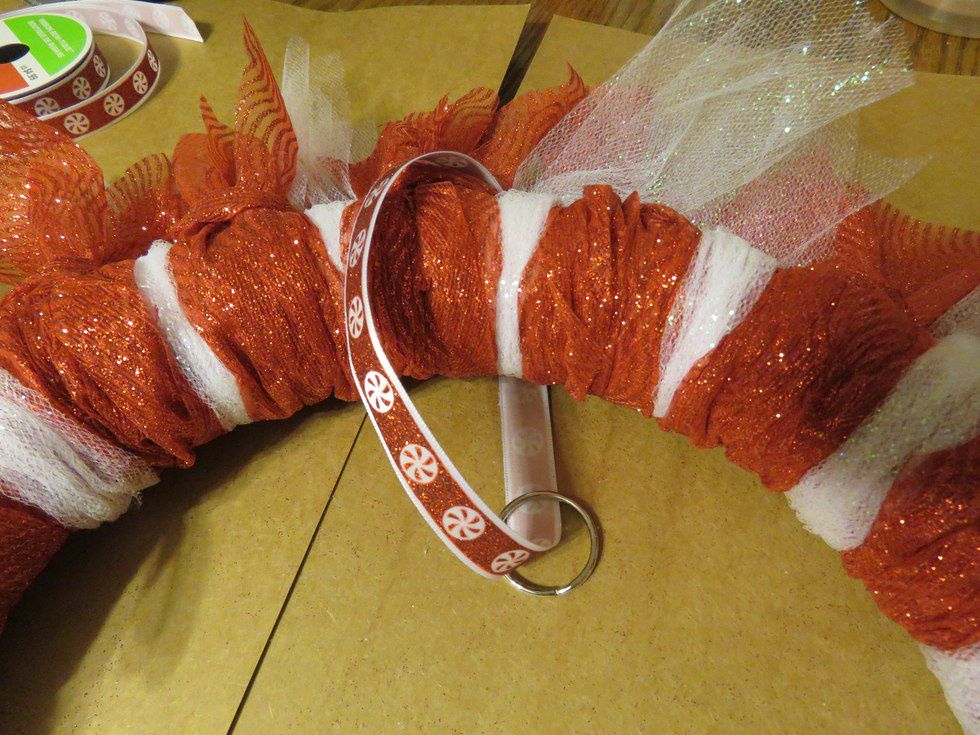
This step is optional, so you can go ahead and skip it if you so desire. If you don't have a wreath hook to hang the wreath up on your door, you can add a fancy ribbon on with a handy-dandy split ring to act as the piece that attaches the wreath to a small hook for hanging. That's what I did.
Step 7:
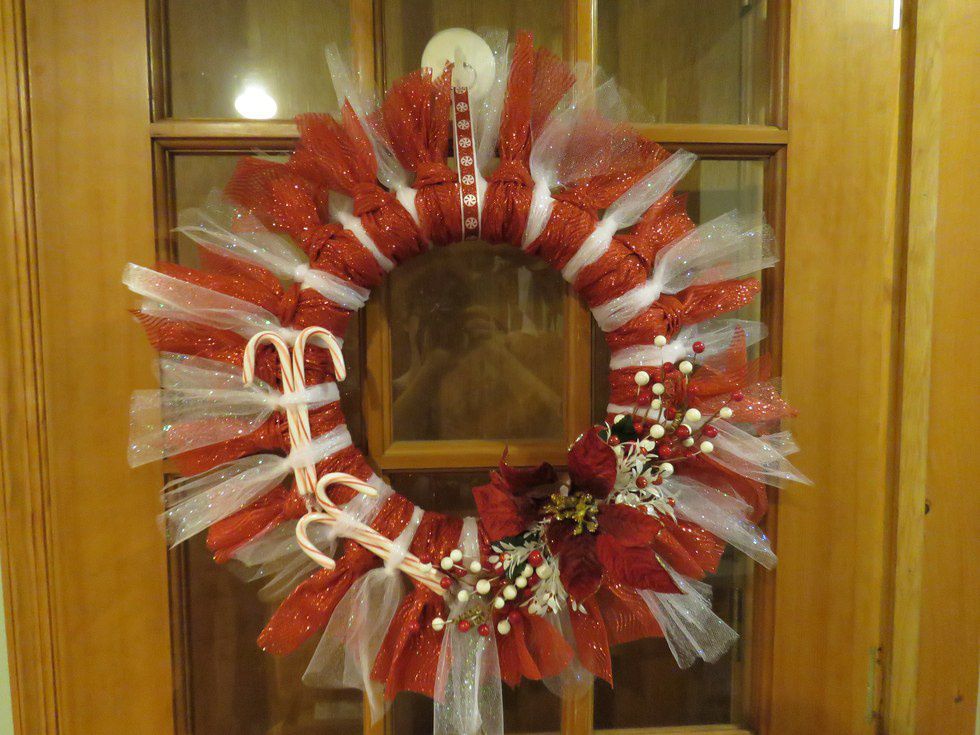
Hang it up and admire your work. You slaved for maybe a few hours to create this masterpiece that you can now show off to your friends, colleagues, roommates, or everyone else. Brag about how easy it was and perhaps direct them to this set of very helpful information with very few steps and encourage them to do their own wreath in whatever color they could possibly want. Then, go back to admiring your work.