If you are looking to build your own photo studio on a budget then check out this article. It's really easy to do and all you need is basic carpentry skills along with building materials (foundation and plywood).
It is an extraordinary feeling: being in a photographic studio with that infinite background in front of you and knowing that it is a blank canvas where you can create whatever you imagine.
However, when we think of that study we usually add to the side a large dollar sign "$" that scares us. It does not have to be like that. A good studio is not exclusive to photographers working on big budgets. If you've ever wondered how I can set up my own photo studio on a low budget? , keep reading. Here we help you to achieve it.
There are two essential things that you must be clear about to create your own home photo studio, and they are not what you imagine. These two things are more important than lights, diffusers, reflectors, and so on.
The most important elements of your photo studio
- Understand that the quality of light in your study is a matter of learning and practice rather than a matter of finance. With a precise understanding of light, which is your raw material in photography, you can create wonderful images with extremely basic equipment. On the other hand, the best and most expensive equipment will not compensate for poor light management.
- Always work with what you have. It is better to master a single light, a single type of reflector, or a specific lighting set, but master it 100%, than to have all the equipment on the market available with 20 lighting possibilities that you do not know how to take advantage of or control.
Once you have the correct perception of what is going to differentiate your work, let's get into the practical details now.
1. Space
The first thing is where you are going to mount it. If we are talking about a low budget, we must open ourselves to the options that are within our reach.
- Do you have an extra room that ended up as a cellar that you could empty and take advantage of?
- Your own room, could you accommodate it to set up an intermittent study?
- How about a photographer friend with whom you could join forces and share a garage or attic, and share expenses too?
Do we invite the light or not?
There are two types of spaces to consider: with natural light and without natural light. The great advantage of having a space with windows is that when you don't want any natural light you can cover them. On the other hand, in a windowless space, you have the limitation of using only artificial light.
Another important question is how much space you need. A large space will naturally have great advantages:
- The light you use will not bounce as much between walls, which happens in a small space if the walls are white or any light color. This equates to more control over your lighting.
- You will have more versatility in terms of the focal lengths (that number of your lens expressed in mm) that you can use.
Considering this, our recommendation is that you look for a space where you can get full-body portraits with a lens of at least 50mm.
Continuing the theme of space, there is an easy point to forget: a walk-in closet.
If you are going to be working with models it is very important that you always look for their comfort. A walk-in closet, no matter how small and simple (like a simple screen with a chair), can do a great job in this regard. And therefore your models will do a great job for you.
The Victorian mansion pictured below is not necessary for this, but this studio photo by Annie G. McDougall dated 1888 may inspire you to include items in your studio for the convenience of your models.
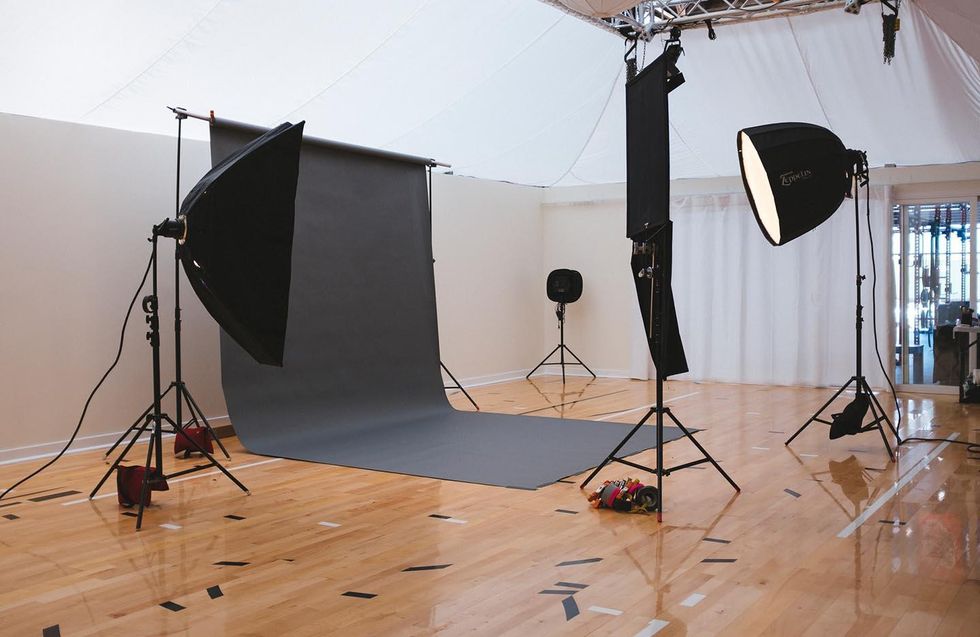
Once you have the designated and free space, it is time to start putting together your low-cost photo studio. Let's start at the bottom.
2. Background
Your ideal background should have a neutral color that can be white, gray, or black. Keep in mind that white is the most versatile since you can convert it, reducing the exposure on it, to gray and even black (this possibility will depend on the size of your studio and its characteristics).
Since an important part of the equation is saving on costs, a white sheet and a black fabric meet what is necessary for your funds. If you have to invest a little more, a cyclorama would be the best option.
The main disadvantage of using fabrics is that it is almost impossible to keep your background free of folds and wrinkles. This implies more work in post-production. On the other hand, a cyclorama frees you from that problem but is usually more delicate. Its disadvantages are that it is easy to break and that it is not only more expensive to purchase but also lasts less.
And what about colored backgrounds?
You can transform a white or gray background to practically any color you want with gels. Gels are simply colored lenses that you put over your light source to turn it into colored light.
Apart from creative uses, gels make it possible to balance the white balance (a setting that achieves correct color reproduction and avoids color casts) when you are using lights of different color temperatures, for example, a flash, which is a light white approaching blue, and a common home bulb that is the warm light.
Considering this, a set of gels like this is a good addition to your home photo studio.
There are also backgrounds with textured patterns that can be very attractive.
For whatever background you decide to use, you are going to require a way to hang it. The solution on the market is a cyclorama holder, but it can be a considerable investment. An inexpensive alternative is to do it yourself.
A few tubes bought at Home Depot do the job perfectly. Here is the exact list of what you need. You can use galvanized or PVC pipe:
- 2x elbow ¾
- 2x floor flange ¾
- 1x 3.20m ¾ tube (for crossbar)
Arming is understood. Screw the flanges to the wall or ceiling and you have it! Your own cyclorama holder at a minimal fraction of the cost of one purchased.
If you prefer not to fix your cyclorama holder to the wall or ceiling, you can do it on the floor. Add:
- 2x 1.83m tube
- 2x "T" of ¾
- 4x 0.46m ¾ tube
3. Before the light
If your studio has windows it is very important that you have control of when you want that natural light to enter and when not. You can solve this very easily with thick black fabrics. A velvet-like fabric is a good option.
It is important that you position them in such a way that they cover approximately 30 cm more on each side of the edges of your window. This will help to filter as little light as possible.
Flags
Another important element to block light is the flags. These will help you prevent your lights from illuminating areas that you don't want to be illuminated.
The solution is very simple: black cardboard. With a clamp and a tripod, you can place it next to any light source and block it where necessary. If your card is black on one side and white on the other, use the black side toward your light source to avoid bouncing.
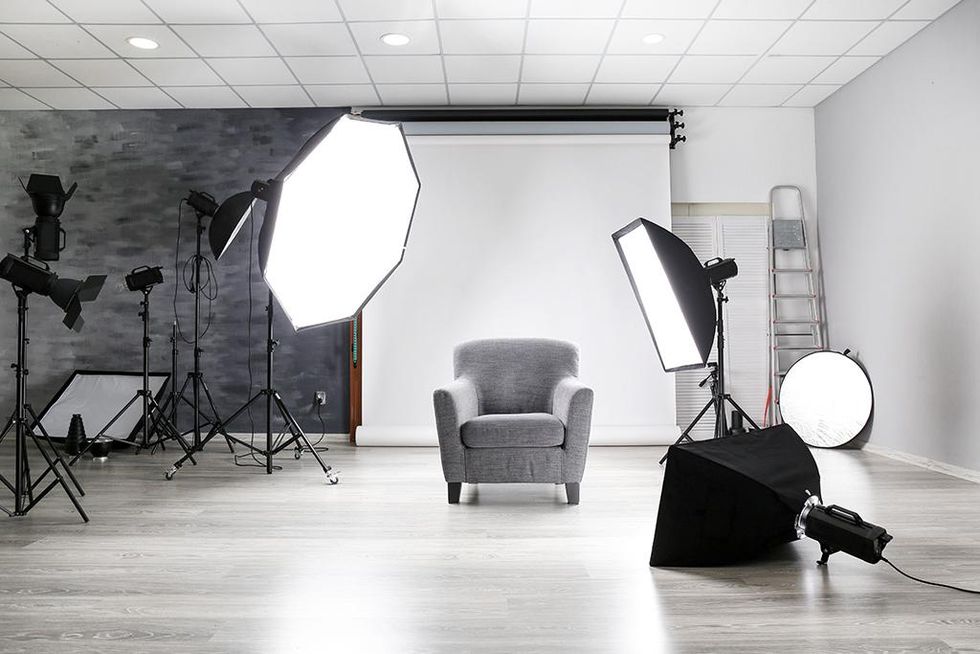
4. Lights
There are two types of artificial light sources: continuous light and flashlight.
Continuous light
Continuous light is what is used for video, but it is also used in photography. An advantage of continuous light is that you can see the effect of your lighting in real-time. The disadvantage of these lights is that, in general, their power is much lower than that of the flashlight.
Of the inexpensive options, there is one that most photographers have used. This kind of hood, to which you can integrate a 250 watt bulb.
There are also some continuous LED lights that are not made specifically for photography but work well and are very accessible.
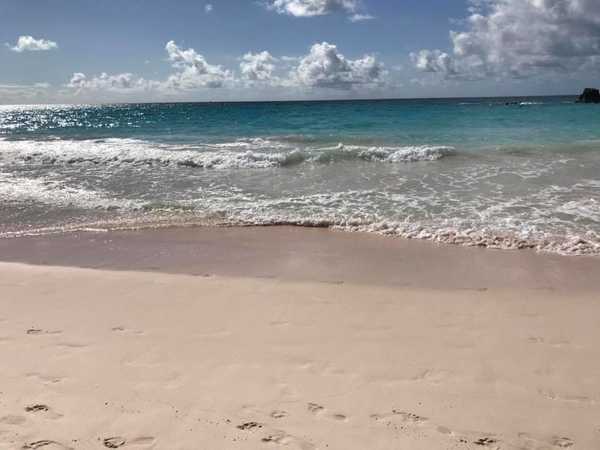
This photograph was created with two of these LED lights to illuminate the door, the subject, and the tree. It is not a study but it can give you an idea of what is possible.
Flashlight
Flashlights are the most used light in studio photography. It is at this point where your savings can leak. So here it is worth emphasizing: achieving good lighting is not about having the most expensive equipment; it's about understanding and managing light well, whether it's natural light or artificial light.
The first sources of artificial lights that are usually acquired are flashes. The reality is that, used with good technique and inventiveness, they can be an extraordinary lighting element, without being excessively expensive and highly mobile.
A flash, once you use it off camera, either with the integrated synchronization system that many brands now have or with a pocket wizard type slave system, opens up a good overview of possible lighting.
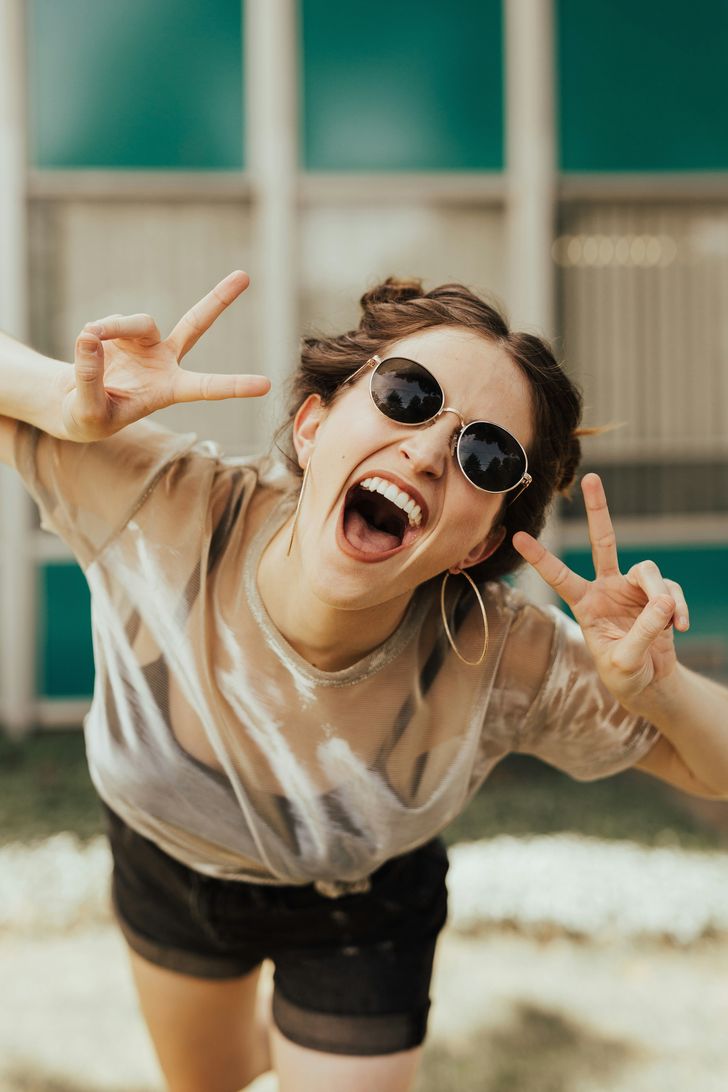
An example of what you can do with a single flash:
If you decide to invest your talent in studio photography, the time will come when you will invest in a specific studio lighting equipment.
Among the multitude of brands and options available, take a step back and buy with strategy:
- The cheapest option may not necessarily be the one that saves you the most money. The flaws, limitations, and disappointment of cheap equipment can cost you in the long run.
- Be clear about what you need to light up before buying. You can save a lot of money if you have an accurate vision of your personal study needs and buy just the equipment that covers them.
When it comes to kits designed for the photographer setting up their first photo studio, Elinchrome's D-Lite series is worth checking out.
5. Modifiers
Even the best have had in the beginning:
- You don't have enough natural light for your shot.
- You release your new flash.
- You see the result: terrible!
- You put your flash away, decide not to use it again, and call yourself a “natural light photographer”.
A first step to avoid this is learning how to use modifiers. These are essential, as the raw light from your flashes or studio lamps produces harsh light. That light must be softened. For that, among other things, modifiers work.
These are some of the most used:
- Lightbox
- Parasol
- Octagon
- Beauty Dish
Since we are talking about a low budget home studio, let's keep things simple. If you could have only one modifier, what would it be?
Eric Valind, a photographer based in New York, gives us his answer: an umbrella.
This is not just a matter of taste. It is a very practical and informed decision. An umbrella works for you for a wide variety of lighting effects. Seeing them in detail is beyond the scope of this article but let's look at some of the uses we can give it.
For bounced light with a wide range. Useful when photographing large groups of people.
Passing the light through the umbrella you achieve very soft lighting. Use it as close to your subject as possible to achieve the softest effect possible.
Partially open for a more directed effect similar to that of a softbox.
“With these techniques, you can light almost anything with a single modifier. So if I had a choice, I would never leave home without a removable bottom umbrella. " -Eric Valind
Reflectors
Another lighting element that will be an essential part of your studio is a reflector.
Specifically, when you are setting up your studio with a low budget, it will be a great help, since if you have a single flash, for example, a reflector can act as a second light source.
There are plenty of options for homemade reflectors and the results are quite decent. Basically any white and sufficiently smooth surface serves as a reflector: white cardboard, Styrofoam, a cut box, or a sheet can all be good solutions that you already have at home.
If you are already going to invest more, Roberto Valenzuela, a wedding and portrait photographer, recommends buying one between 40 and 52 inches in diameter. An excellent choice is the Omega 10-in-1 reflector devised by Jerry Ghionis and manufactured by Westcott.
6. Last but important
To complete your study let's see what else you might need apart from the main elements that we already saw.
Clamps
These tweezers are used for everything. Whether it's to hold your background fabric, fix your continuous light to a tripod or put up a flag to block light, they will always be necessary.
Remote Switch
Perhaps to minimize camera shake and obtain crystal-clear images or to be able to interact with your subject instead of always being behind the camera, a remote shutter can be a great worker in your new studio. You can use a wired one or a remote control.
It is also useful for shots where you are going to capture action. This type of photography becomes easier when you can have your eyes and attention directly on what is happening on set.
Bench and/or small table
Whether it is to sit the model or play with different postures, a common bench or a small table, among other decorative elements, will always be useful in your study.
It is clear: creativity is more important than budget when making your own photo studio. Use this article as a starter guide, add your own wit, and transform that forgotten room into your new muse.
What other creative solutions can you think of or have you already used to put together your own studio? Leave a comment to share the inspiration.