
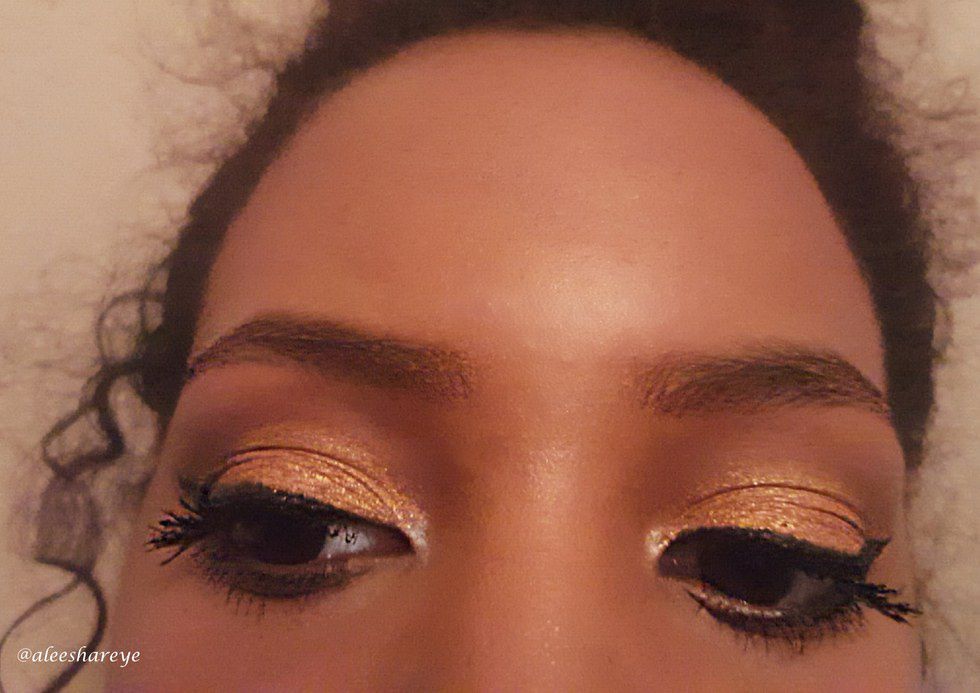
In the words of Britney Spears, “All the eyes on me in the center of the ring just like a circus.” Every now and then, a girl wants to walk into the room and make a scene without saying a single word. In the best possible way, of course, what better way to do that than with this look? A metallic eye, thick winged eyeliner, and a bold lippy to match, with a contour that screams, “SLAY GIRL!”
Majority of the makeup I used is very affordable, I promise: I’m a broke college student. So you'll have been there before and you know my struggle. Plus, we could all save money, while looking good doing it. Nothing wrong with that, right? Step by step, price, and where you can find each product to recreate this look.
Step 1: Prime
- Apply a generous amount of primer all over your face. Make sure to really get every part of your face and wait for a couple of seconds to make sure it’s dried. You can use a damp sponge to press the primer into your face to speed the process up.
Step 2: Brows
- Shape out your eyebrows and fill in. Remember to use hair like stroke and blend to make them appear naturally full. Top with a powder to set and a brow gel to keep the hairs in place.
- NYX Micro Brow Pencil Chocolate ($10)
- ELF Brow Kit Dark ($3)
- Maybelline Eye Studio Brow Drama Tinted Gel Mousse ($8.29)

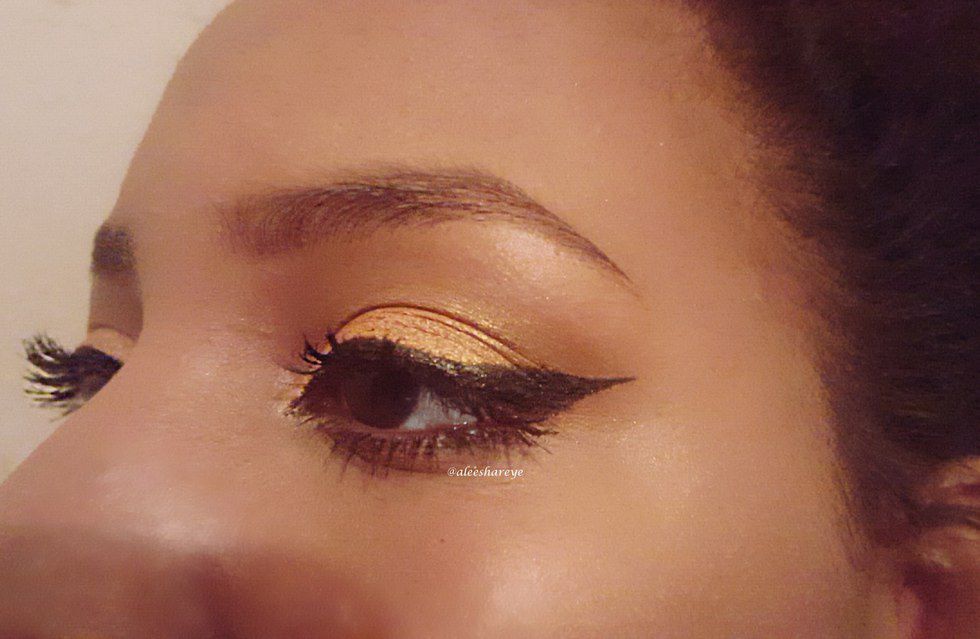
- Apply an eye shadow base to ensure your shadow will last all day/night long. Make sure to blend and let set into skin for a second. Then use a red-brown transition color to your crease and outer corner of your eye and blend away with a tapered fluffy brush. You don’t want harsh lines. Then apply a yellow gold on top of the uncovered lid space and a little but of the corner you blended already with a flat brush. To get maximum pigmentation, dip the brush in the eye shadow then spray the brush. Blend again to take away harsh lines.
- Eyeliner: if you're not a pro, that’s OK. I’ll come up with a post for eyeliner to help with that. Also, if liquid liner is your weakness, it’s totally fine. You can get way with using pencil or a black shadow.
- Mascara: I personally do mascara absolutely last because when I use face powder, I see the transfer, and I don’t like it. But to each their own.
Step 4: Face
- Concealer: (Always remember, CREAMS BEFORE POWDER. If you want to contour and highlight using creams, please do it before applying powder. Vice versa will create texture that will be very hard to blend out.) Use a concealer to color correct if you would like. (I can write a post about color correcting and which shade to use for what purpose.) Blend with a damp sponge, and top (cover other concealer) with a shade similar to your natural skin tone.
- Foundation: Apply all over face with a wet sponge for even coverage.
- L’Oreal Infallible Pro-Matte Foundation Mix 108 & 109 ($13)
- Under Highlight: (This is an extra step and can be skipped) Put cream highlight on the back of your hand and warm it up with your fingertips. Then apply to the highpoints of your face. Cheekbones, bridge and tip of the nose, forehead, Cupid’s bow, and chin. With a damp sponge, blend into skin by bouncing the sponge off of your face in a patting motion.
- Powder: To set foundation use a skin toned powder to set foundation with a dense fluffy brush.
- L’Oreal Infallible Pro-Matte Powder 700 ($13)
- Sephora Collection Classic Multitasker Brush #45 ($24)
- Contour/Bronze: I use powder to contour/bronze because I find it the simplest to work with, it saves time, and is easier to blend. Use a powder with the shade three to five shades darker than your own (this depends on how you want your contour/bronzer to look like). Apply with a contour brush and blend with a light fluffy brush.
- L’Oreal True Match Super Blendable Powder C7 ($11.49)
- ELF Contouring Brush ($3)
- ELF Completing Brush ($4)
- Highlight (Powder): Apply highlight to the high points of the face with a fan brush.
- Physician’s Formula Shimmer Strips Vegas Strip/Light Bronzer ($13)
- ELF Fan Brush ($2)
- Set: Using a setting mist, generally (drown,) apply to the face to set makeup and ensure that it will last all day/night long.
Step 5: Lips
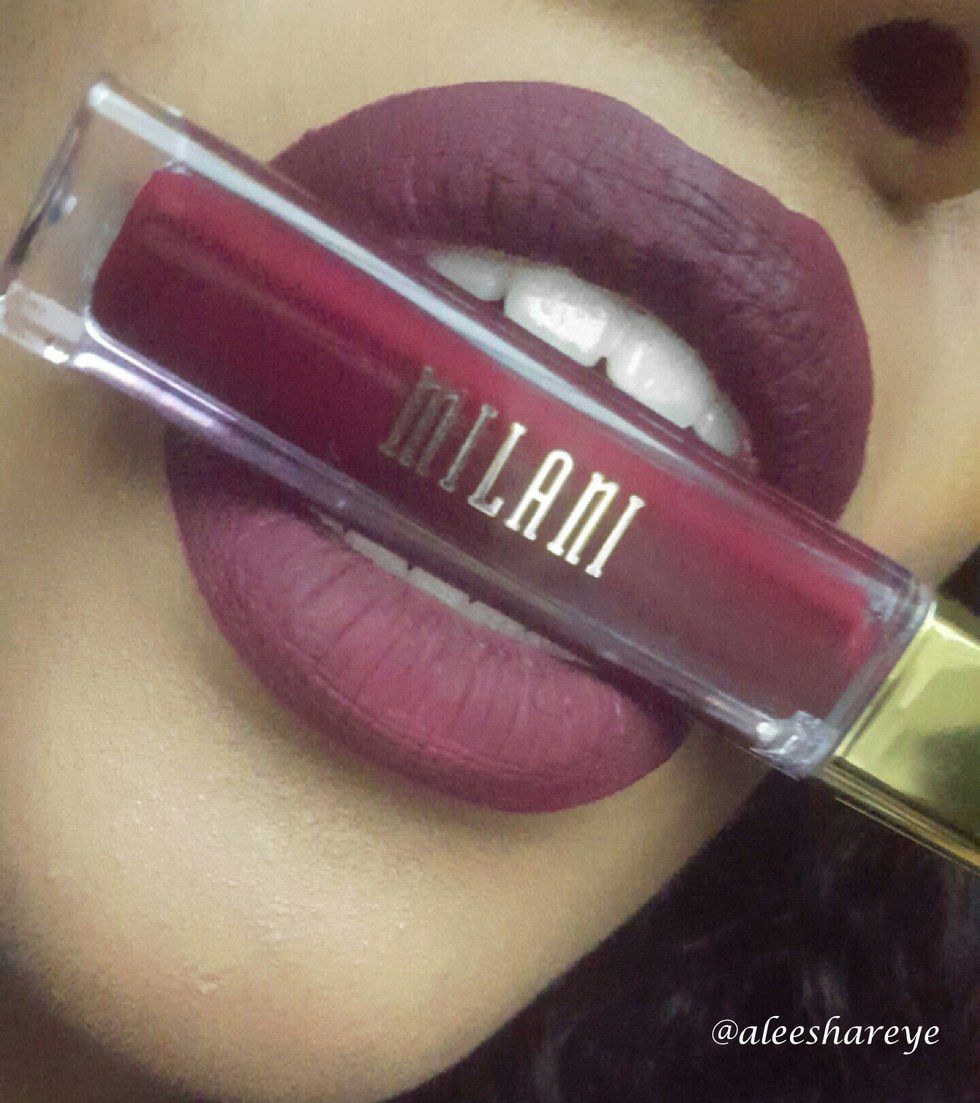
- Apply lip cream to lips: No need for lip liner, but if you feel more comfortable using one, then do so.
I hope you guys liked this. In no way do you have to follow exactly the way I do my makeup. I plan to have many more posts like this one. I am working on improvements and pictures to incorporate, but for now I’m just trying to get familiar with the format of Odyssey, so bear with me. Please like, share, and comment below what you would like to see in the future. I am totally open for suggestions.