
My father jokes that Mom and I plan our entire day around when and what we want to eat. So when the middle October hit - FRIENDSGIVING.
Food. Friends. Thanks.
The Turkey.
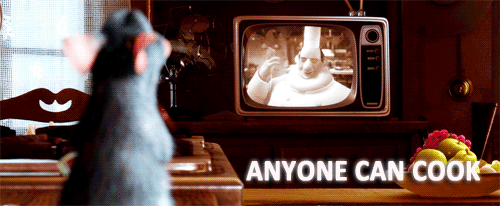
The Turkey can be the most complicated part of planning a friendsgiving feast. But I promise you - it's nothing to stress over! I learned everything from Butterball, my mama and Ratatouille, so just follow through these simple instructions, and let's get cooking!
Phase 1: Picking out the turkey
The math has already been done. By looking at this chart here, you can determine exactly how much turkey you will need to feed the people coming to the party. Check out local sales - many groceries have sales the weeks leading up to Thanksgiving.
Phase 2: Prepping the turkey
DO NOT - I repeat - DO NOT - wait until the day before to take your turkey out of the freezer. It will NOT thaw by then! I purchase the bird 4-5 days before the feast and stick it right in the refrigerator until the night before.
The night before, there's a lot of cleaning/prep work to be done.
Step 1. Roll up your sleeves and put on an apron. I promise you, the last thing you want on your clothes is raw turkey juice. Ew.
Step 2. Disinfect your kitchen sink and all surfaces around it.
Step 3. Take the turkey out of the fridge, unwrap it and remove the gizzard and other bits from the chest cavity and set aside. Then start washing! Rinse the turkey under cold/cool water - rinse all over - the top of the skin, under the skin, the chest cavity, all over! When you're done, pat dry with paper towel and set in a roaster in the refrigerator.
Phase 3: The Morning Of
With some more help from Butterball, you can easily determine how long to cook your turkey and at what temperature.
After that, wake up and start prep about an hour before then - this allows for a few snoozes of the alarm and plenty of time if something goes wrong.
Seasoning time! There are many different options with seasoning - you could go with a lemon herb garlic combination, or my favorite, Emeril Lagasse's Rustic Rub! I've included the recipe below!
Whatever seasoning you decide to use, rub the seasoning all over the turkey, under the skin, in the chest cavity - all over! I mean it!
Then - roasting time!
If your turkey is starting to get too done on top - too crispy, etc - loosely cover the turkey in aluminum foil. Baste the turkey every so often to keep it juicy and delicious. At the end of cooking time, check the temperature with a meat thermometer - NOT the little temperature device that comes with the turkey.
Phase 4: Carve and eat.
IT IS TIME!
Your turkey is done - carve it, separate white and dark meat and serve!
Pro tip: Leftover turkey is delicious in homemade soup!
Rustic Rub Recipe
Ingredients
8 tablespoons paprika
3 tablespoons cayenne
5 tablespoons freshly ground black pepper
6 tablespoons garlic powder
3 tablespoons onion powder
6 tablespoons salt
2 1/2 tablespoons dried oregano
2 1/2 tablespoons dried thyme
Combine and enjoy! If you are only using the seasoning for the turkey, you can half or quarter it. I usually at a minimum half it so I can use the seasoning for other recipes - chicken, gumbo, jambalya.