

Delaney: I love trying new hairstyles, some simple and some crazy. Sometimes I try to pull off a super high-tech braid that has like five or six different braids within one French braid. As I sit down to do it, I realize, nope! That’s not going to happen. So I shake it off, swallow my pride and create the one easy hairstyle I know I’m a boss at: “The Messy Bun,” or as my friends like to call it, “The Delaney Bun.” You see, around Asbury University’s campus, I am known for my messy buns. Someone tries to find me in a crowd, they look for my bun; someone tries to describe me to a stranger, they say, “the girl with the messy bun.” I’m not saying that I have perfect hair—because I certainly do not—but what I am trying to say is that my bun has become my statement piece. And now I want to pass on my messy bun secrets, so you too can master it for yourself. What’s truly astonishing about this bun is that, believe it or not, there are no socks involved!
Cathryn: Who in their right mind would ever want to put a sock on their head? Seriously, throw out the socks and buy more bobby pins. The world is a better place because of bobby pins. This look that Delaney has artfully created is so simple and cute that it has become my go-to hairstyle in the mornings I’m in a rush. Plus, I receive compliments every time I wear the look. To share with you this hair wisdom, I’ve teamed up with Delaney (her as the model and me as the videographer) to present to you the Perfect Messy Bun tutorial, brought to you through photos, gifs, and a really tricked out time-lapse video. Let’s go!
Items Needed:
1. A hair tie or elastic (depending on how thick your hair is)
2. Bobby pins (lots and lots of bobby pins are the key)
3. Hairspray (I’m all about Big, Sexy Hair)
4. Wide-tooth comb (optional)
Seven Easy Steps:
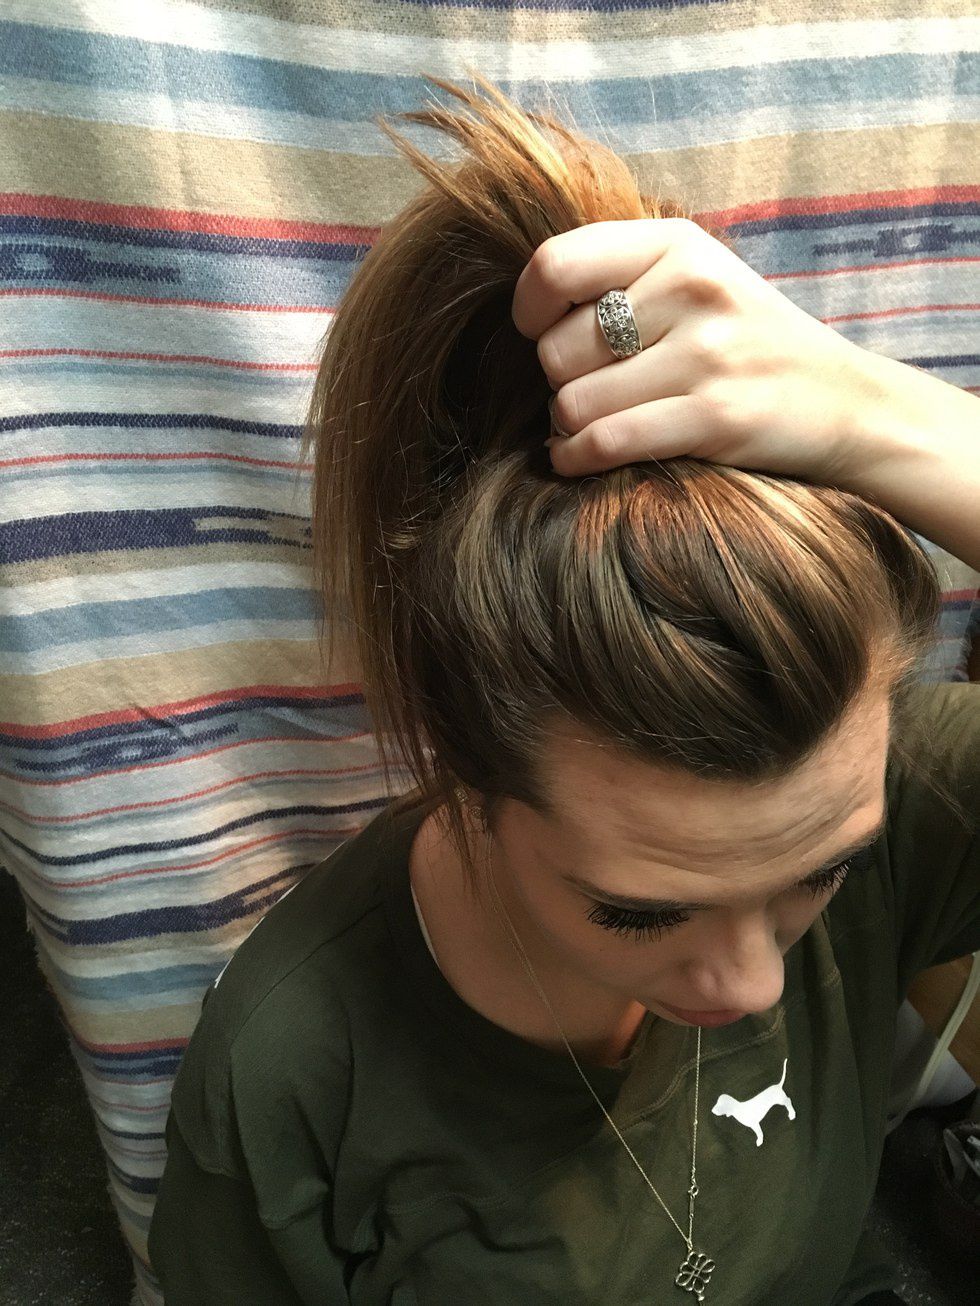
Step One:
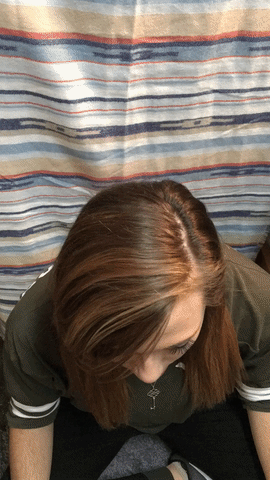
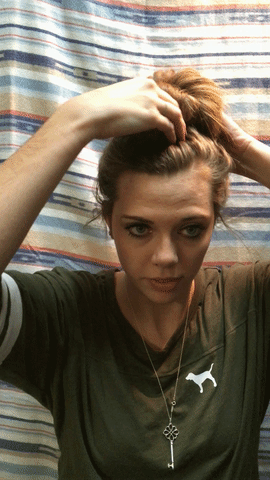
Gather all of your hair into a high ponytail, holding it in your hands on top of your head. (Don’t loop your hair through the hair tie yet!) If you’re using a comb, you can brush the sides and back of your head to make sure there are no bumps in your hair.
Step Two:
Take the ponytail and bunch it into a ball in your hand. You’re basically making a small, messy ballerina bun within the palm of your hand.
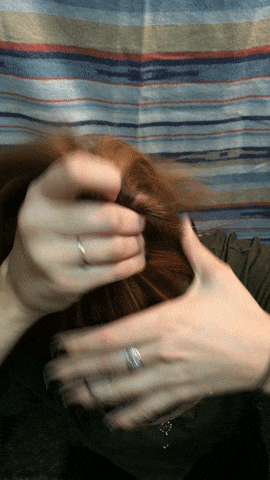
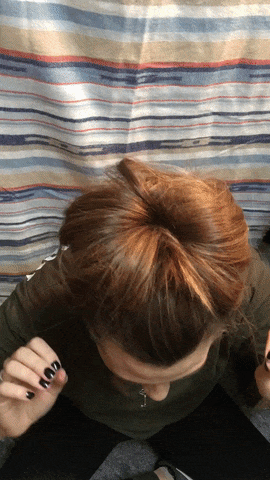
Step Three:
Secure your bun with the hair tie. Although my hair is medium-thick, I usually wrap my hair tie only twice around because it makes it easier to maneuver the bun. Then later I secure it with, you guessed it, bobby pins! If your hair is extremely thick, I would recommend wrapping the hair tie around three times and then secure it with bobby pins.
Step Four:
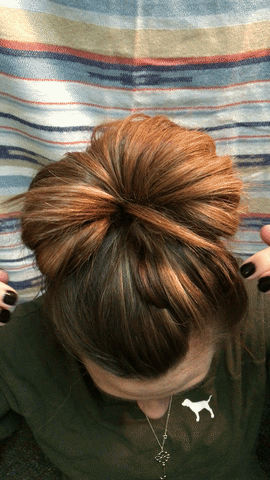
Fan out the edges of the bun. You want to pull the bun apart to create a fanlike appearance. You should try to make sure that when you fan the bun out, there aren’t any gaps between pieces of the bun so it will create a fuller effect. Then lay the bun down flat on your head.
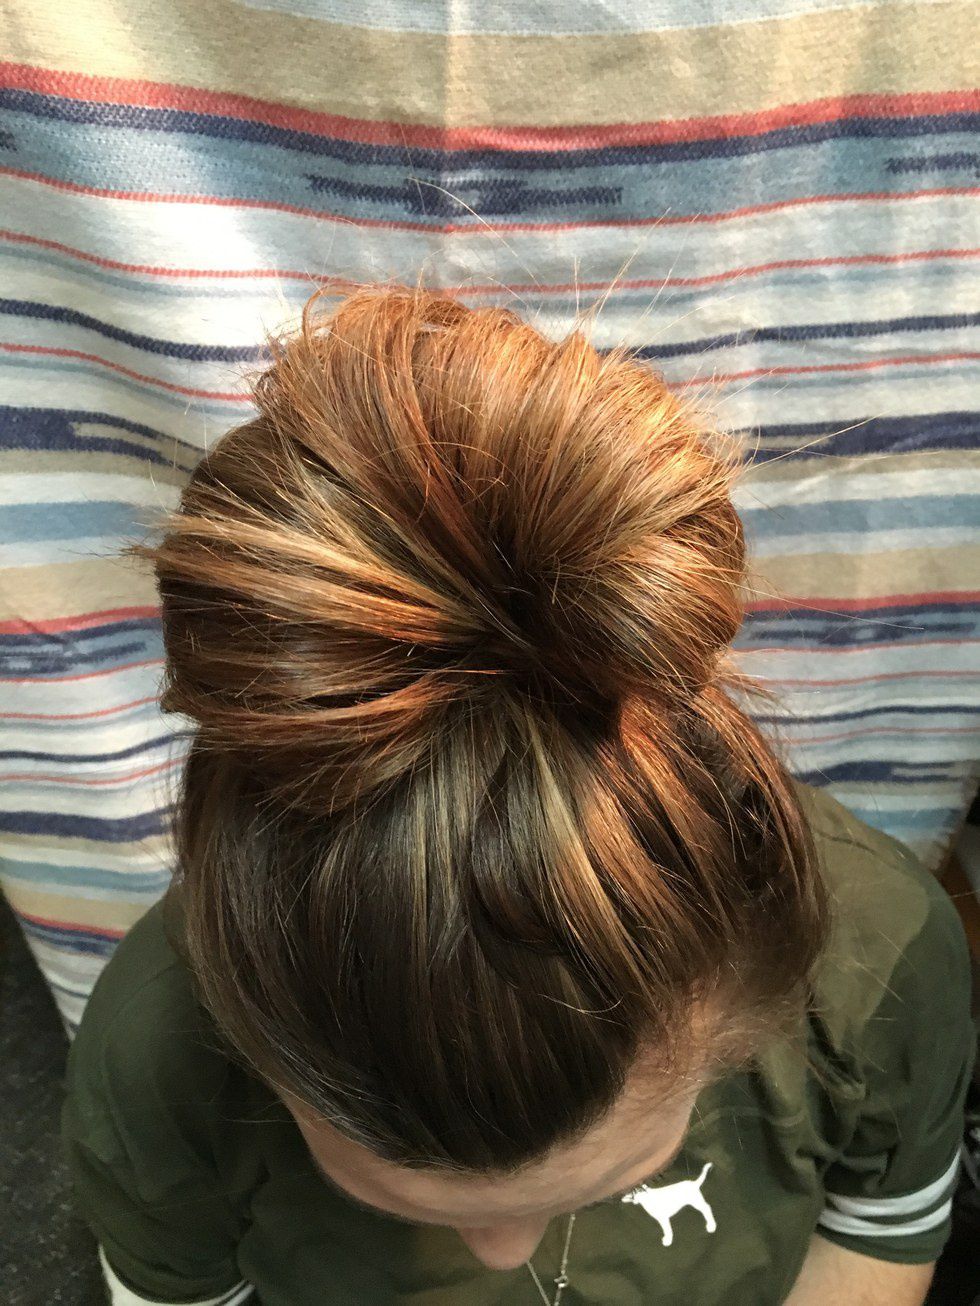
Now your bun should look almost complete; you just need the finishing touches.
Step Five:
Take both ends of the bun and pull them together, bobby pinning them in place. After doing so, your bun should look like a sock bun, creating a donut right on top of your head.
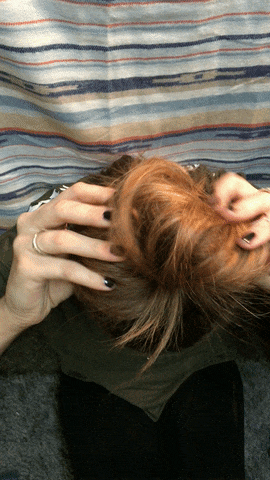
Step Six:
This is where all the bobby pins really come into play. Now you can secure your bun in place by bobby pinning it down in the middle and all around the edges. I need a lot of bobby pins in the center to make sure my bun is secure. You also want to make sure that any flyaways doing their own thing are pinned down as well. If you want to keep them out you can. It will add to the messy effect.
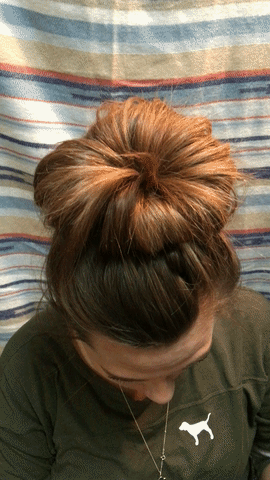
Step Seven:
If you want it messier, you can pull out the sides and back of your hair to add volume. I like to pull the sides of my hair out a lot because I love volume. You can also pull out wispy pieces to frame your face. Use generous amounts of hairspray to keep the bun in place (This bun is versatile, so it can also function as a polished look. If you want a sleek hair-do, pin all the loose pieces down and smooth any flyaways with hairspray).
That’s it! Practice makes perfect for any hairstyle, so don’t be discouraged if it doesn’t turn out the first time you try. Sometimes you have to talk to you hair and coax it to working with you (because it knows your weaknesses).
Thanks for reading our How-To! If you enjoyed this article, tweet at us or comment below and we’ll try to publish more tutorials in the future. Happy styling!