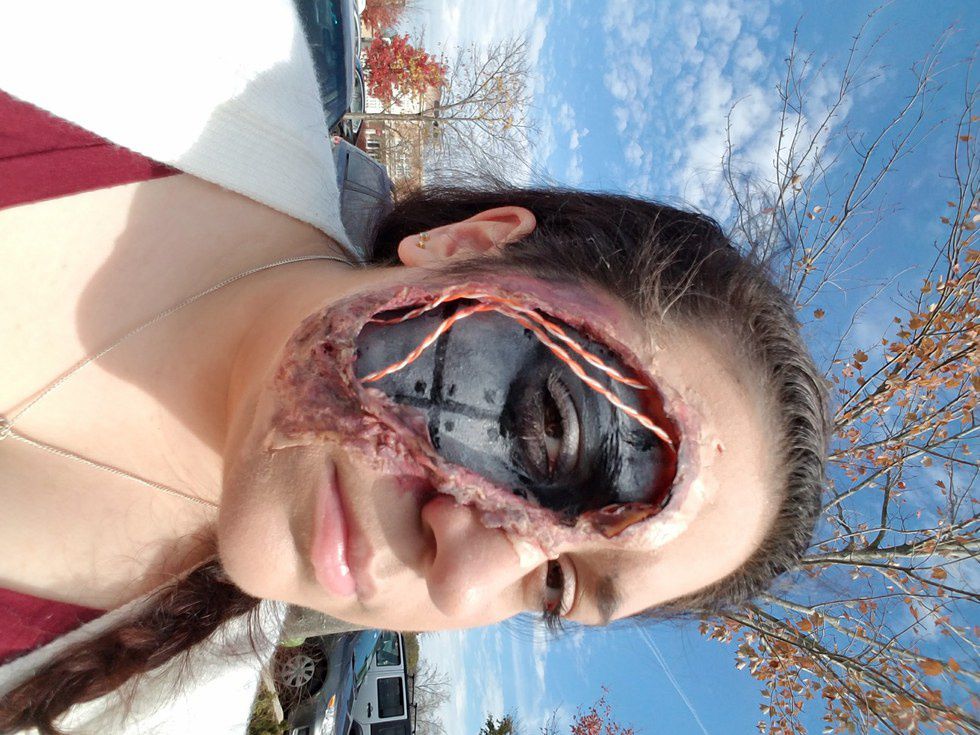


I've been working with liquid latex and cheap Halloween paints for years. I am not an expert. I am all self taught from videos and tutorials on the internet. My favorite creations have been a robot and a zombie who's eye was gouged out, but this article is just going to cover the basics of how to use latex to create a wound in the face!
Disclaimer: I am not an expert. If you are allergic to latex, I highly suggest you do not use it. Also, latex can look like peeling skin. If you don't like that sort of thing, I urge you to look away.
Things You Will Need:
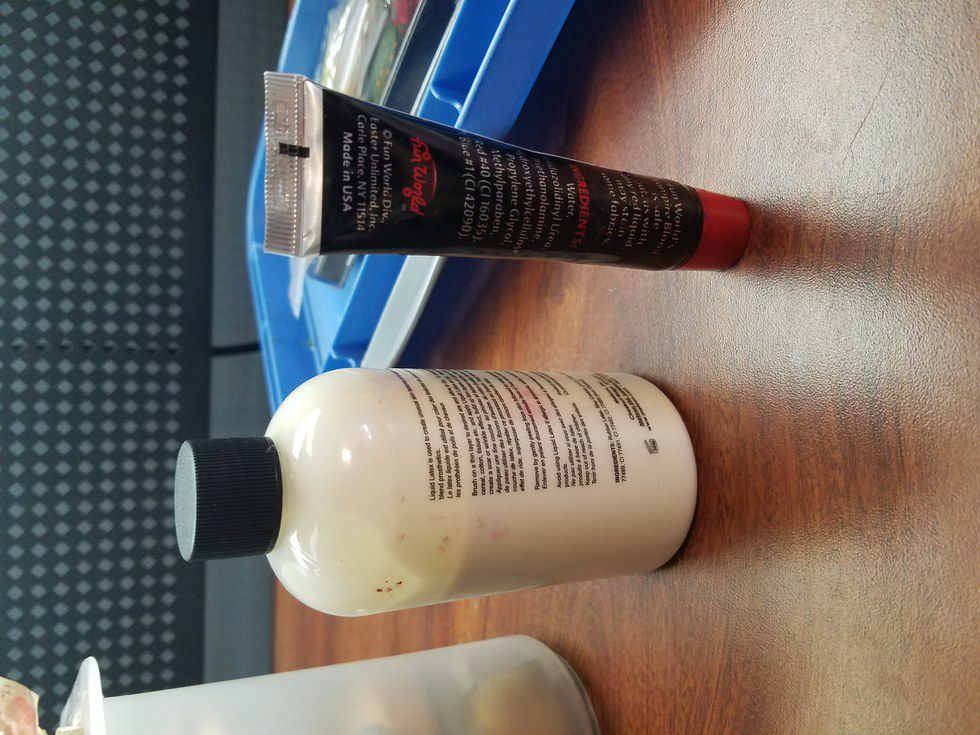
Liquid Latex (plain school glue actually works well, your final product will just end up crunchy instead of skin like)
Makeup Sponges
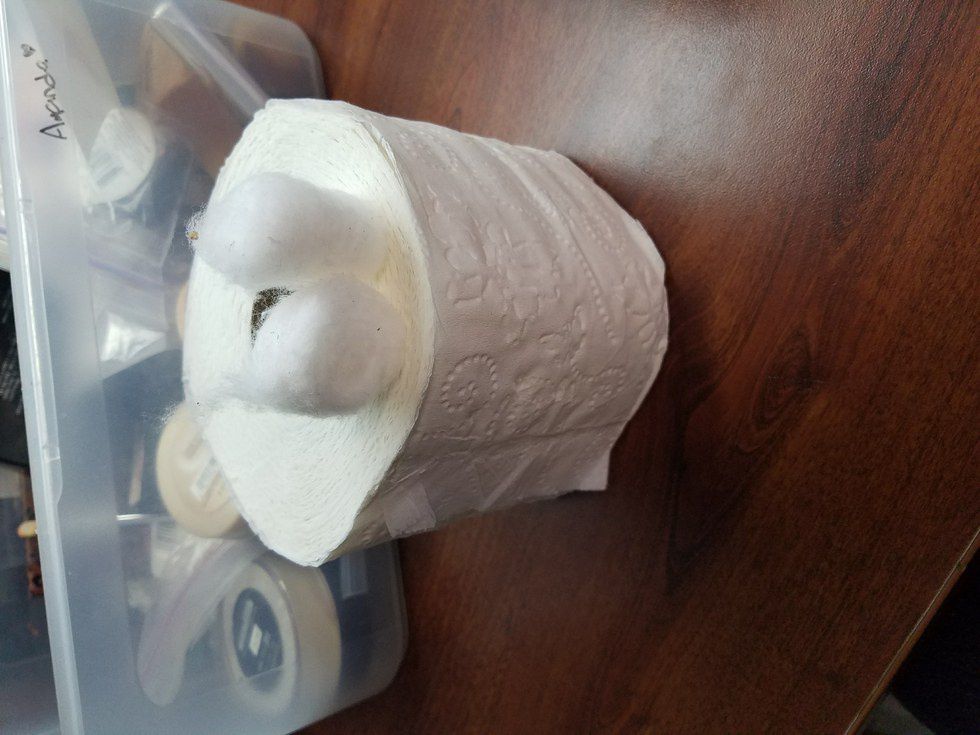
Cotton balls
Some stick type object to poke stuff with (fingers work if you don't mind getting messy)
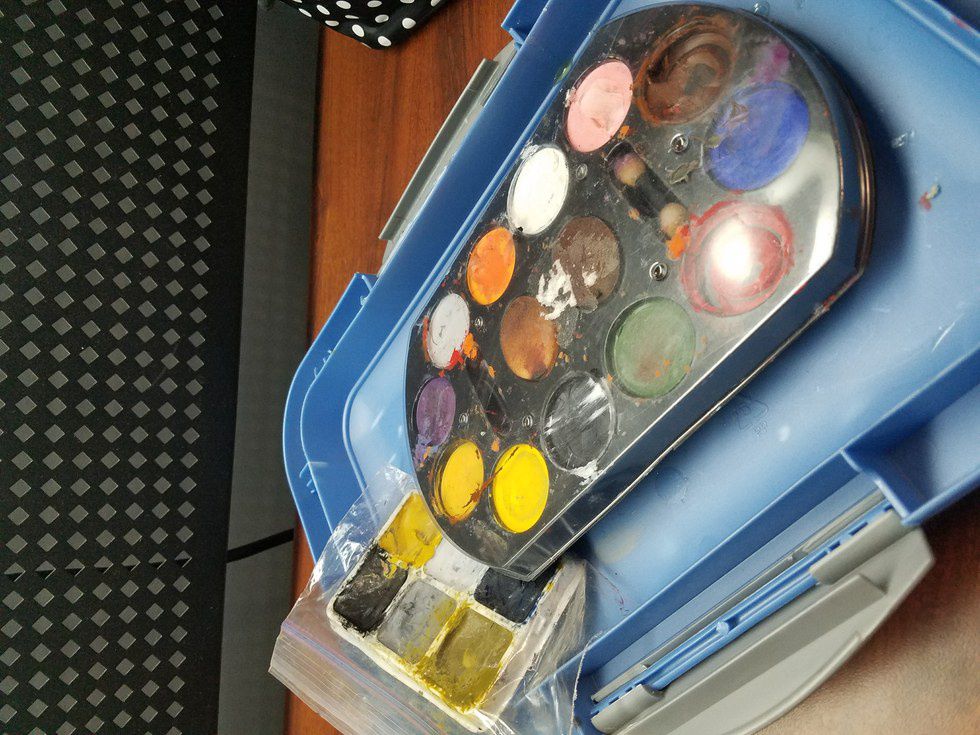
Body paints, makeup, AND/OR cheap Halloween makeup kits
Small brushes you don't care about ruining (kids craft ones work just fine, I however used my fingers)
Towels or rags to help with clean up (something you're okay with ruining or throwing out)
Extra bits to stick into the latex (i used old wires)
Step 1:
WASH THE AREA YOU WILL BE APPLYING THE LATEX! Latex does NOT smooth out easily over make-up, oils, or creams. Do not moisturize after you wash either. Also, if there is hair, shave or use a bald cap if you're doing your head! To protect eyebrows(unless you want them gone) use a washable glue stick to hold them down.

See? Clean face. No makeup. No creams. Nothing.
Step 2:
Gather all of your supplies in one spot!
 ]
] 
The toilet paper was for cleaning up messes!
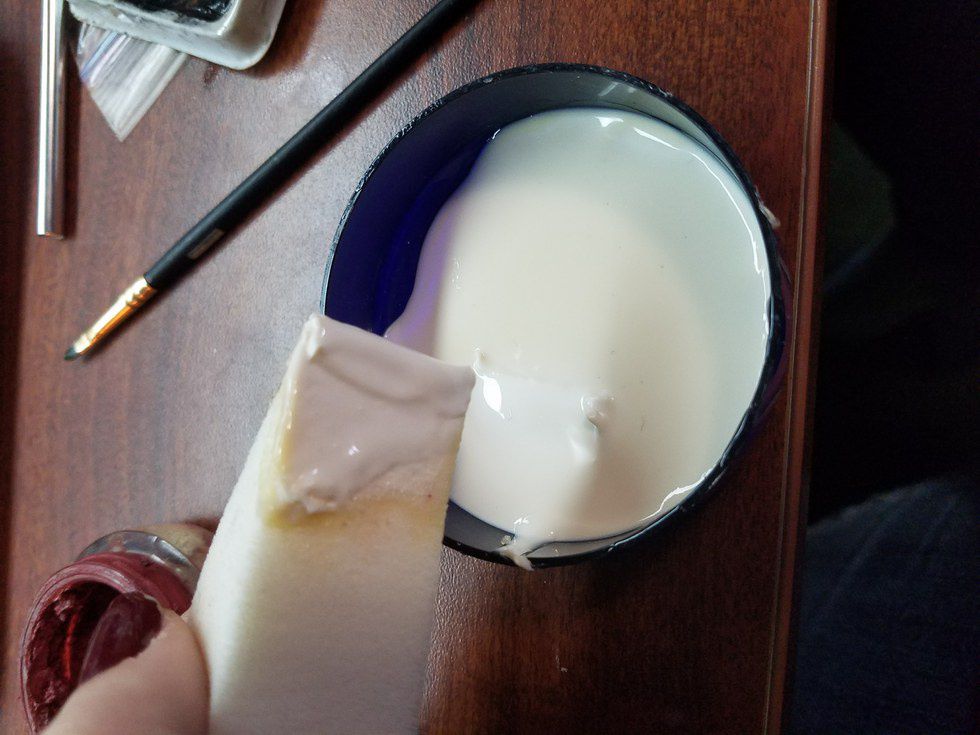
Step 3:
Start putting the liquid latex where you want it on your face. Try to envision your desired outcome. Having a reference really helps. In my case, I had done a robot before, so I had just looked at a picture from the last time I had done it.
You can place your wounds/scars/gauges/whatever anywhere you want. It does not have to be the face either if you are concerned that your skin will react badly.
Step 4:
Pull apart your cotton balls and stick them to the latex while it is still wet. Nothing sticks to latex but latex when it's dry. So, work quickly. Make sure you cover the cotton balls in latex as well after you stick them to your face. We'll use the clumps to make skin flaps later.

Continue on with this until you're happy with your outline of your wound. I wanted a large one to make it look like my "skin" had started to melt off, but you can make any size you desire.
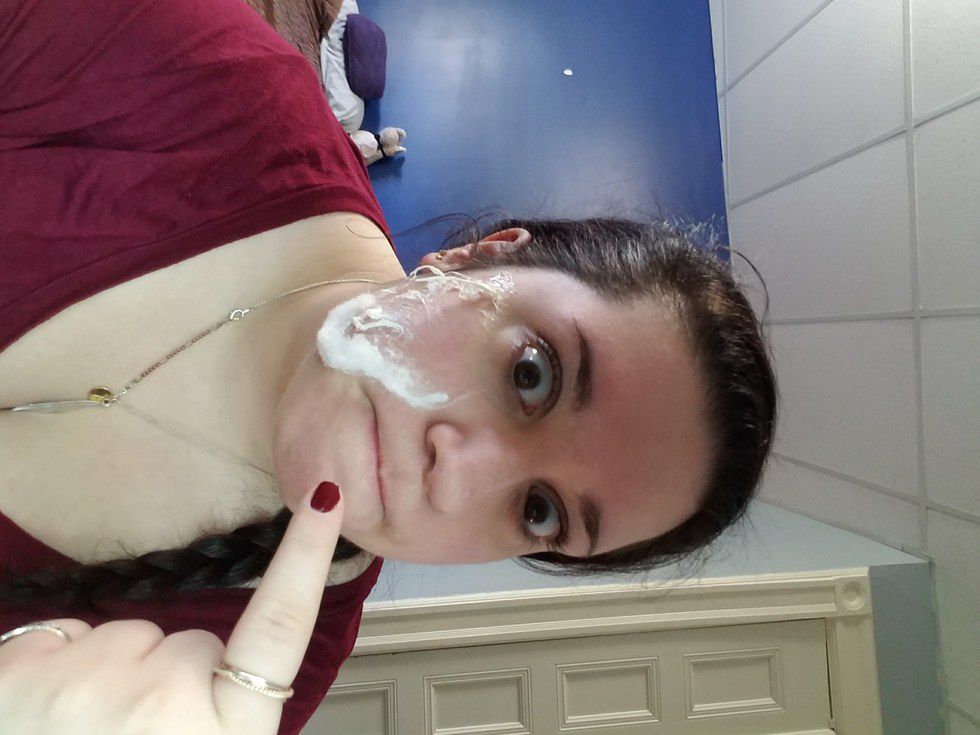
Step 5:
LET IT DRY! Latex can take a long time to dry and become pliable if you keep messing with it. Just go sit in front of a fan or go do some homework or chores while you're waiting. I decided to do my makeup on the other side of my face while I waited. I also covered my eyebrow with a light foundation to make hiding it easier.
Step 6:
Once the latex is dry, you can peel bits of it back to look like flaps of skin. Try not to pull too far in areas that you left skinny. Otherwise, you will end up with holes. Unless you want holes. Then, that's okay.
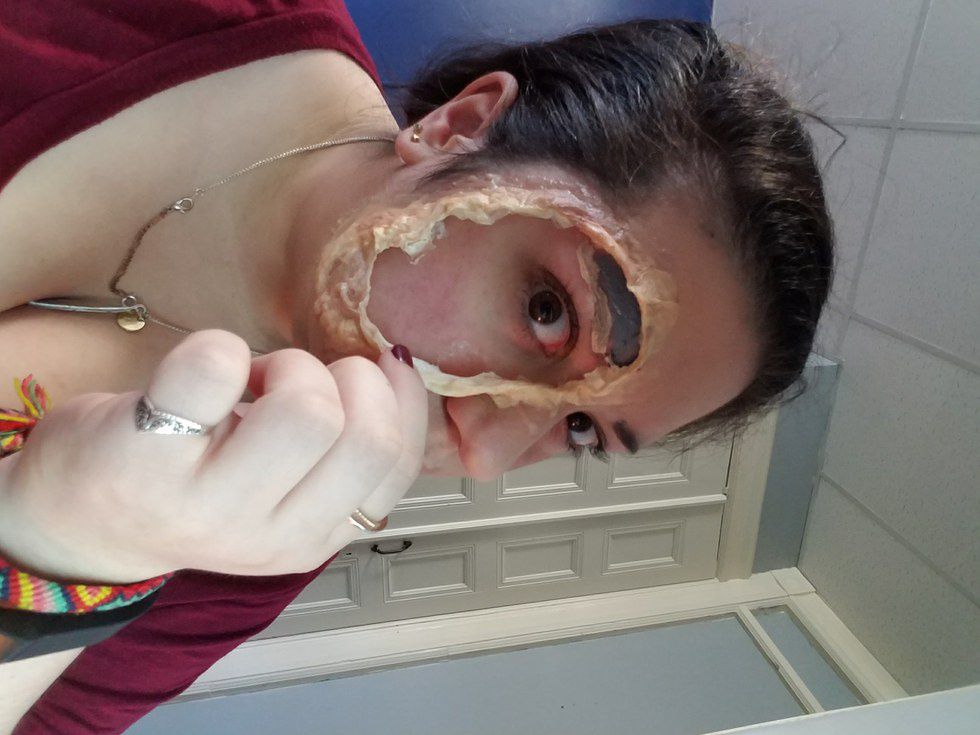
Step 7:
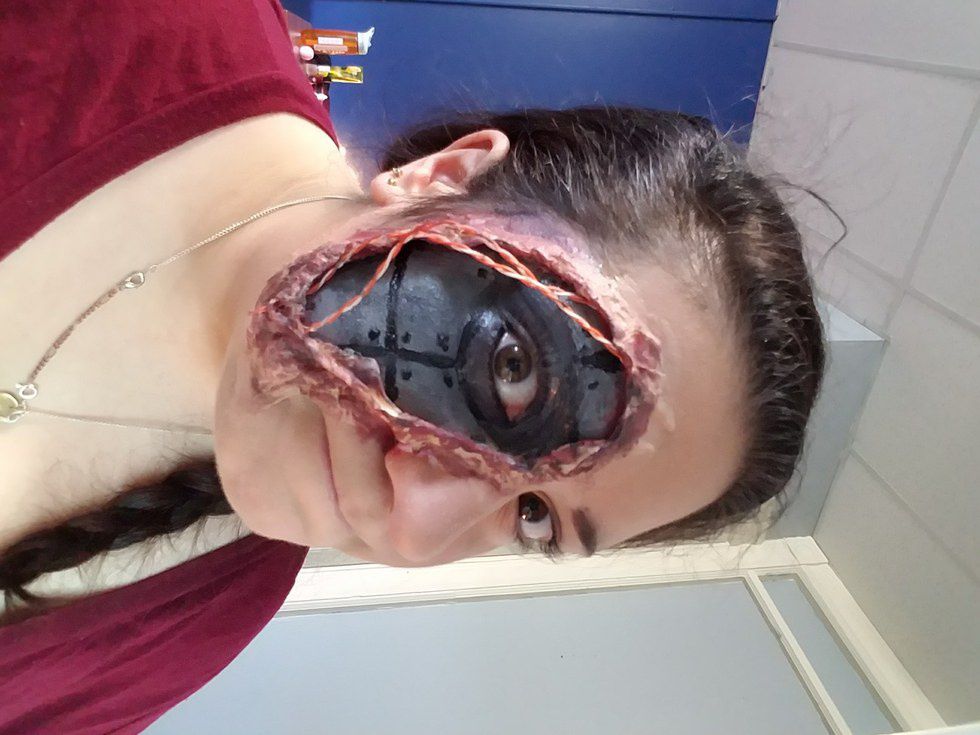
Start filling in your empty area with your desired paints. I wanted to look like an android style robot. So, I made it look like I had metal plating underneath my skin. I also lifted up the latex to paint underneath it to give a bit more realism to the whole wound area.
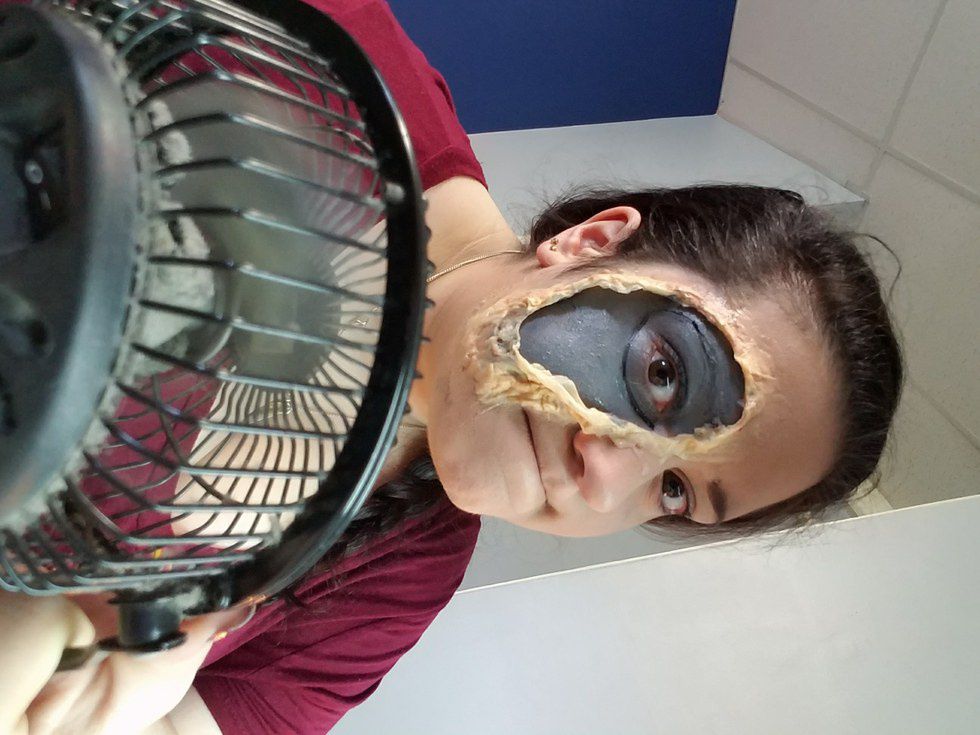
You have to let each layer of paint/makeup dry before starting the next. Otherwise, there will be smearing. Smearing isn't good if you need precise lines. I need those. Hence, the fan.
Step 8:
Finish the details. I decided that I had been burnt. So, I made the edges of my latex look crispy and singed with some black and red paints. I also finished up the lines inside the wound to make my face look like it had to be pieced together.
I also had taken apart an old Ethernet cord to turn into internal wiring for my look. Extras like this are completely optional, but they can add to a look if you're adventurous.
Step 9:
Go outside and scare the heck out of people that don't know who you are. Have fun, and remember be safe out there on Halloween.