
The next time you fall in love with a $40 scarf at Target, DO NOT BUY IT.
You can make, yes MAKE, the very same cozy, cute scarves you always see in stores this time of year, for half the price! Knitting is easy to learn, easy to master, relaxing and addicting! Imagine how good you'll feel knowing the scarf around your neck is one of your own creations!
All you have to do is follow these steps and you'll be making beautiful scarves in no time!
Step 1: The Slip Knot
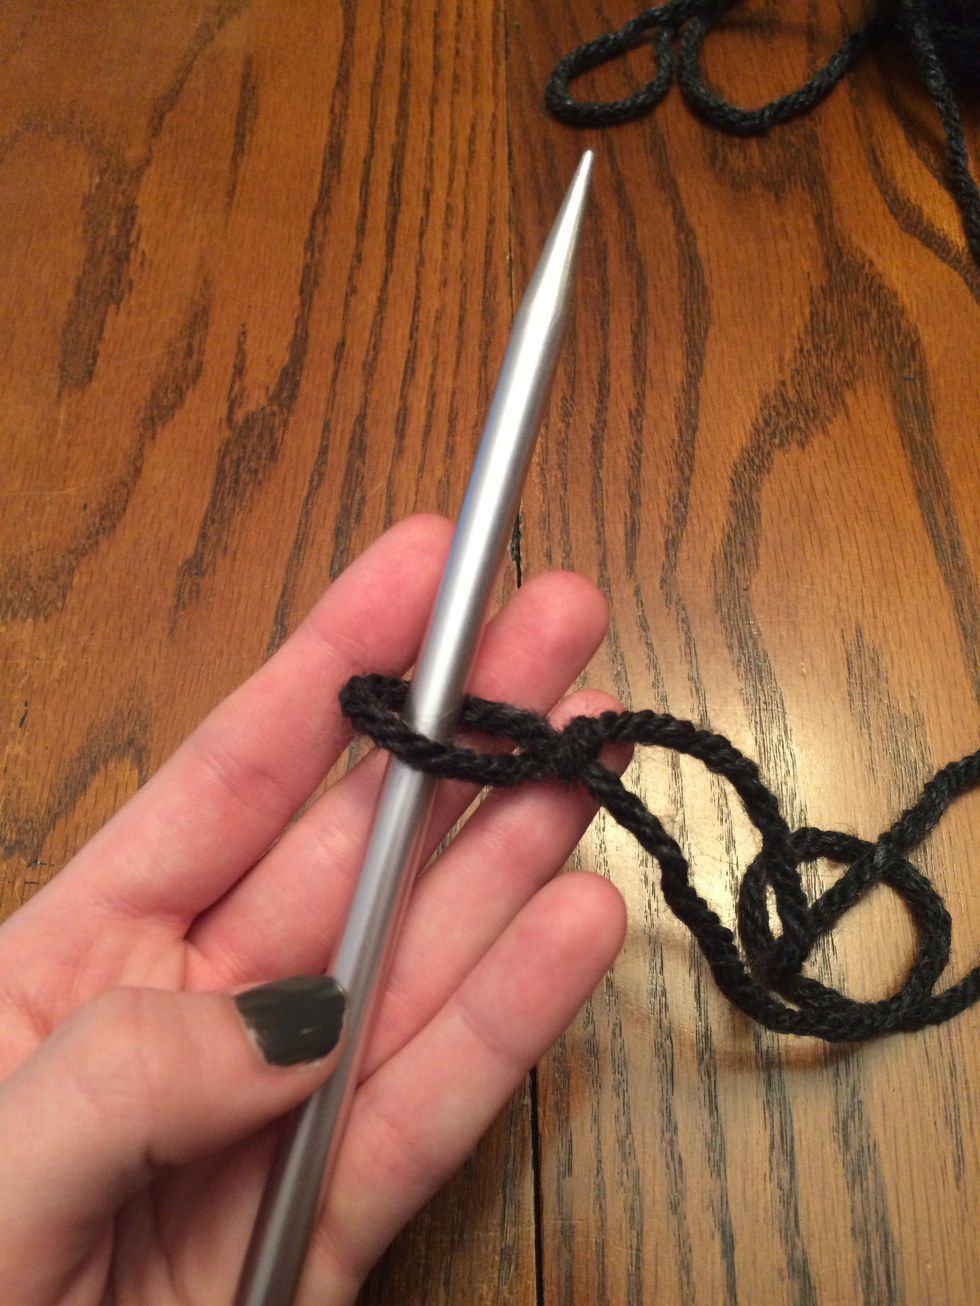
Before you begin knitting anything, you must first tie a slip knot. When I first started knitting, I had no clue what a slip knot was. Most people who knit recommend using one of the knitting needles to tie a slip knot, but I think it's easier to just tie the slip knot and insert the needle after. Let me show you what I mean:

First, lay your yarn on a desk or table as shown above.
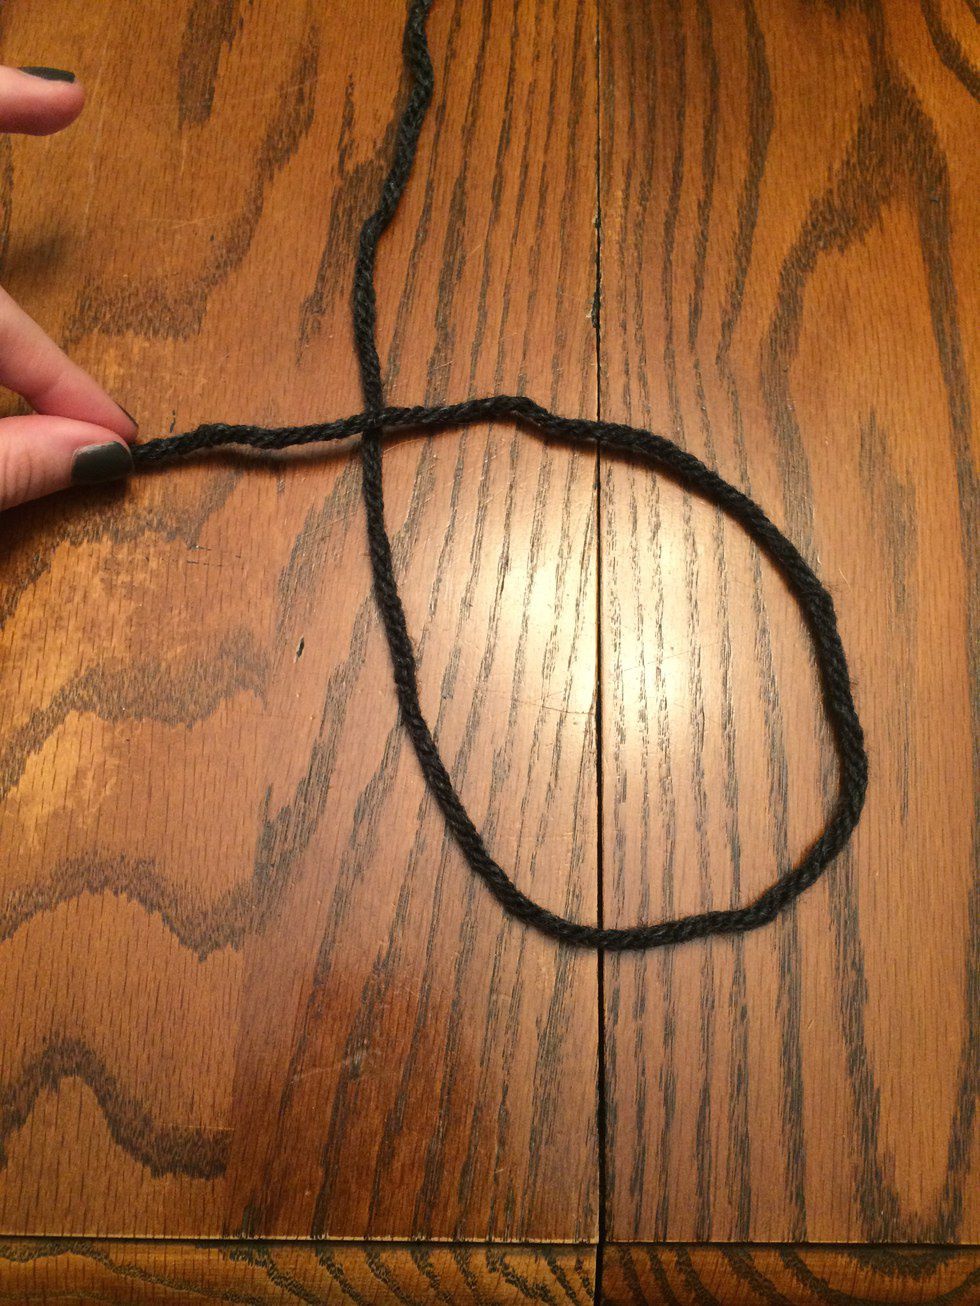
Then, lay the yarn end piece OVER the side that leads to the ball.
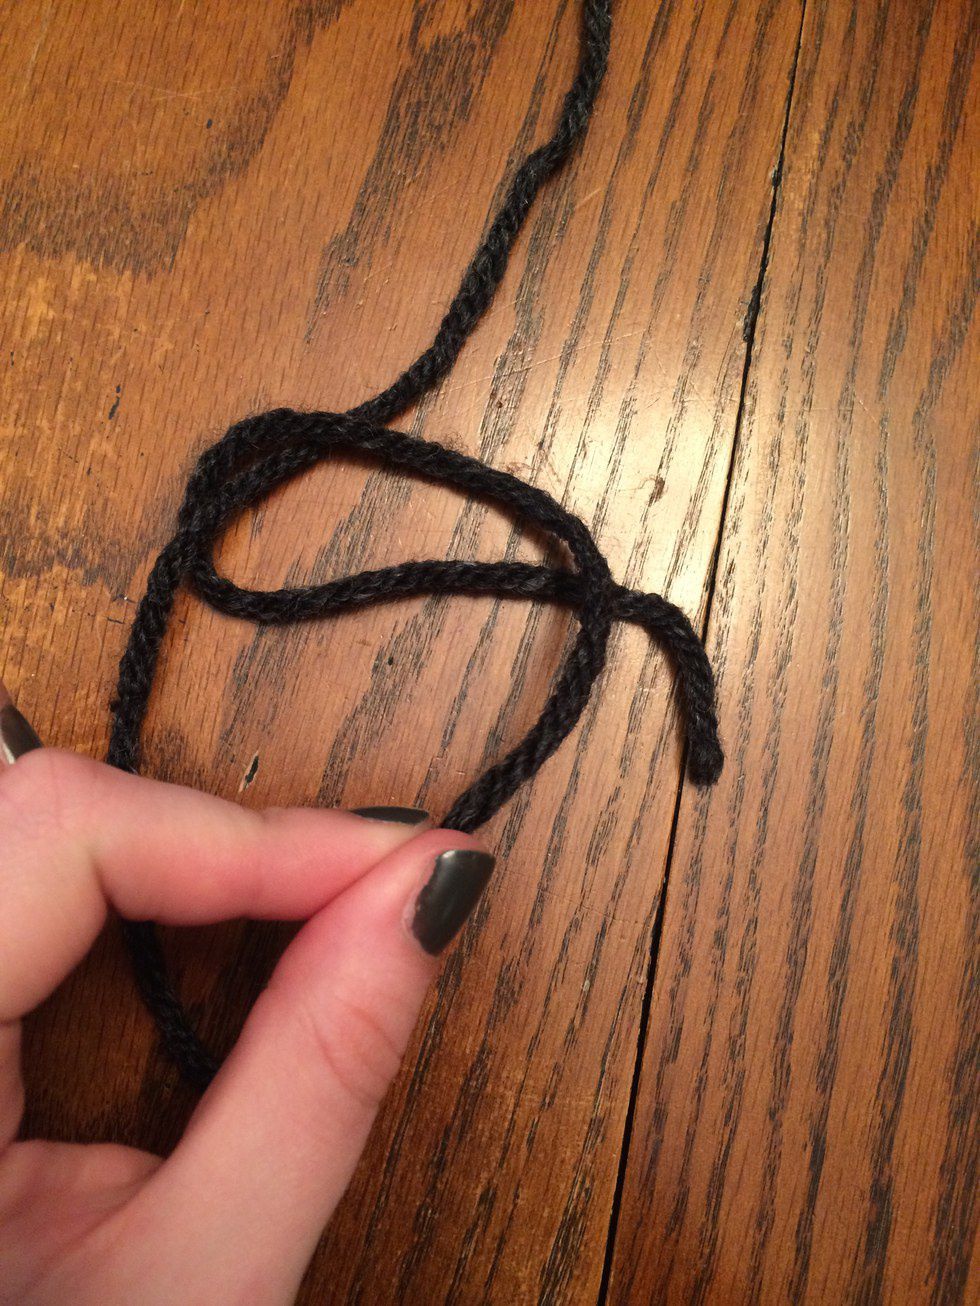
Next, lay the yarn end piece UNDERNEATH the loop of yarn. The entire loop should be on top of the yarn end piece.
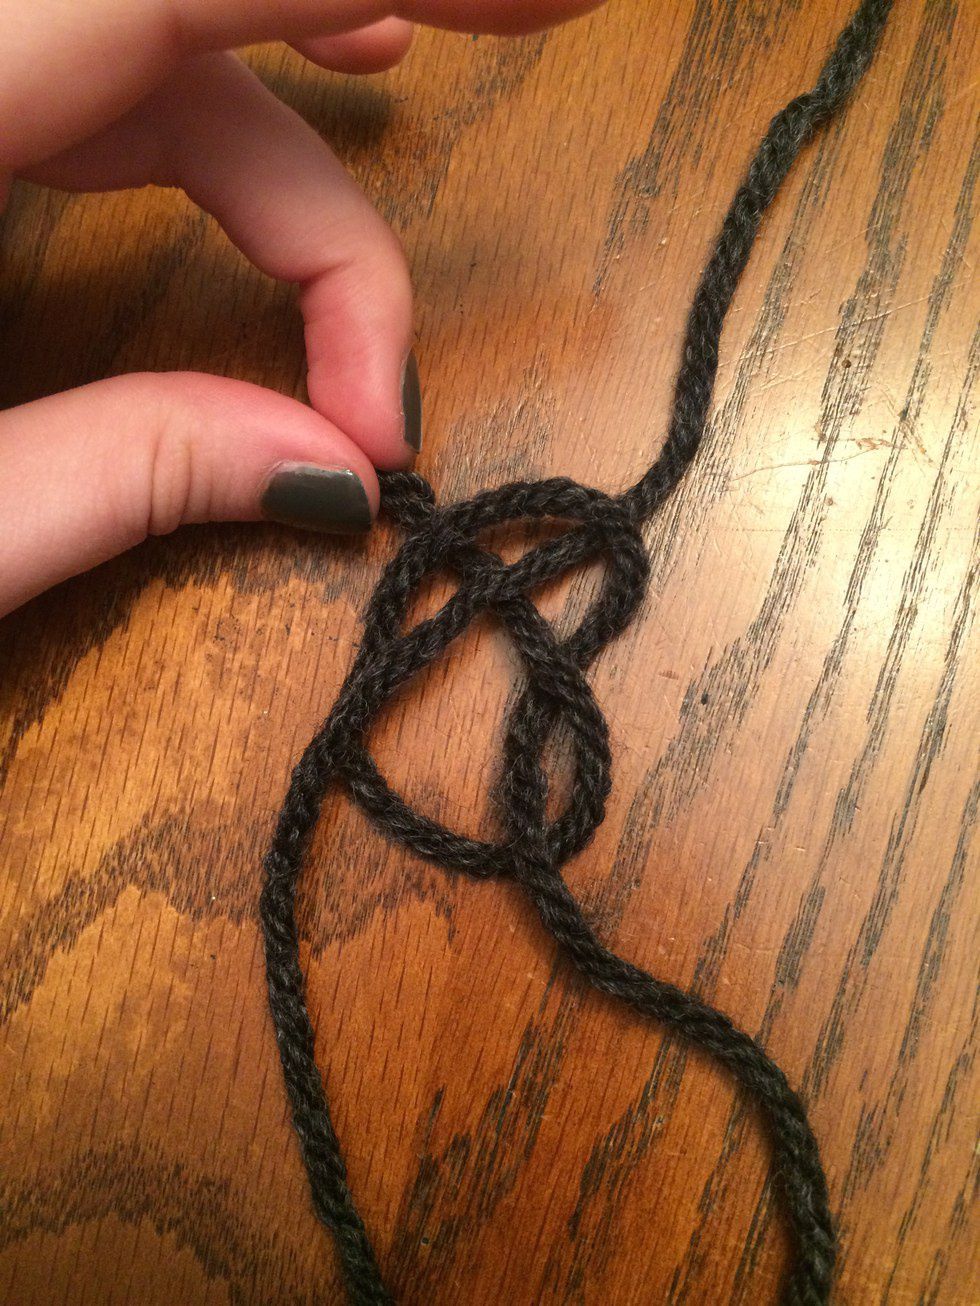
After that, pull the yarn end piece THROUGH the small opening towards the top of the loop.
Then, pull the yarn end piece and place your finger in the loop. This will tighten the loop, reducing its size.
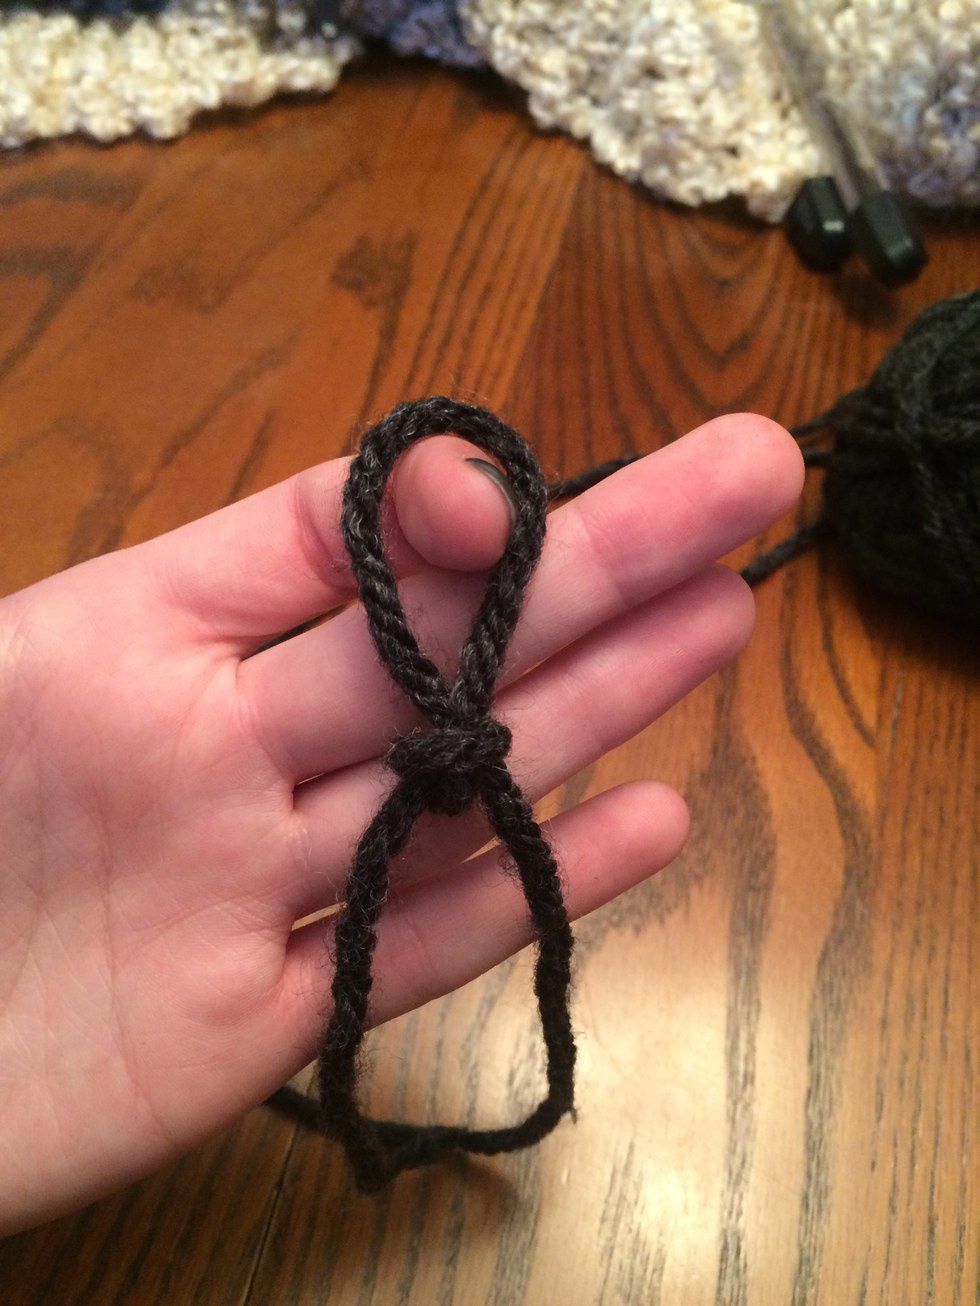
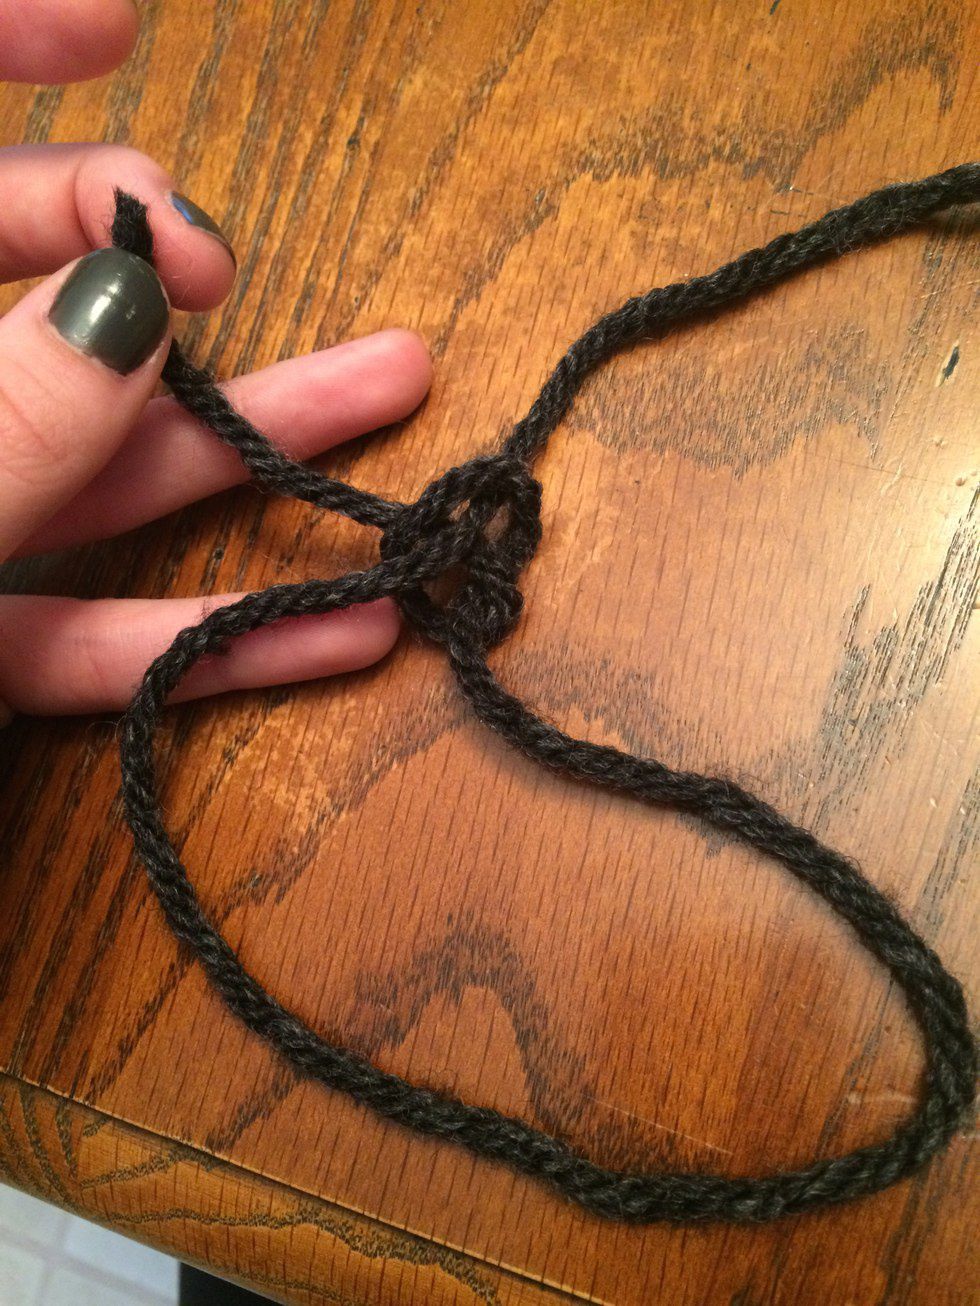
You have finished your slip knot! The finished product will look like the photo above. Insert one of your knitting needles and you're ready to start knitting!
Step 2: Casting On
Now that you've inserted your knitting needle, as shown above, you're ready to cast on!
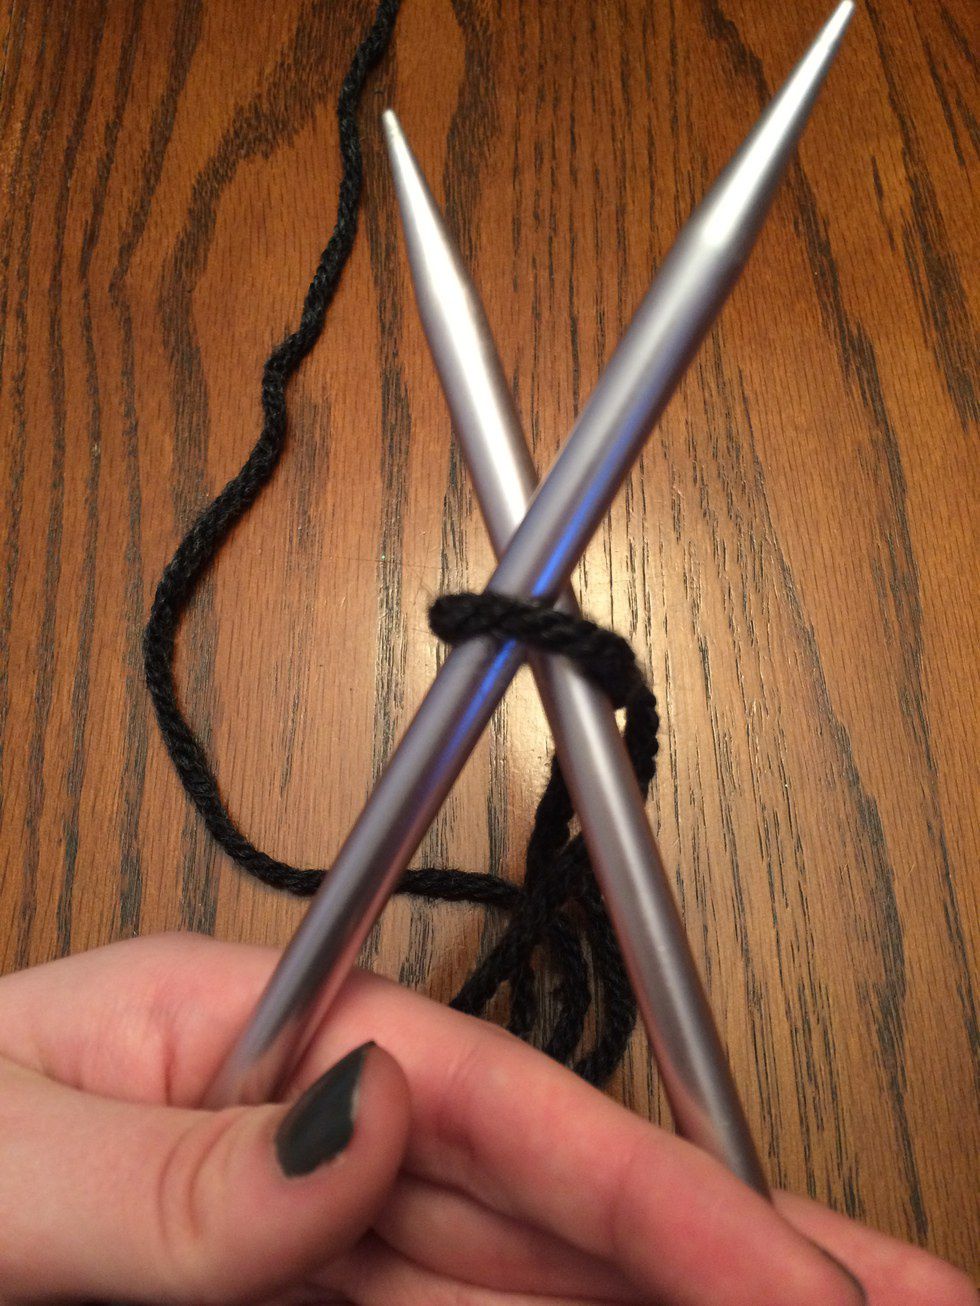
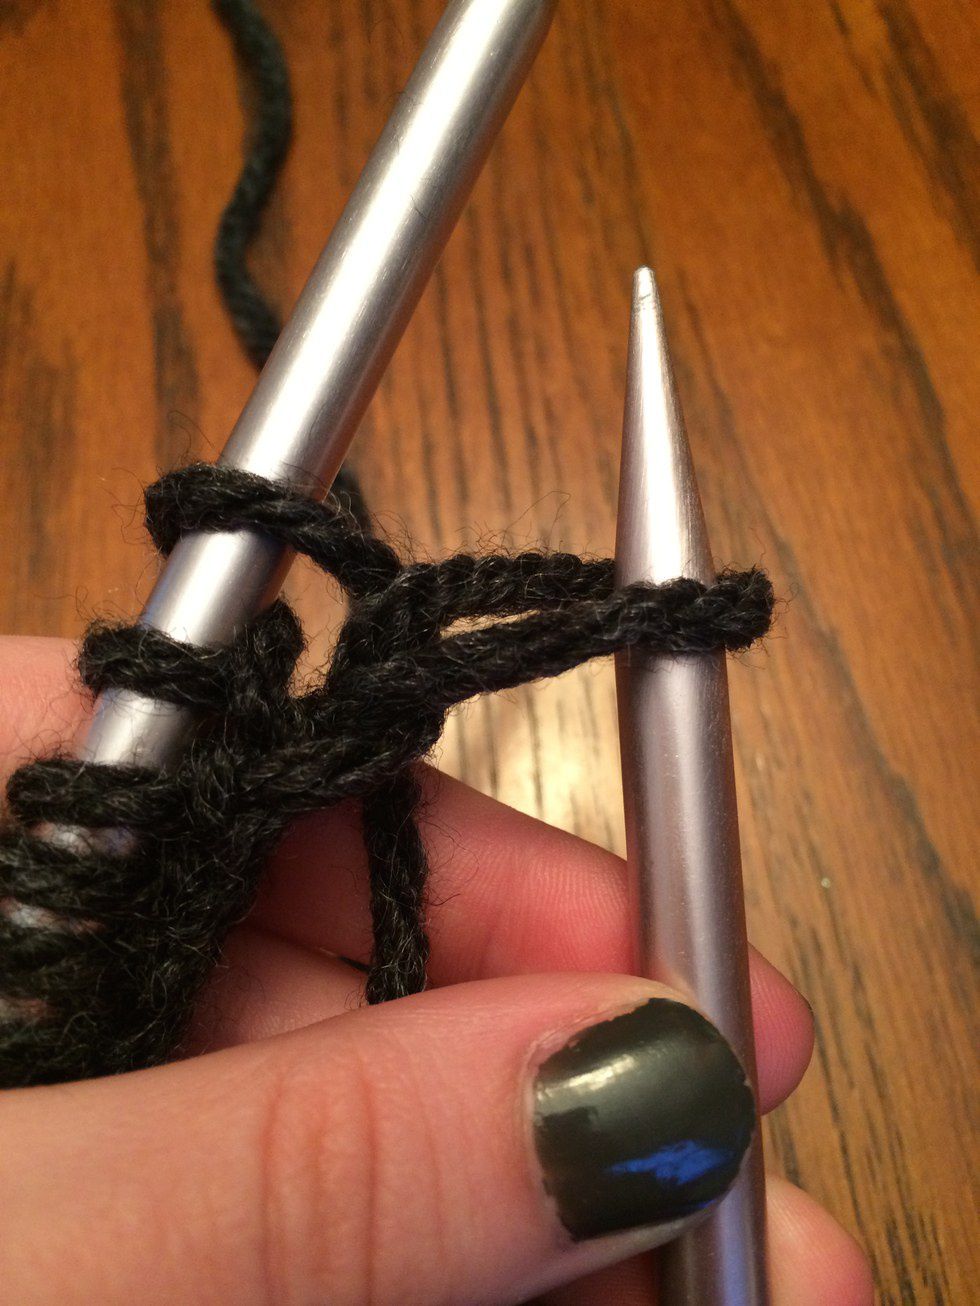
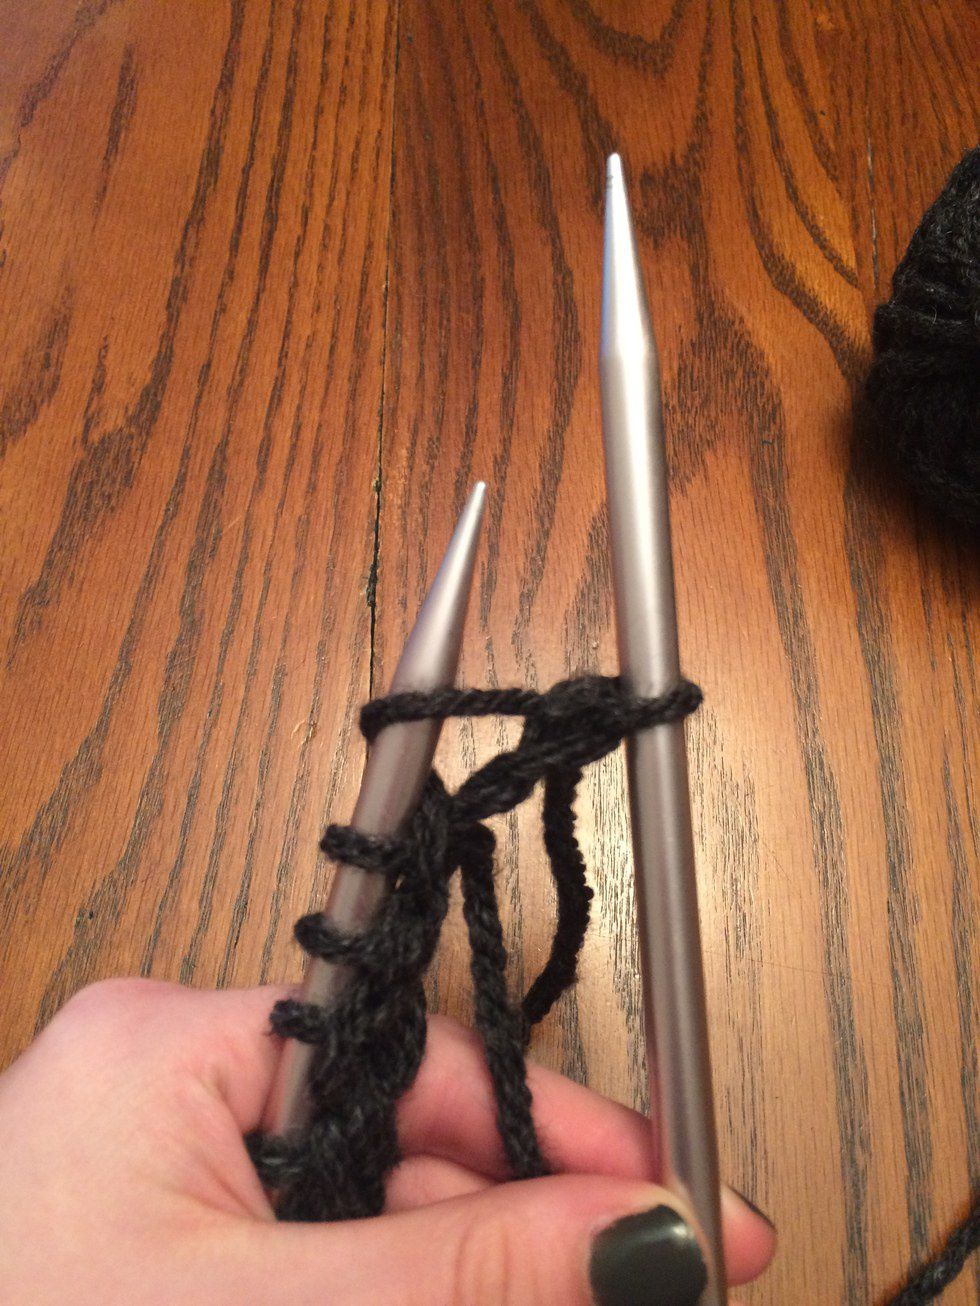
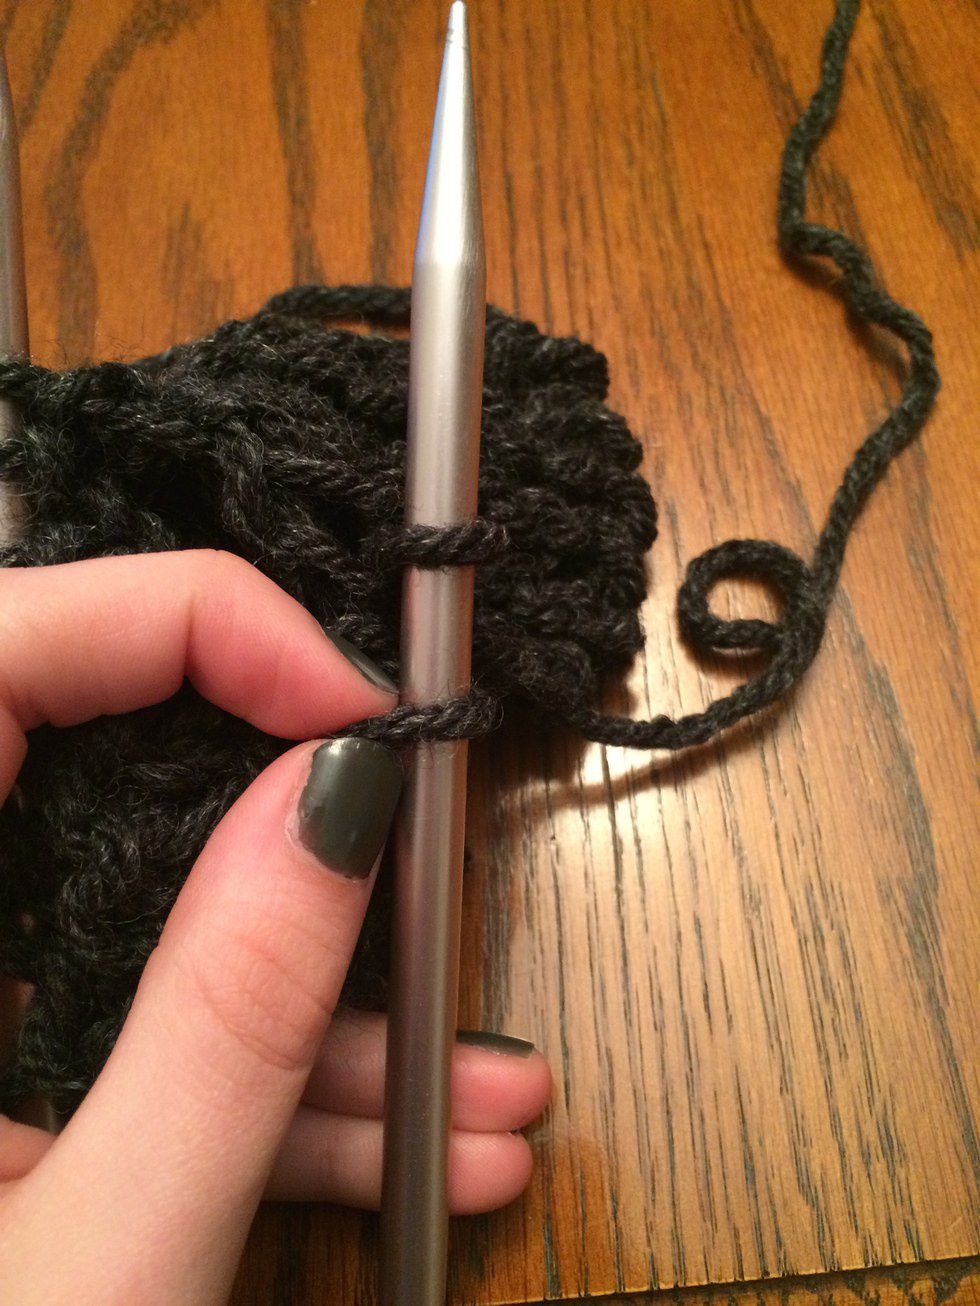
First, insert your second needle into the loop, UNDERNEATH the first needle.
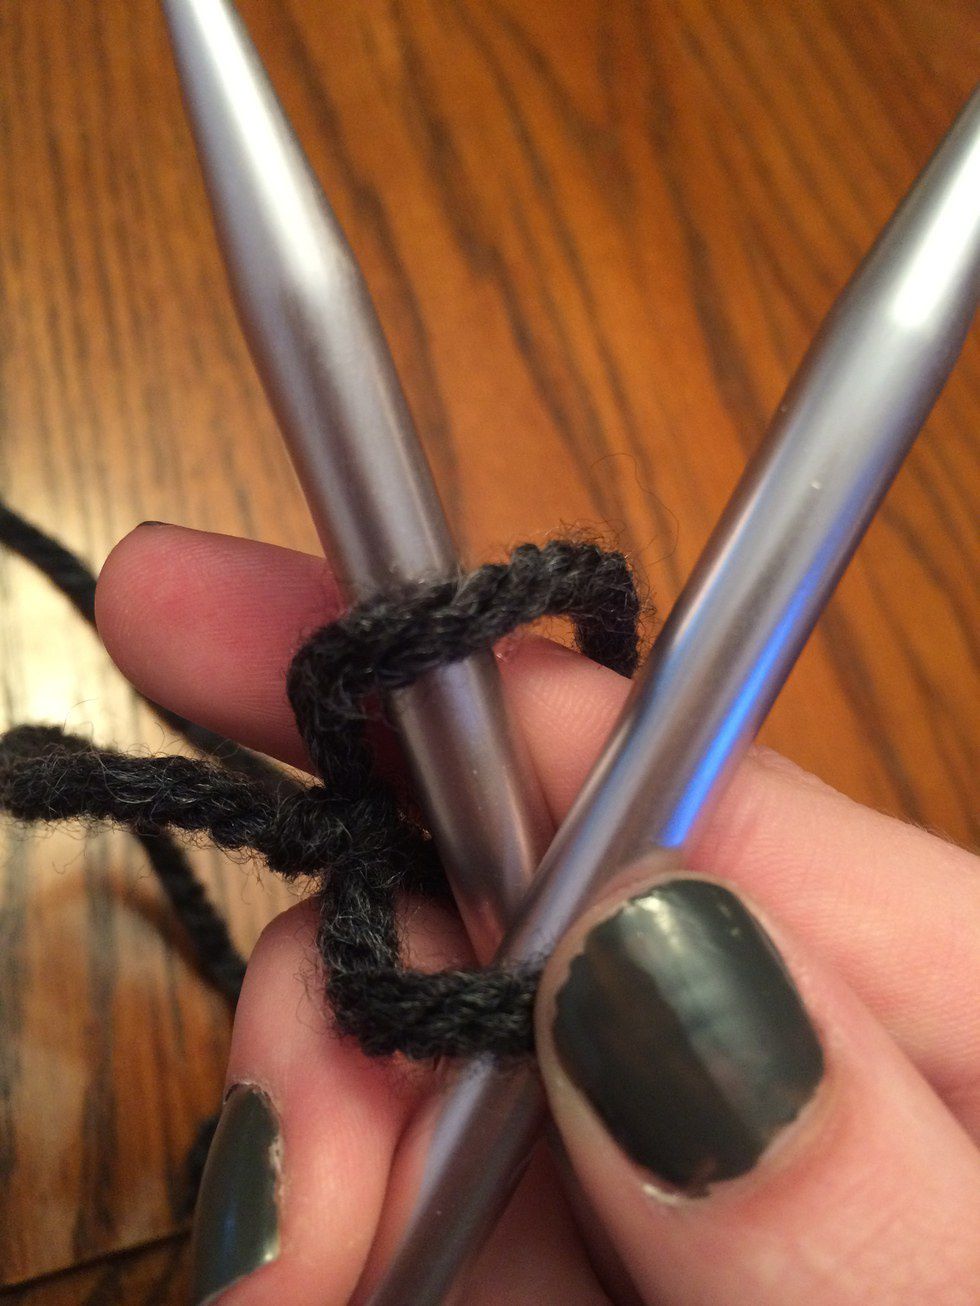
Next, take the yarn piece that leads to the ball and drape it OVER the bottom needle.
Then, hook the draped yarn piece and pull it THROUGH the starting loop.
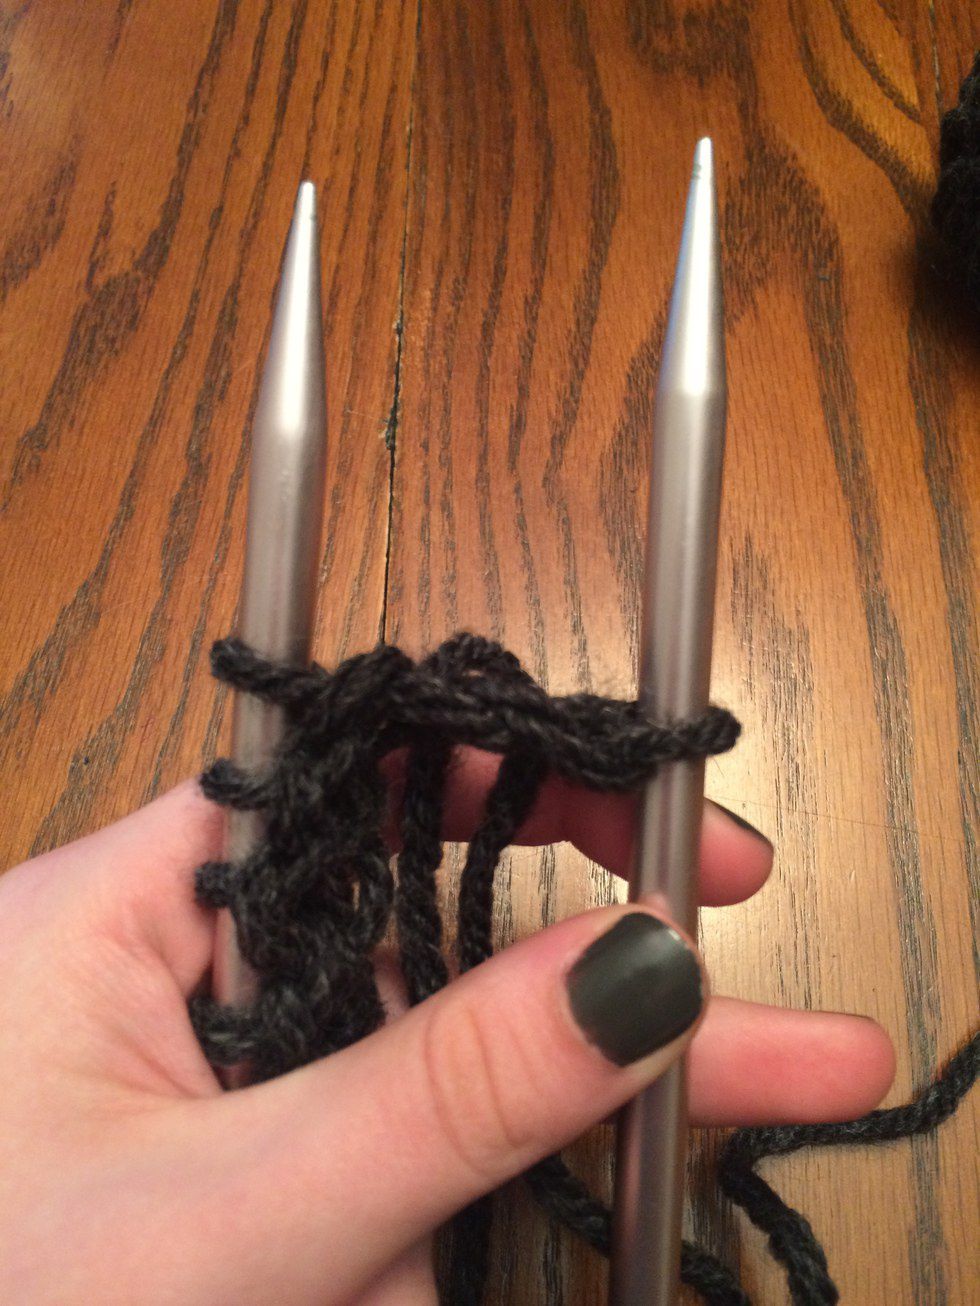
After that, your needles should look like this. You should have created a new loop.
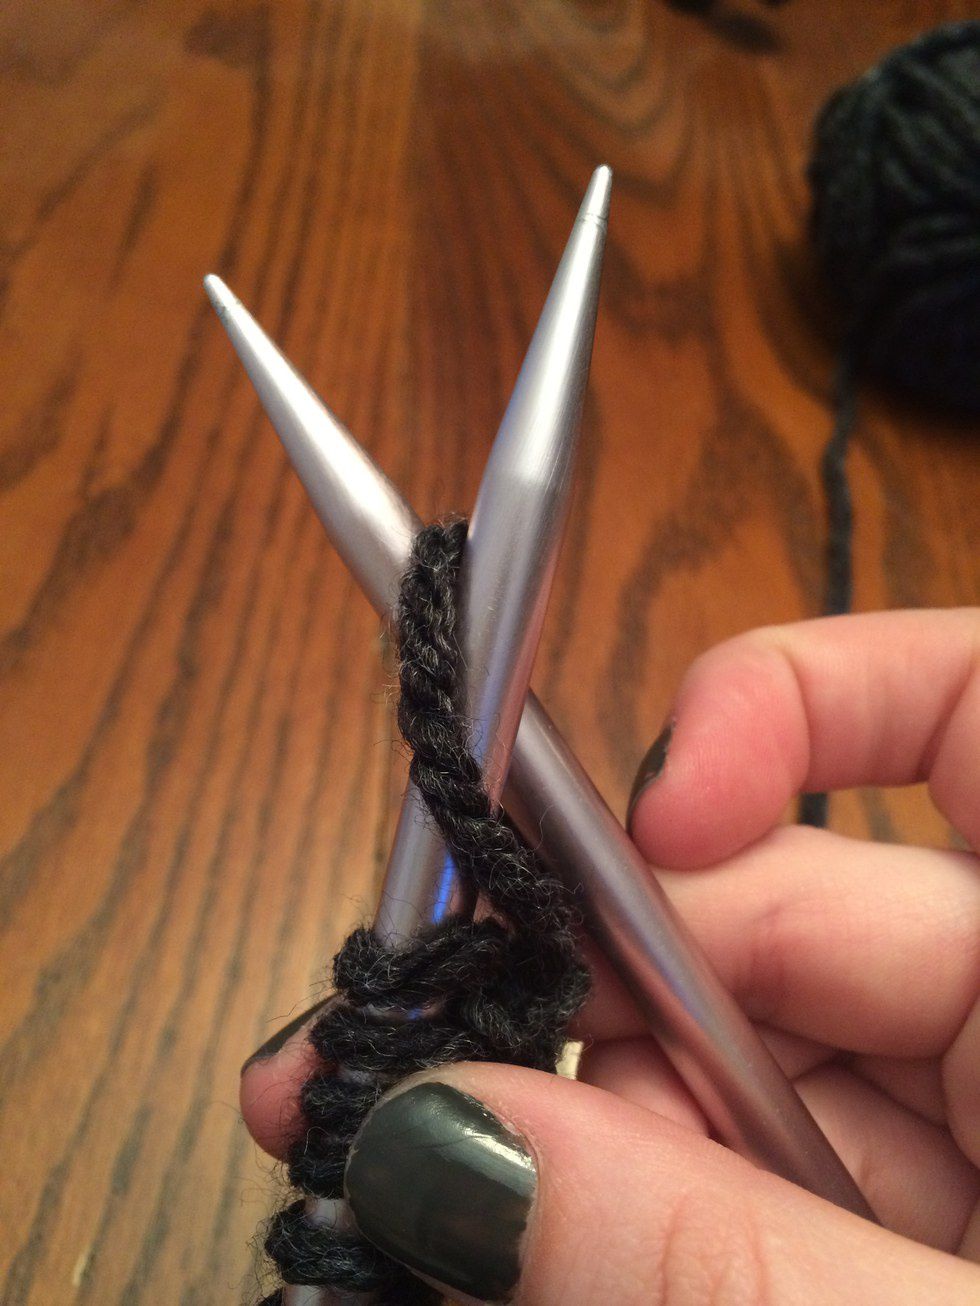
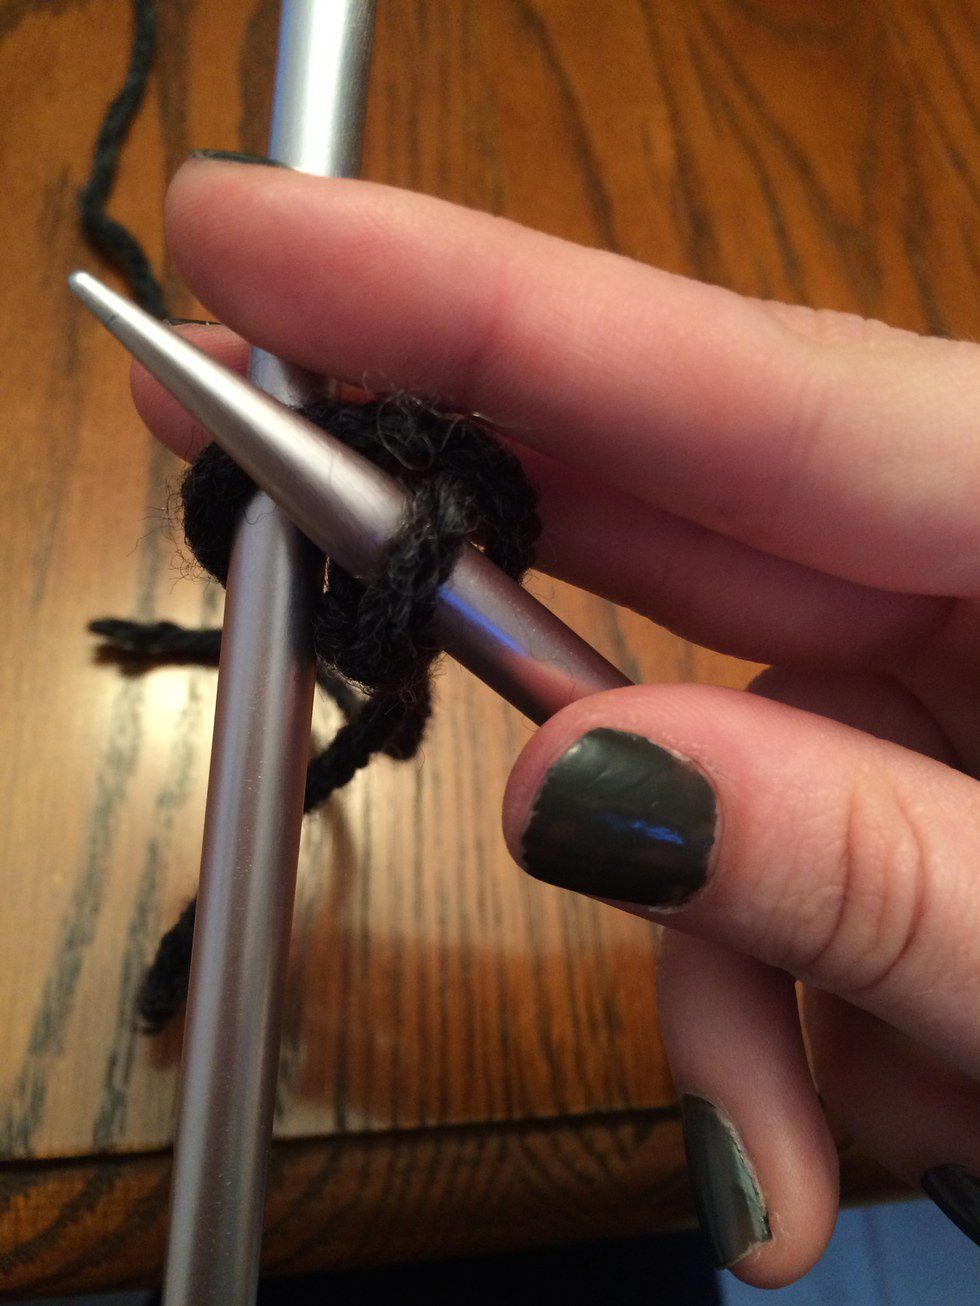
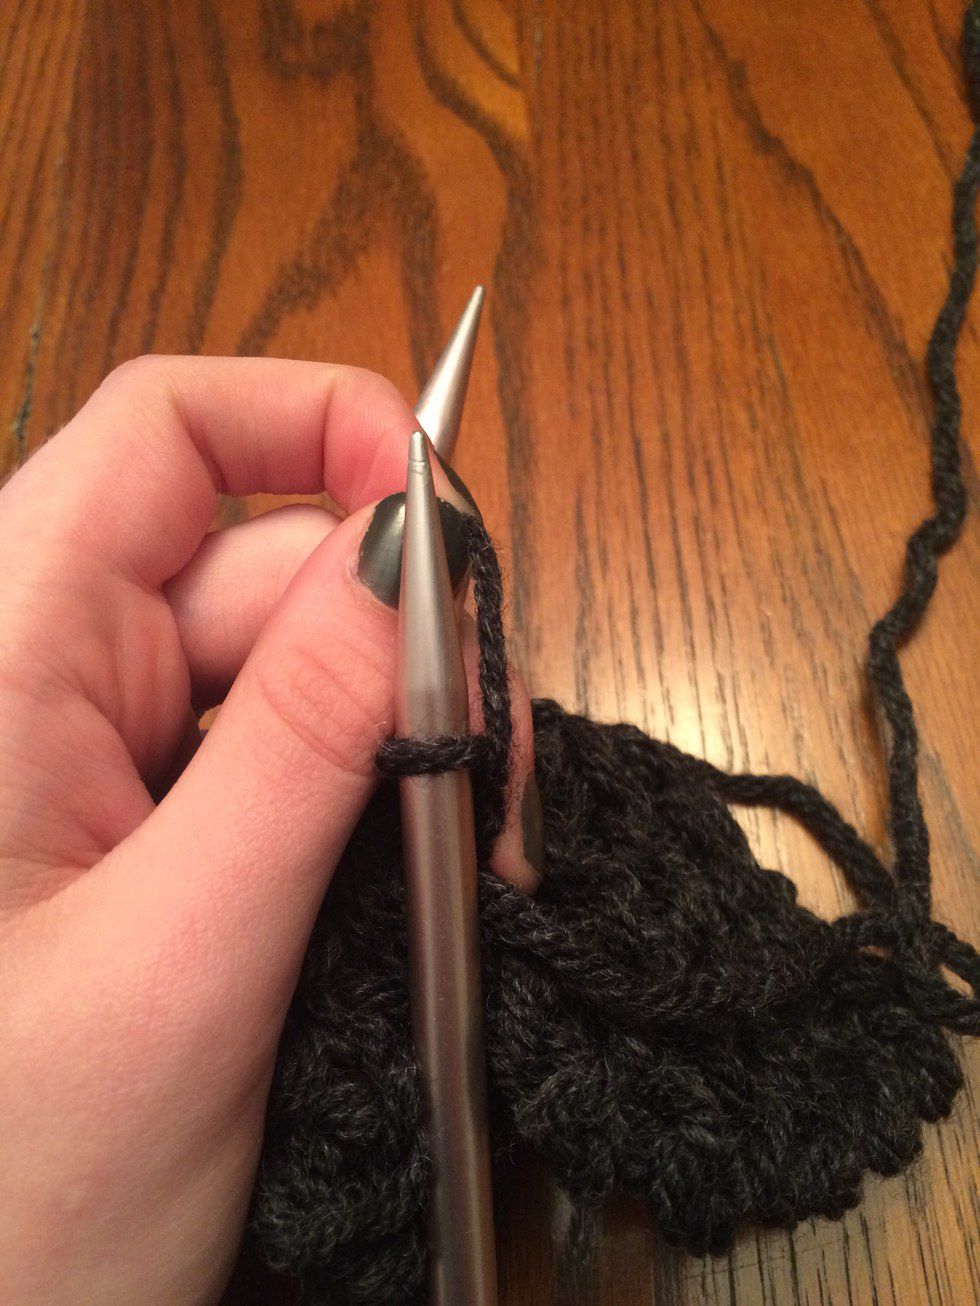
Then, take your left hand needle and insert it into the new loop. This should have placed the new loop onto your left hand needle. Pull out the right hand needle.
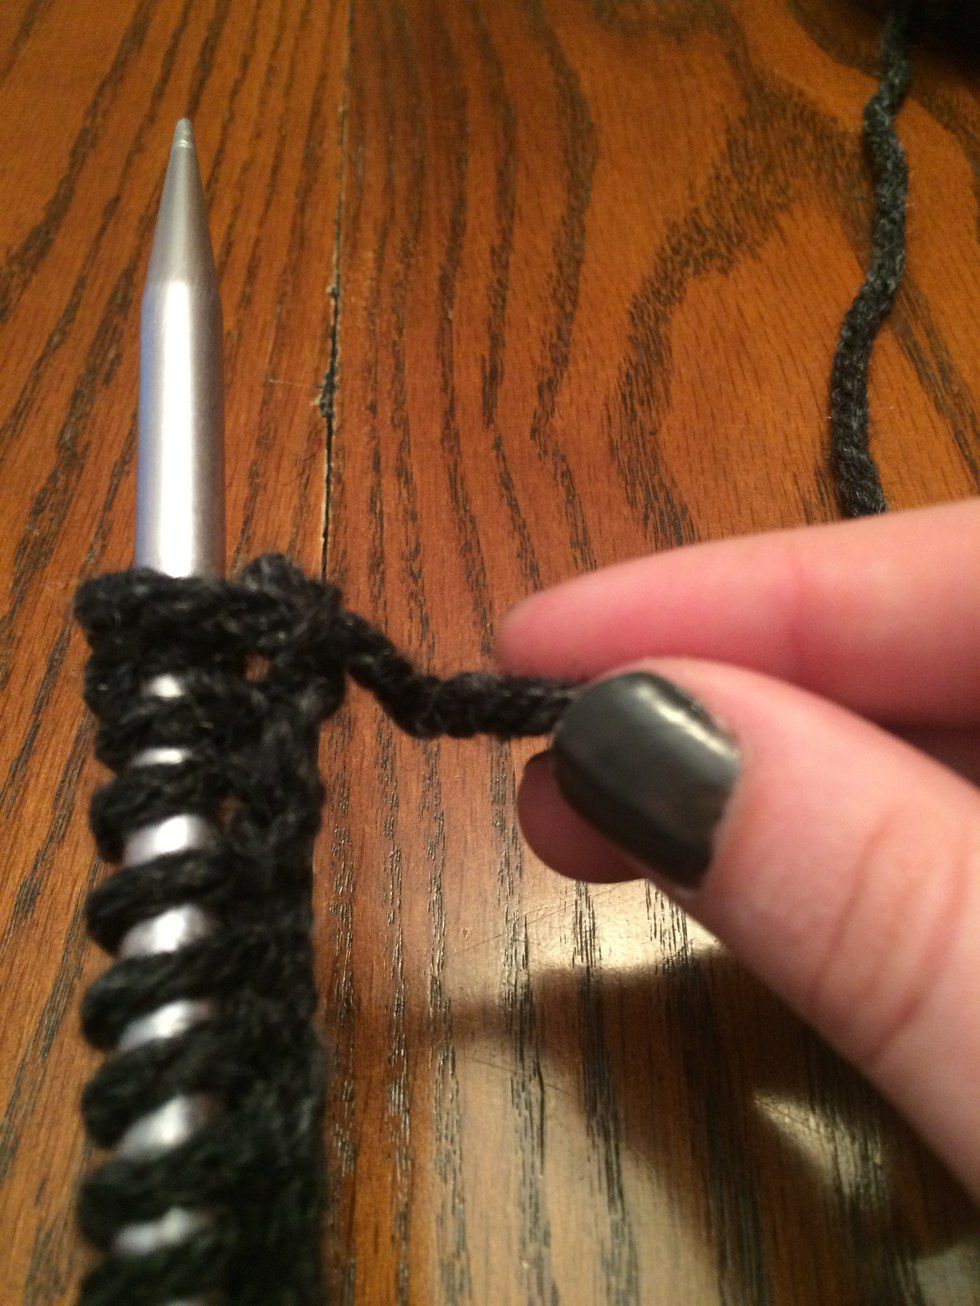
Pull the yarn end connected to the ball.
slightly to tighten the new loop.
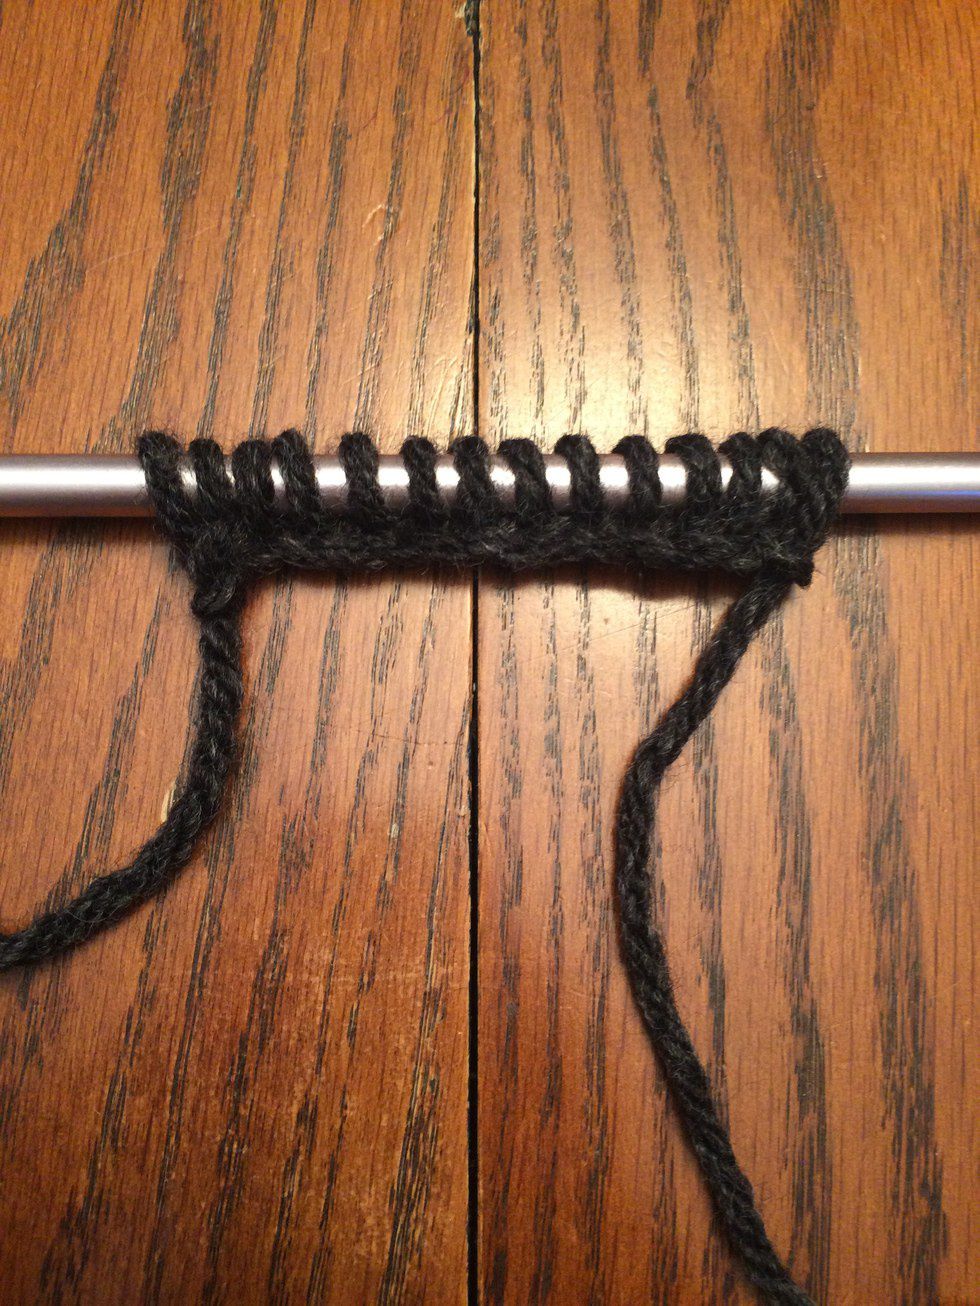
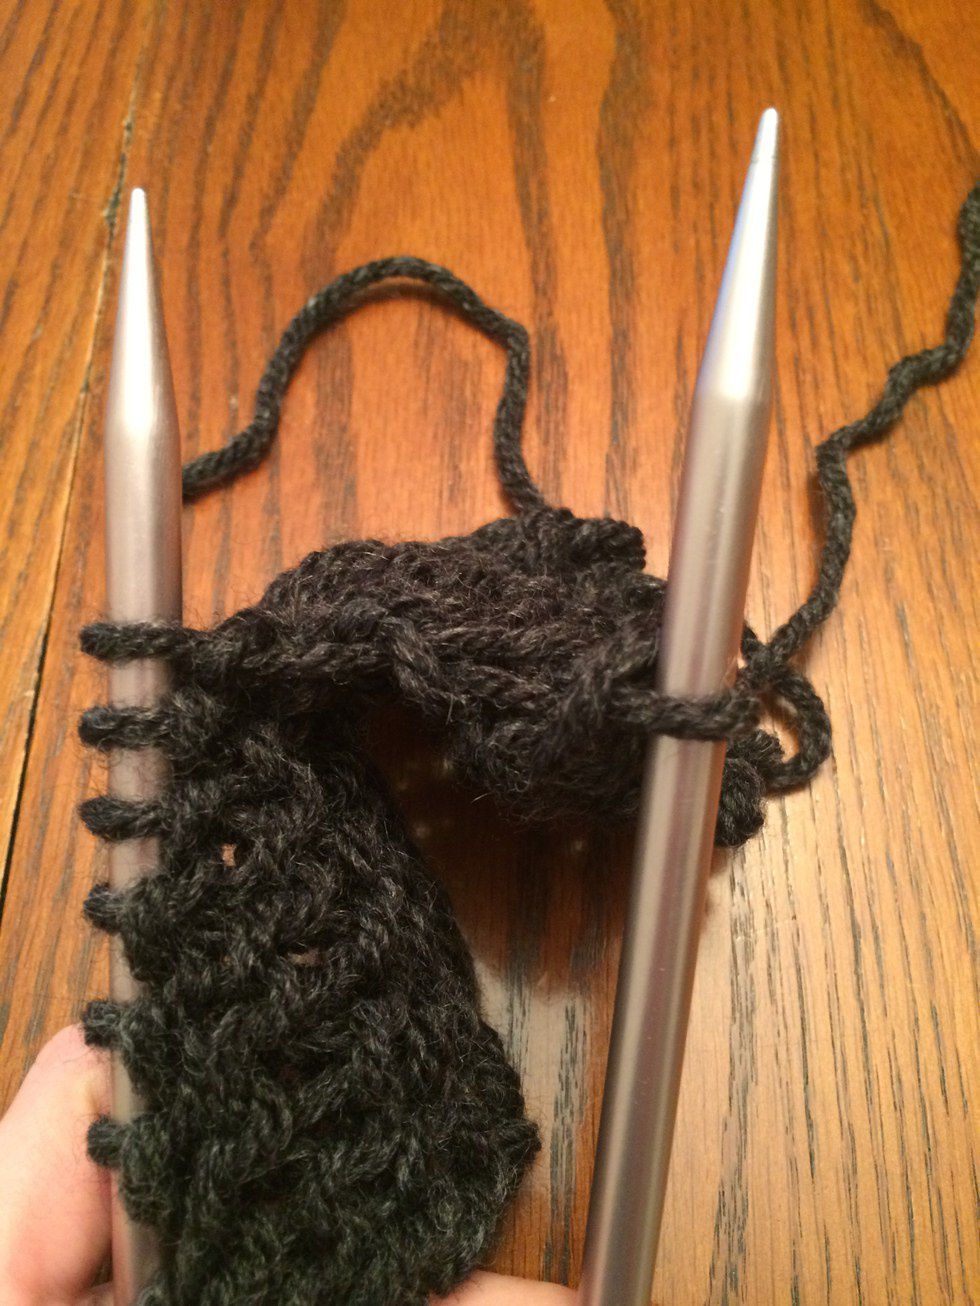
Repeat all of the above until your desired scarf width has been achieved!
Step 3: Start Knitting! - The Knit Stitch
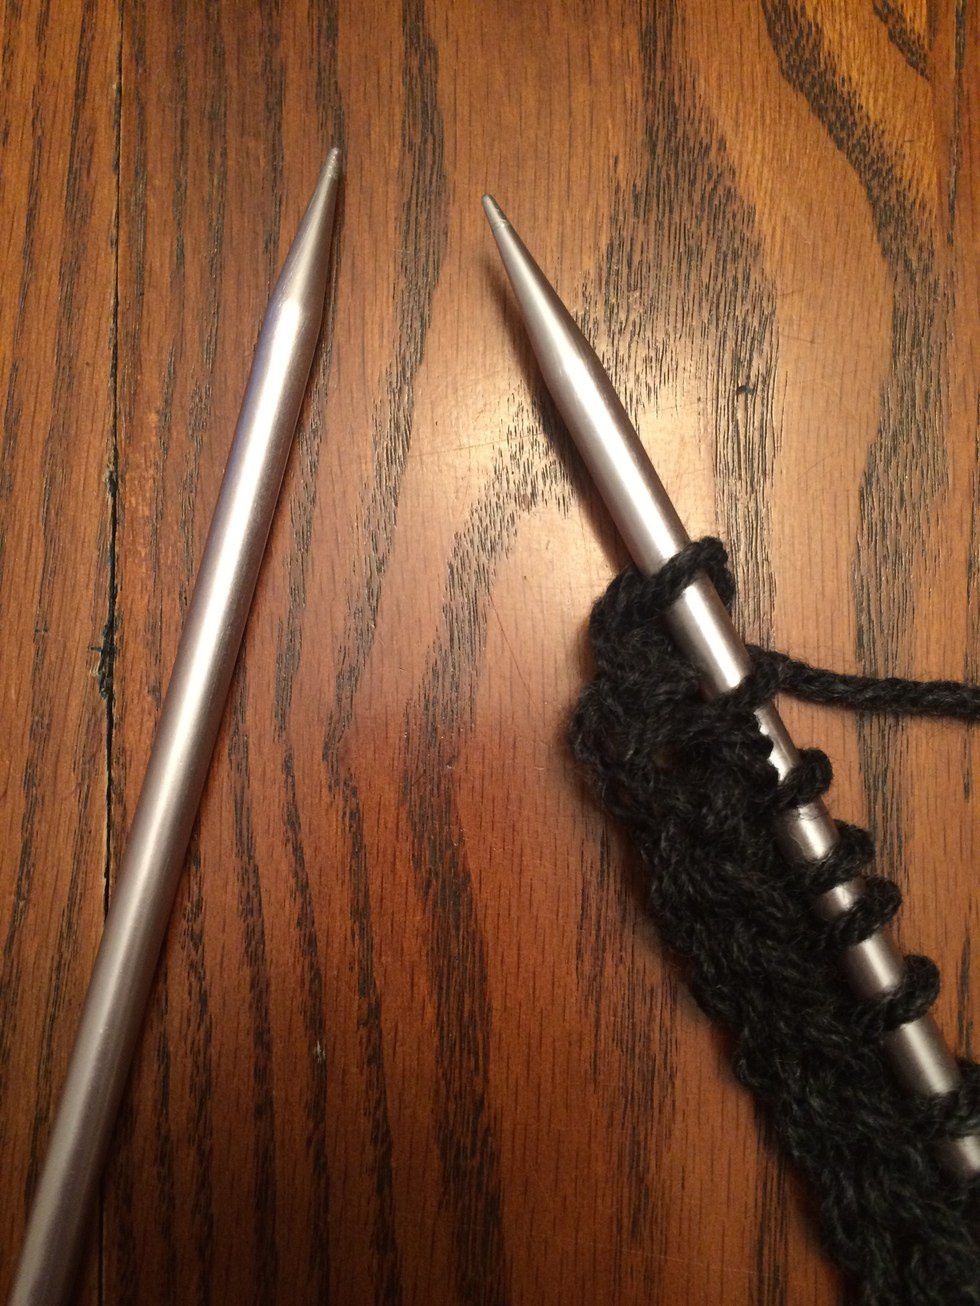
Casting on was just the start of your scarf. Knitting the scarf is a little different. Repeat the first three steps of casting on. Feel free to scroll back up to the "Casting On" section to view the photos. Insert the right hand needle into the first stitch on the left hand needle, making sure the right hand needle is UNDERNEATH the left hand needle. Then, drape the yarn end connected to the ball OVER the bottom needle. Hook the draped yarn piece and pull it THROUGH the first loop, creating a new stitch on the right hand needle! (Below)
Now, instead of replacing the new loop on the left hand needle, simply pull the left hand needle out of the loop. (Below)
You now should have a new stitch on the right hand needle! You have just learned The Knit Stitch!
Repeat the Knit Stitch steps until there are no more stitches on the left hand needle, and continue. There are many other kinds of stitches that create different textures in knitting, but the Knit Stitch is the easiest to begin with.
Step 4: Finishing The Scarf - Casting Off
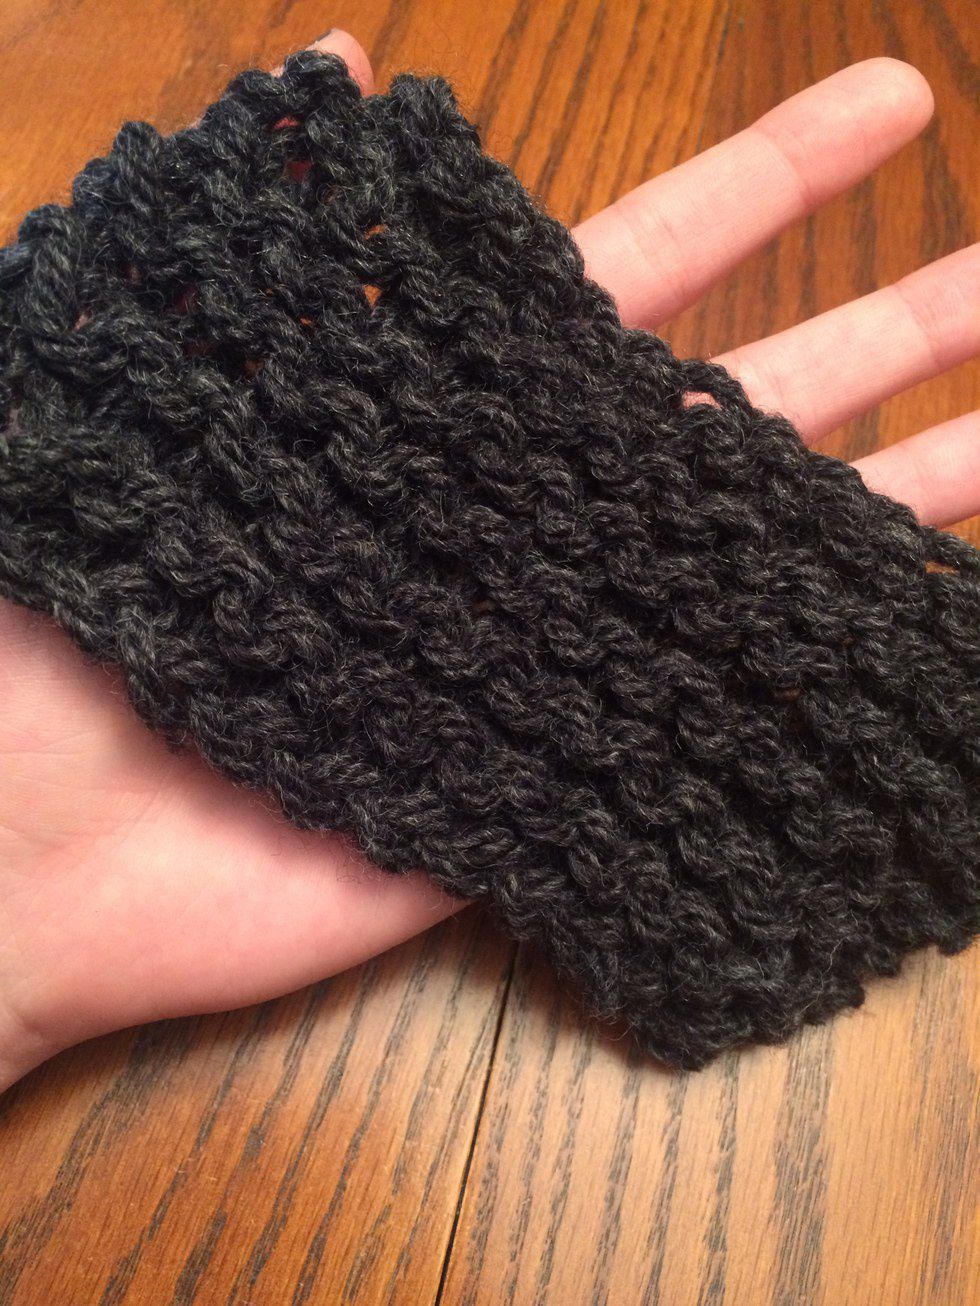
Once your scarf has reached the desired length, it's time to cast off. Casting off can be tricky, but following these directions carefully will get you there in no time. Mine is only a sample, which is why it's so small.
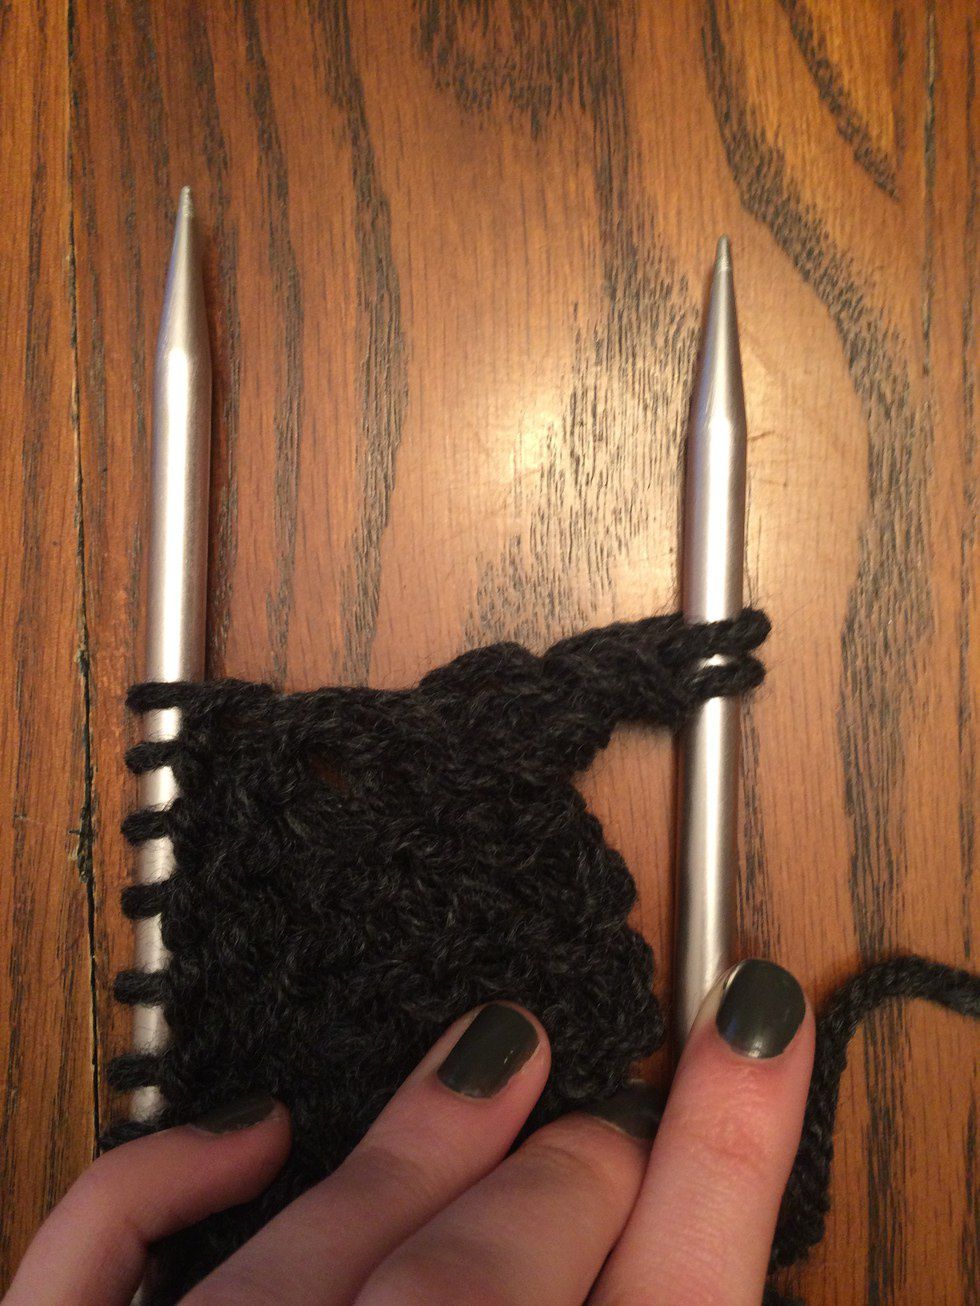
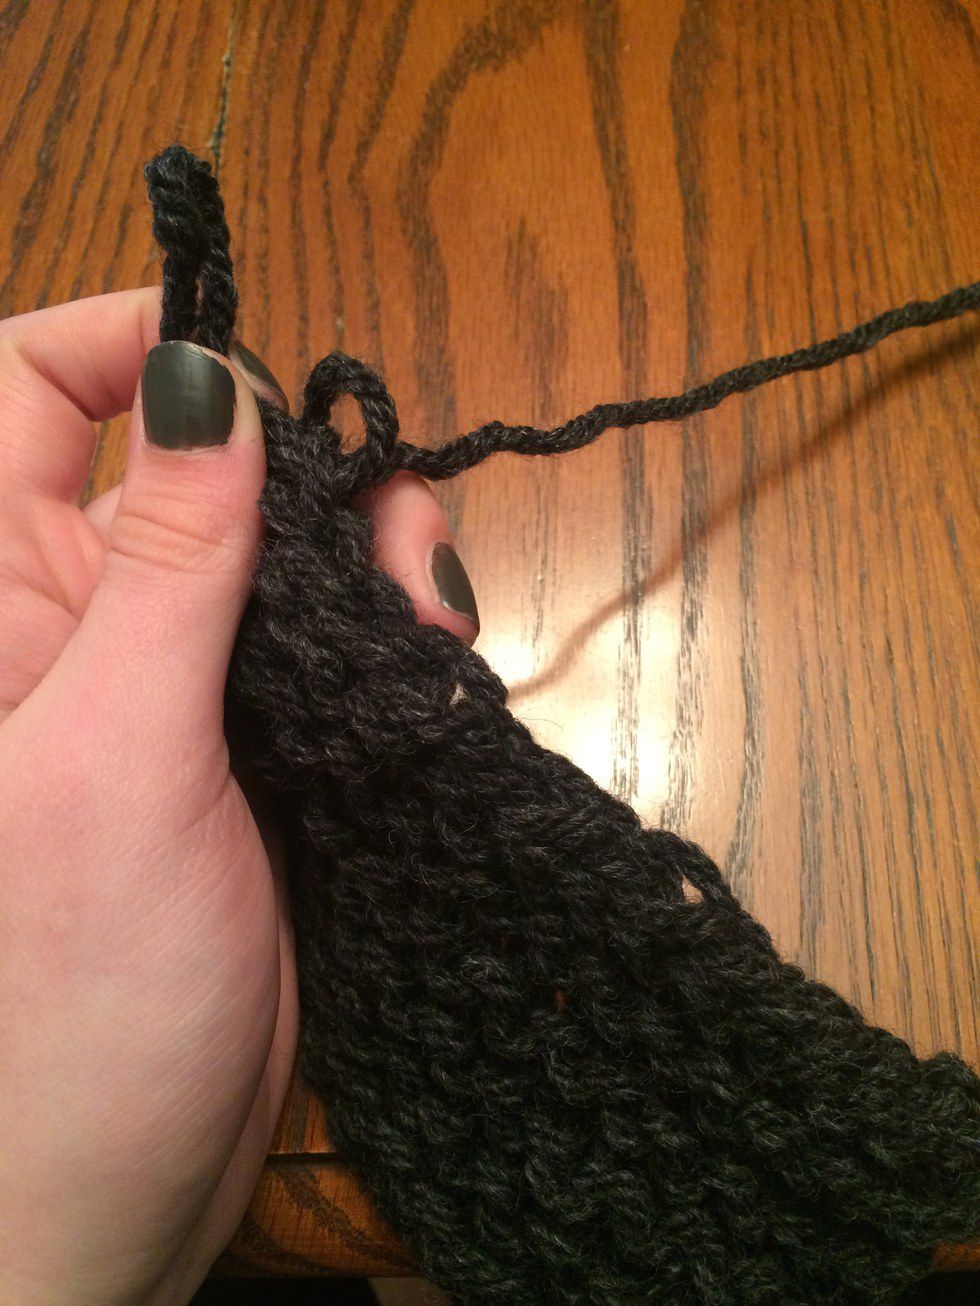
To start, knit two stitches.
Then, pull the bottom stitch OVER the top stitch, and OFF of the right hand needle completely.
You will be left with one stitch on the right hand needle. From here, knit another stitch. Repeat the Casting Off steps until one stitch remains.
Take the last stitch, use the yarn piece connected to the ball to tie a double knot, thus finishing the piece! Cut the connected yarn ball piece and enjoy your scarf!