It's actually really easy to do, and I'm going to walk you through the really cool method that I use to make yardage and also the most fabulous scarves.
What you'll need:
Off-white or ivory silk
Various colors of dye (I've been using RIT dye for natural fibers. There are other brands available, but RIT is the most readily accessible one.)
Water
White vinegar
Rubber bands
Chip brushes, one for each dye (wooden handles, beige bristles. Usually not more than $1)
Marbles
Spray bottle of water
Latex gloves
Plastic wrap
Plastic ziplock bag
Plastic tablecloth (painting drop cloths work great since they're huge)
Takeout containers with lids
Laundry detergent (non-bleach)
Microwave
Cheap measuring spoons (for measuring dye. They will not be safe to use with food after touching the dye, so get a cheap set from the dollar store.)
Cheap ladle (same thing, not food safe once it touches dye)
Big pot (but you mix the dye in the pot itself, the pot is no longer food safe)
How do I do it?
Preparation.
First things first: set up your workspace. Get the area you're dyeing on completely covered with the plastic. Tape it down if you need to, especially if you're working on the floor and might walk on it.
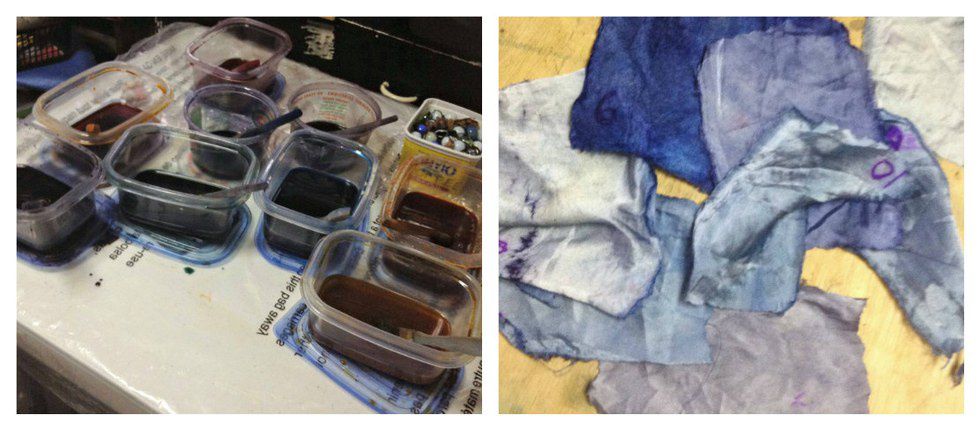
Next thing is to get the dye solutions ready. Measure out your dye powder or liquids into the takeout containers, rinsing the measuring spoons between each color. The RIT website has a great color library where you can find color formulas (here), or you can mix your own formulations up.
Measure equal parts vinegar and water in the pot, and heat it until it simmers. The idea is to get the liquid hot enough to dissolve the dye but not hot enough to burn you or the fabric. Once it gets to that point, use the ladle to transfer the vinegar to each container. I like filling mine about halfway, since I can always dilute it further. At this point, you can make test swatches to see how the colors will react with the fabric or you can just wing it. I usually do the swatches though. Word of advice: number your swatches and dye so you know for sure which was which.
You'll have something like this:
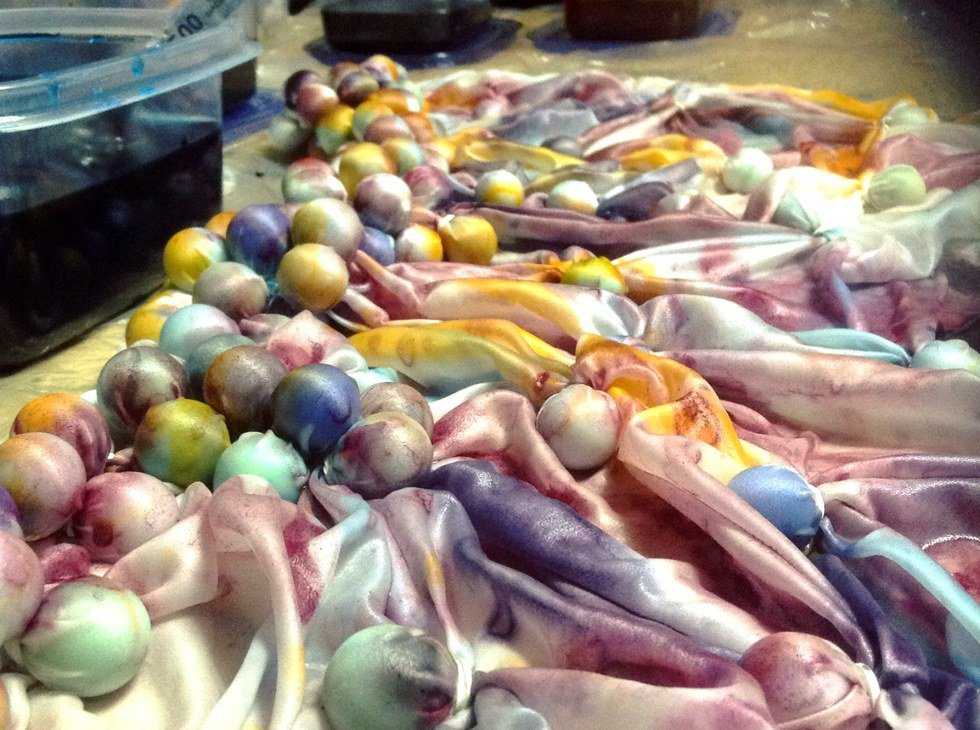
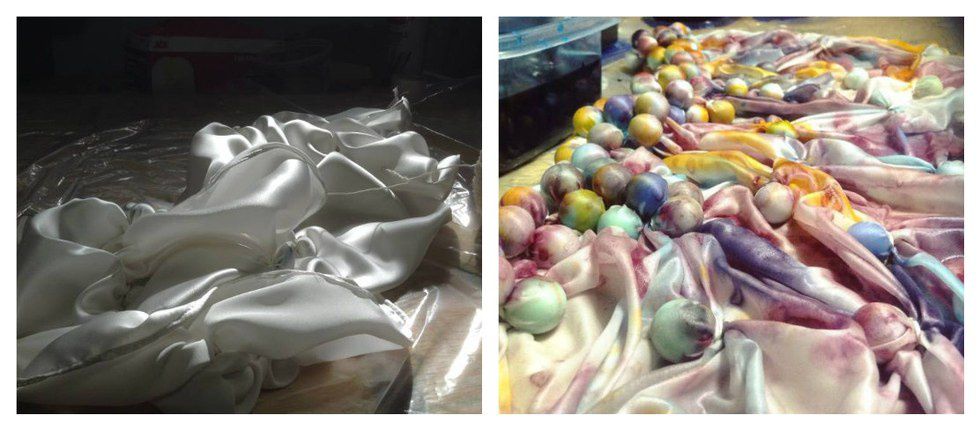
Next step is to prep the fabric. What I do to get the great watercolor effect is basically a take on a technique called shibori dyeing, mixed with my childhood tie dyeing. You take a marble, put it on the underside of the fabric, push it up so it creates a mountain, and then wrap the rubberband around the fabric over the marble. Do that until you're satisfied with the layout of your design. The more wrinkles and ridges and valleys in the fabric, the more personality the dye will have once it's introduced. Put the fabric on the protected surface.
Dyeing.
Then the fun starts. Lightly spritz the fabric down with water. Get the gloves on (unless you want smurf hands), grab your chip brush, and start painting! The dye will naturally run down the hills and collect in the valleys you made, and places where the rubber bands are stay the original color of the fabric. This is the step where you have to be aware of the color wheel. If you're using complementary colors, realize that a muddy mid tone will happen where they overlap. Analogous colors will create even more shades between each other. There will also be water marks where the dye ran, and sometimes you might get undissolved dye particles. It's all good. Whatever you end up getting will be absolutely one of a kind.
Once you're done painting your masterpiece, roll it up with plastic wrap between each layer. Almost like the fabric is one of those roll cakes and the plastic wrap is the frosting. Then get it all in the plastic bag, squeeze out the air, seal it, and microwave it for 15 seconds at a time. Do this for a minute and fifteen seconds, flipping the bag around so each part gets exposed. This step is setting the dye so it doesn't transfer, and doesn't run.
Wash out the fabric by hand with cold water and a tiny bit of detergent until the water runs clear. Let it dry, iron it, and then make it into whatever you want it to be!
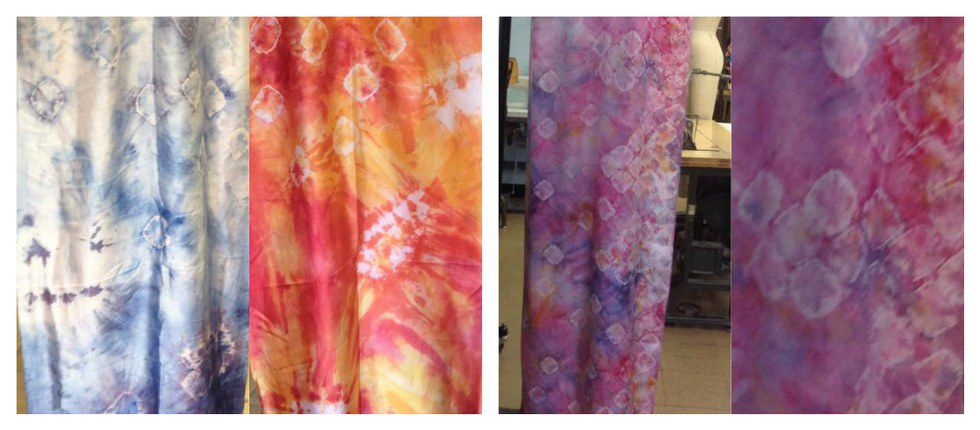
These three fabrics were dyed exactly the same way, with different arrangements of dye and marbles. I'll definitely explore more ways to dye in the future. We still have straight dye painting, dyeing spirals, salt dye, and how to dye shapes into fabric!!!