
With fall move-in day closer than you think, you may still need to start getting everything you need for your dorm. If you're low on funds, check out these inexpensive and easy DIYs that are sure to turn your dorm room into a space that feels more like home.
Here are 4 inexpensive DIY dorm décor ideas you can try out.
1. Decorative Jar
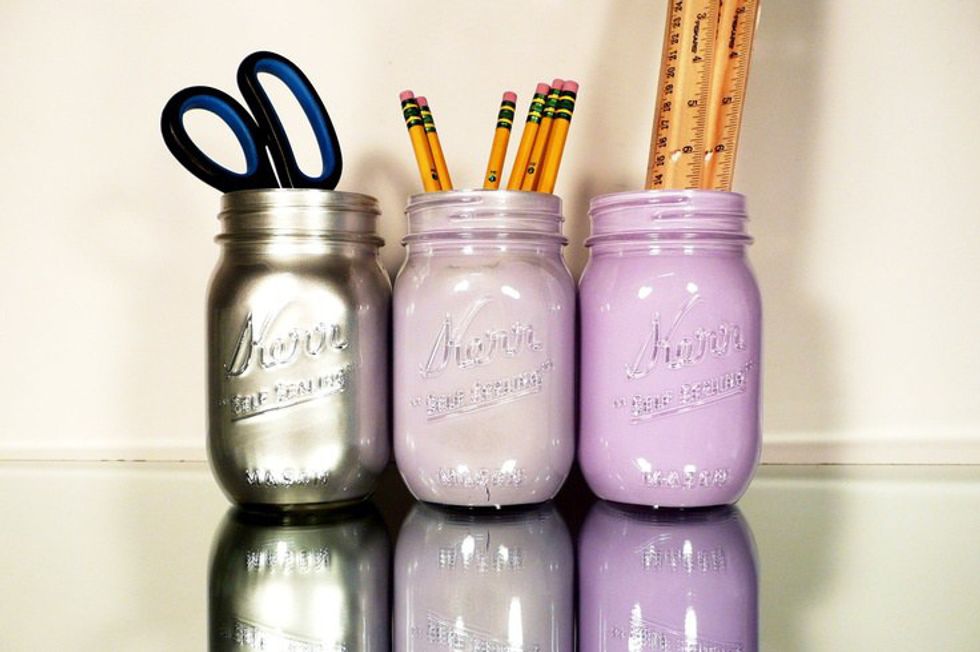
Decorative Jars are a great way to add color to your desk or dresser while providing an easy way to organize your things. You can purchase a jar at your local craft store or you could use an empty jelly jar found at home. All you need is acrylic paint or spray paint (which tends to be easier and faster), paint brushes and anything else you may want to put on your jar such as glitter or labels.
Once you have painted your jar with either the acrylic paint or spray paint, wait for it to dry. Next, add any additional designs on your jar and then you're done! You can use these jars to store your school supplies, art supplies and even your makeup brushes.
2. Wall Art
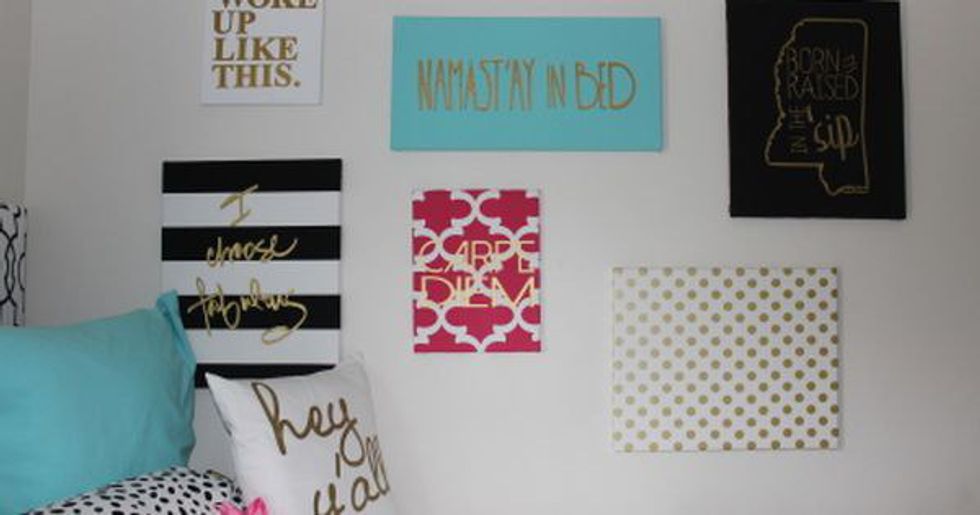
You can find a simple white canvas at your local craft store. You will also need paint or spray paint and paint brushes.
With this project, you can easily paint whatever design or inspirational words you want to hang up in your dorm. If you feel that you don't have the skills to paint, then print and cut out any stencil design you want on your wall. When painting over your stencil, hold it steady or tape it down to avoid making a mistake.
Once you are done painting, wait for the canvas to dry. Paint as many as you want to create your own art gallery in your dorm.
3. Throw Pillows
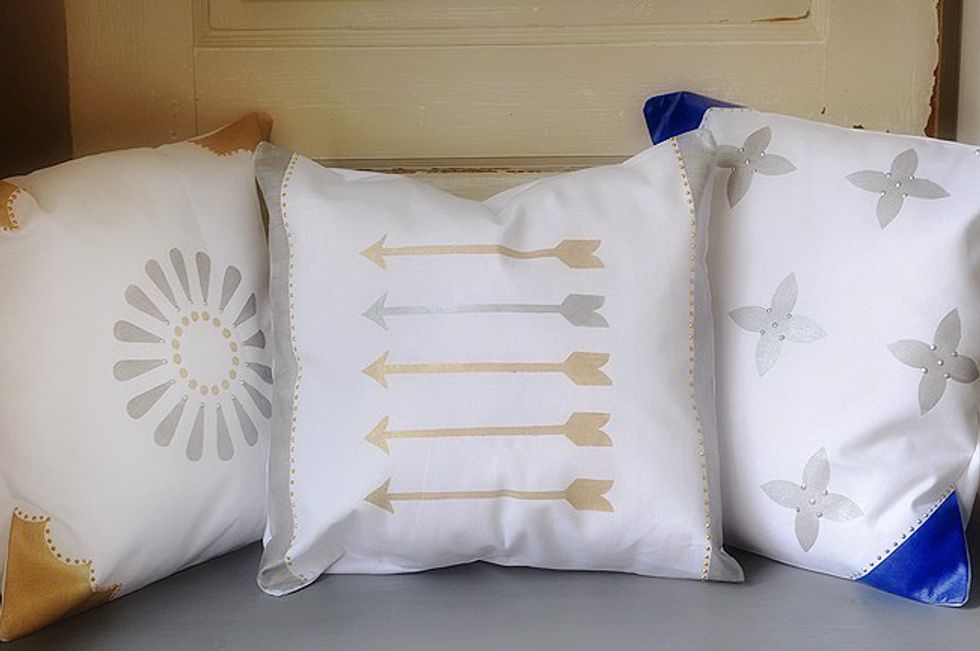
Crafting your own throw pillow may seem difficult, but it's actually really easy and fun. You will need a pillow case in any color you want, a pillow, fabric paint, cardboard that will fit inside of the pillow case and needle and thread or a hot glue gun.
Before you begin painting, place the cardboard inside your pillow case. Now, just like painting your wall art, you can paint anything you want, but if you're not very artsy, once again you can print and cut out a stencil design. If you use a stencil, make sure to hold it steady or tape it down while painting.
Once you are done painting, you will have to wait 24 hours for your pillow case to completely dry and 72 hours until you are able to hand wash it in cold water. Place your pillow inside of the pillow case when it is dry and sew the opening together. If you're like me and can't sew, you can also hot glue the opening together. I did this and it works perfectly fine.
4. Floral Letter
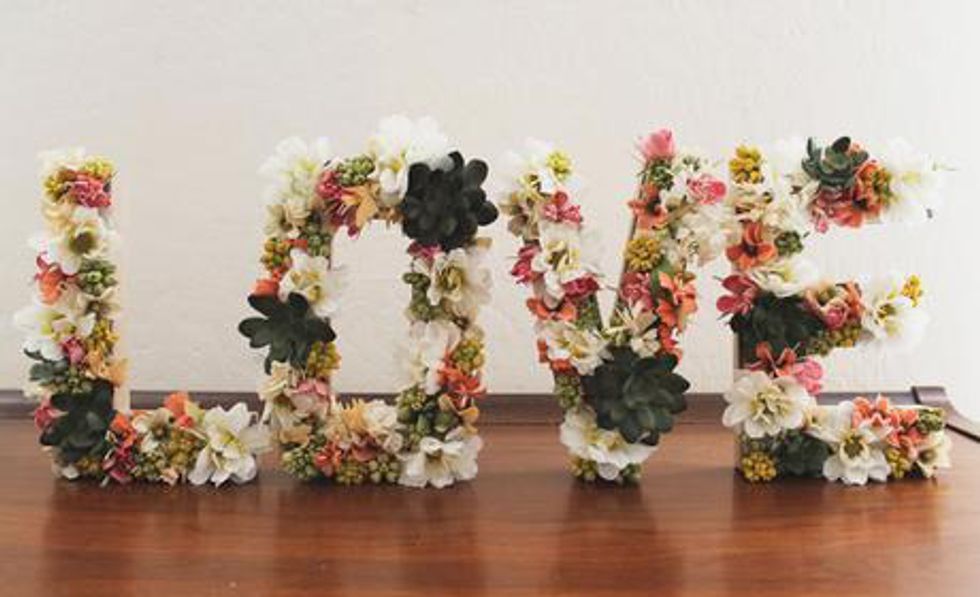
You should be able to find paper mache or cardboard letters at your local craft store along with fake flowers of different sizes and a hot glue gun. You could also make your own letters out of cardboard.
Start by cutting the flowers off the stems as close to the flower as possible. The closer you cut, the flatter the flower will lay down on the letter. Arrange the flowers how you want, so that the shape of the letter shows a little. I suggest you start by arranging the large flowers. Spread out similar looking flowers so that there is more texture to the letter. Once you’re happy with the placement of the large flowers, start adding the small flowers. Use the small flowers to add more variety to the arrangement and to fill in most of the gaps.
Once you’re happy with the arrangement, start hot gluing the flowers in place. You may want to take a photo of the arrangement before starting, so that if any flowers are knocked out of place, you can match them up to the photo. When you are finished you can place your beautiful floral letters on your dresser or even hang it up on your wall.