I have always loved baking- it is a great way to express yourself and demonstrate your creativity. Not to mention you get to eat the results! Baking helps me relax and makes me feel good about myself because I get to share my recipes with the people I love. I think baking is entertaining and it's something fun you can do with friends and family. My grandmother, Charlotte, bakes all sorts of pies and cakes for the holidays. When I was younger, I would visit to her a day or two before the holiday and we would just bake- all day long. By the end, we would have approximately six pies, three cakes and several types of cookies. She taught me the best baking tricks I know.
I especially love baking for the holidays because you can find so many themed recipes. Halloween is coming up fast and I found some mouth-watering, spooky recipes to try and share. These creations are sure to make your dish the talk of the party!
1. Pumpkin Rice Krispie Treats

Ingredients:
6 Cups Rice Krispies Cereal
3 tbs Butter
10 oz Marshmallows (approximately 1 Bag)
Red & Yellow Food Coloring (to make orange color)
12 Tootsie Rolls
1 Green Fruit Roll-up (you will only be able to find the blue/green combo)
Instructions:
Melt your butter in a large sauce pan over low heat.
Add marshmallows and stir constantly until melted.
Remove from heat.
Add approximately four drops of red food coloring & two drop yellow food coloring- Add until you have a nice bright orange color.
Mix in Rice Krispies.
Form small balls into the shape of a pumpkin, (Tip: Add Non-Stick Cooking Spray (Pam) or Crisco to your hands before forming your balls).
Cut Tootsie Roll in Half and add a half into each pumpkin while still warm.
Cut small leaves from the green portion of your Fruit Roll Up.
2. Chocolate Chip Spider Cookies

Ingredients:
- 2 cups plus 2 Tbsp all-purpose flour
- ½ tsp baking soda
- ½ tsp salt
- 12 Tbsp butter (1½ sticks) melted and cooled until warm
- 1 cup brown sugar
- ½ cup granulated sugar
- 1 large egg + 1 egg yolk
- 2 tsp vanilla extract
- 2 cups semi-sweet chocolate chips, divided
Instructions:
- Heat oven to 325 degrees F.
- In a medium bowl mix together flour, salt, and baking soda..
- In a separate large mixing bowl beat the butter and sugars together with an electric mixer until well blended. Add the egg, egg yolk, and vanilla. Stir in the dry ingredients and mix until just combined. Gently stir in ¾ cup chocolate chips. The dough will be soft.
- Gently scoop dough into balls and place on a parchment lined cookie sheet. Bake for 10-12 minutes. Remove from oven and place 3-4 chocolate chips into the tops of each cookie, point side up.
- Add remaining chocolate chips to a microwave safe bowl and microwave, on low power, stirring every 30 seconds, until melted. Just barely cut the corner off of a small sandwich bag (you want the hole to be very small to make your spider legs). Spoon the melted chocolate into the bag and use it draw spider legs on the sides of the chocolate chips.
- Store cookies in an airtight container or freeze in a freezer-friendly sandwich bag.
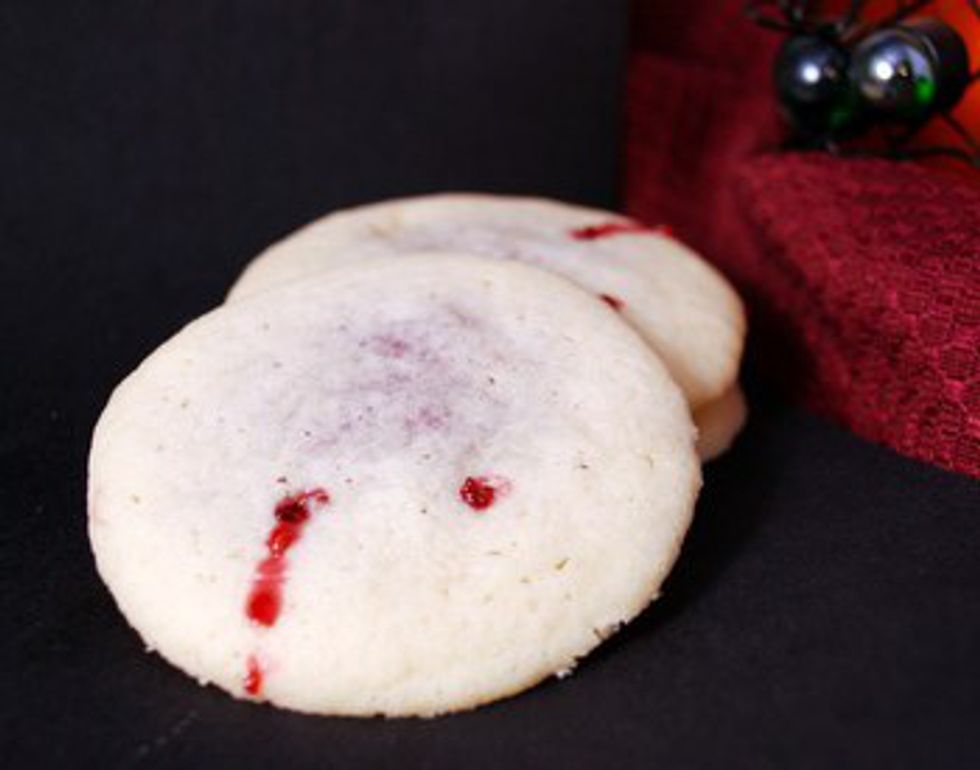
3. Vampire Cookies
Ingredients:
3/4 cup butter, softened
1/2 cup sugar
1 large egg
1/2 tsp vanilla extract
1/8 tsp almond extract
1 1/2 cups all-purpose flour
1/4 tsp salt
approximately 1/2 cup red jam (raspberry/strawberry)
Instructions:
In a large bowl, cream together butter and sugar until light. Beat in egg and extracts.
Add flour and salt to the bowl and mix them into the butter-sugar mixture at low speed until dough is just combined. Wrap dough in plastic wrap and refrigerate for at least 1 hour.
Preheat oven to 325 degrees.
Divide dough in half and keep the portion you are not using in the refrigerator.
Roll dough out on a lightly floured surface until it is about 1/8-inch thick. Use a cookie cutter to cut out two inch rounds.
Place rounds on a baking sheet, put a teaspoon of jam on each of them and cover with another round of dough. Press edges down lightly, pinching the edges onto the cookie sheet. Use a toothpick and poke two small holes (like a vampire bite) in the top of each cookie.
Bake for 10-12 minutes, until cookies are set.
Cool for about five minutes on the baking sheet, then transfer to a wire rack to cool completely.
Dip a toothpick in some extra red jam and re-insert in the “bite” holes you made before baking to emphasize them, if not already red. Draw a blood trick down from one of the bites with the jam, if desired.
Cookies are best the day they are made. Makes 2 dozen.
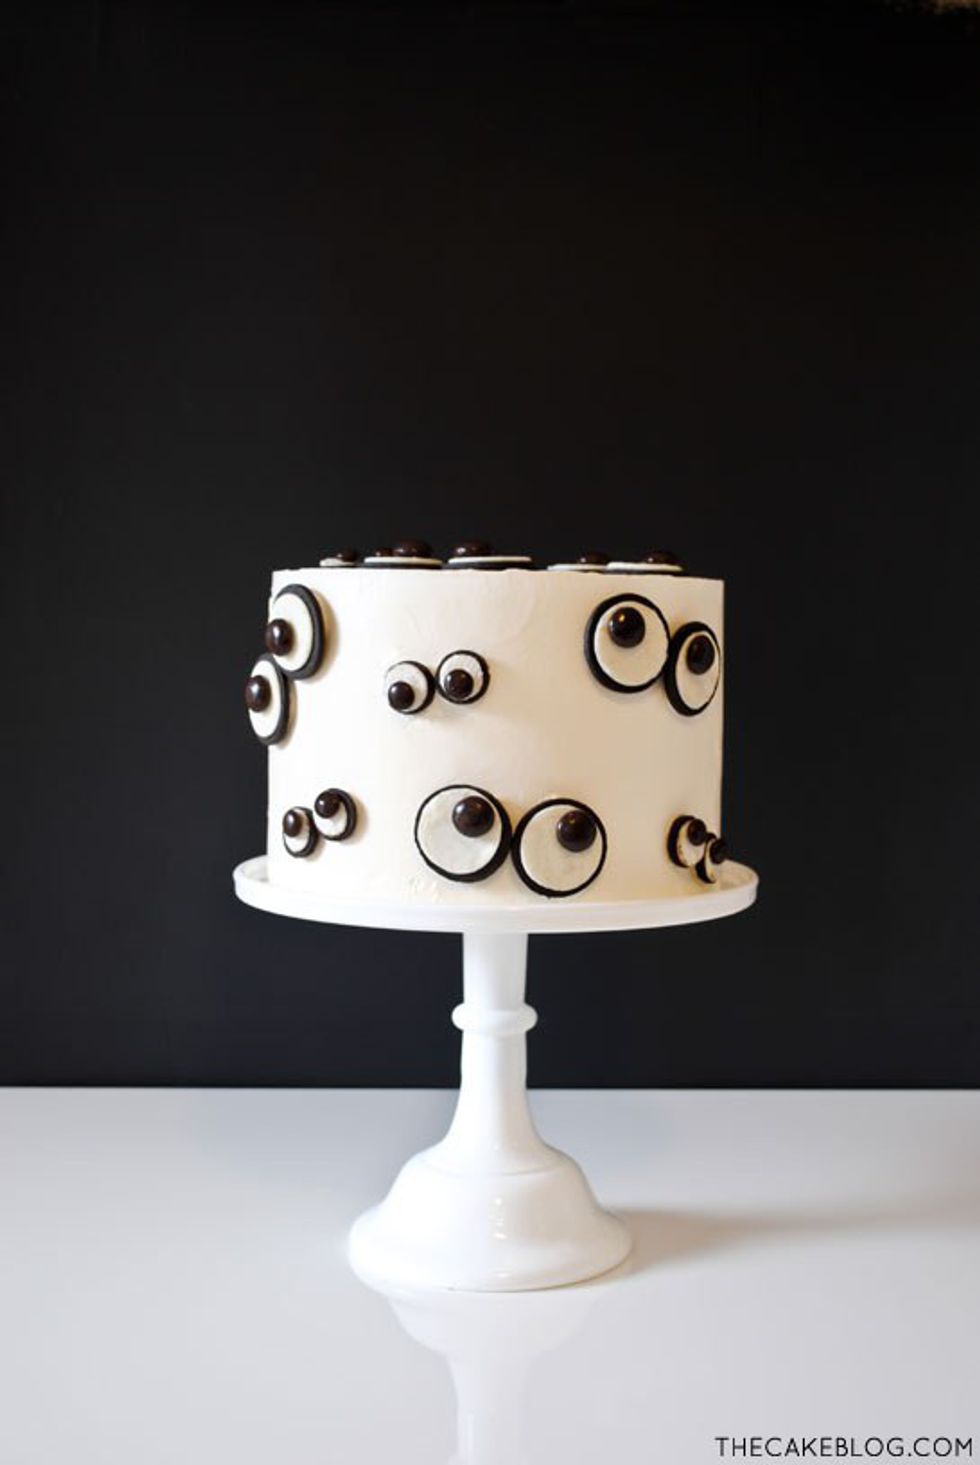
4. Monster Eye Cake
Ingredients:
Cake
Frosting
Oreo Cookies
Mini Oreo Cookies
Junior Mints
M&M’s
Instructions:
STEP 1: Start with an assembled cake, frosted with the icing of your choice. You can bake this from scratch, from a box or pick one up at the local bakery.
STEP 2: Twist apart an Oreo, exposing the cream and trying not to break the cookie. Save the plain cookie half to use in another recipe. Push a candy into the cream, creating an eye. Repeat to create a second eye, completing your pair. Do this with the full sized Oreos and the mini Oreos.
STEP 3: Put a small dab of frosting onto the back of your completed eye.
STEP 4: Place eye onto cake. Add a second eye to complete the pair.
STEP 5: Add additional pairs of eyes all over the cake. Place so that the eyes look up, down, over, cross-eyed, etc. More or less, the number of eyes is up to you! Just add until you’re happy with the final look.
NOTE: Some cookies twist apart and leave a nice and white, crumb-free cream. Some come apart and you have oodles of little spots, dots and crumbs. You can lightly scrape these off with the back of a knife, or let it go. This is completely up to you. I scraped a few of the worst offenders but left a few spots here and there.
ANOTHER NOTE: I paired the Junior Mints with the full sized Oreos. And the M&M’s with the mini Oreos. If the candies are not sticking well to the cream, use a tiny dab of frosting to keep them in place.
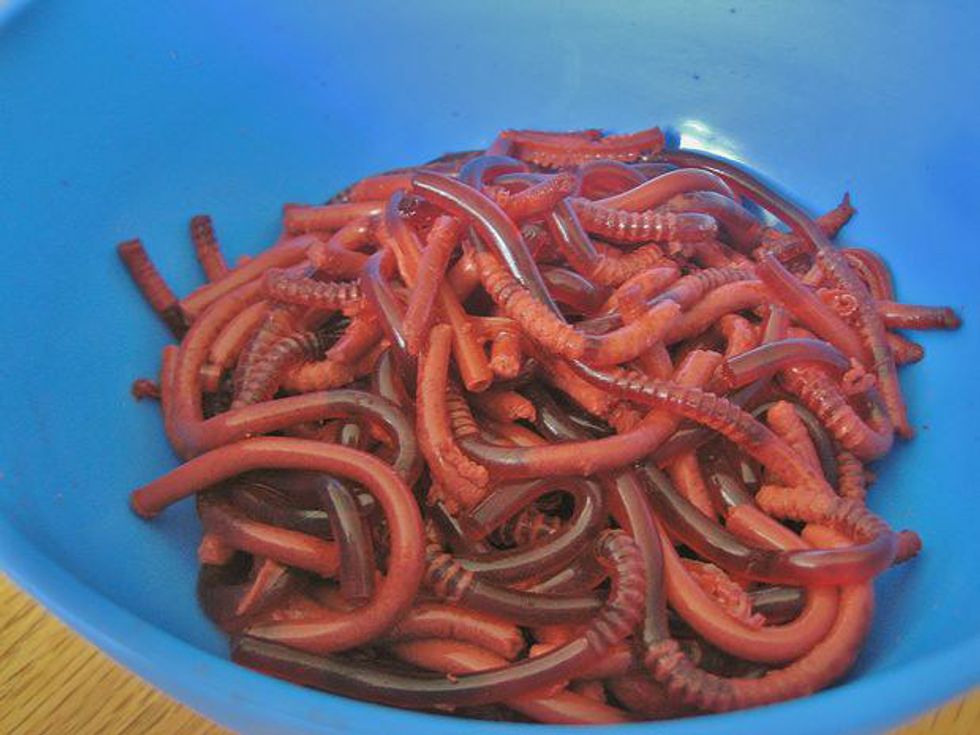
5. Bowl of Worms
Ingredients:
2 packs (3 oz) Raspberry jello
1 pkg unflavored gelatin (for extra firmness)
3/4 cup whipping cream
3 cups boiling water
15 drops green food coloring
100 flexible straws (or enough to fill your container)
Tall container (1 quart or 1 liter carton of milk)
Directions:
1) Combine gelatin in bowl and add boiling water.
2) Let it cool to lukewarm and then add the whipping cream and 15 drops green food coloring.
3) Gather your straws (don't forget to flex them out) and put them in the container. It's important that the straws have a tight fit so the jello stays in the straws. For this reason, a 1 liter carton may be better; you will probably get longer worms since there is a tighter fit. If you have a bigger container, a rubber band around the straws is helpful. Or you could just add more straws to fill the container.
4) Add the gelatin mixture to the straw-filled container and let it set until firm.
5) There are multiple ways you can remove the worms from the straws. You can roll a rolling pin over the straws and squeeze them out or you can hold the straws over warm water. The worms will slip right out.
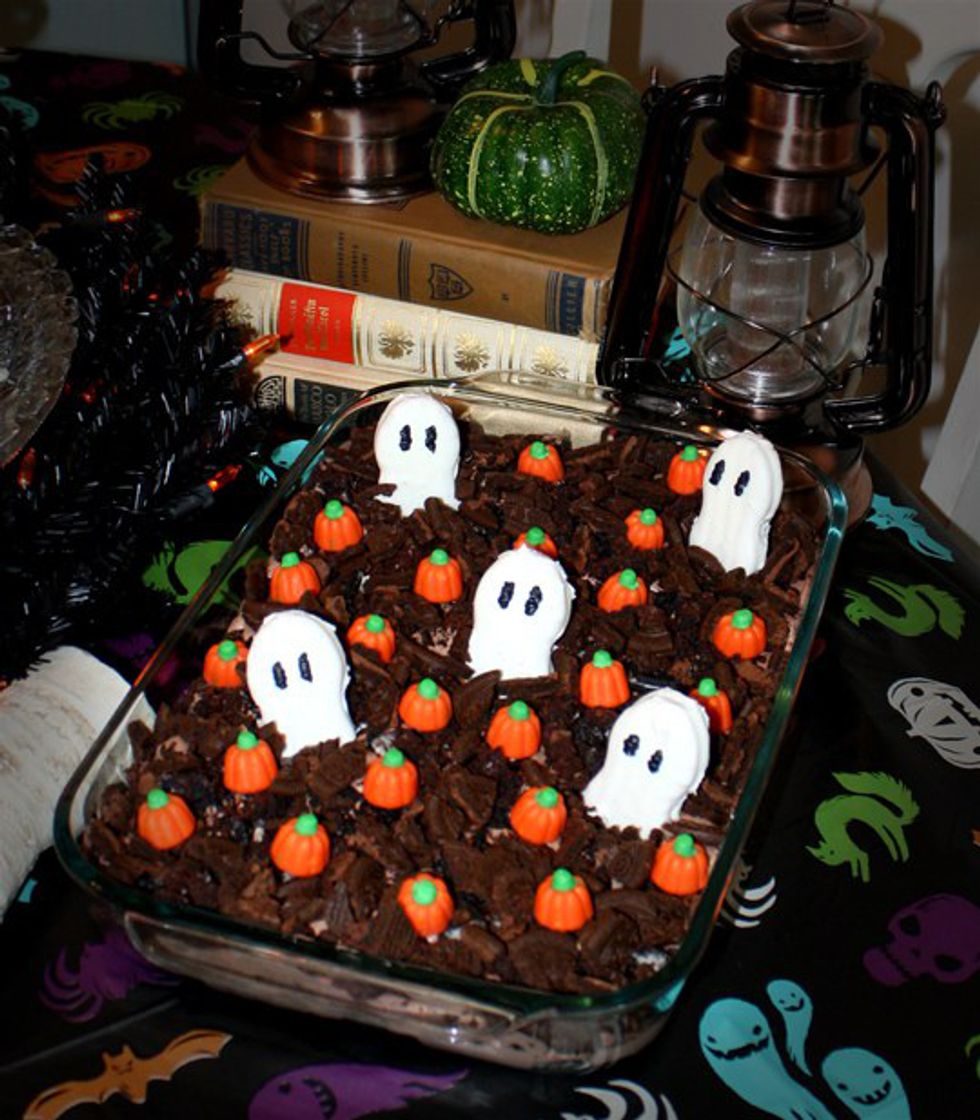
6. Ghost in the Graveyard
Ingredients:
- 2 Pkg. (3.9 oz. each) Chocolate Instant Pudding
- 1 box Chocolate Brownie Mix
- 3 Cups Milk
- 12 oz. Whipped Topping (Divided)
- 1 1/2 Cups Crushed Cookies (Your Favorite)
- 3 Creme Sandwich Cookies
- Decorating Gel
- 5 Candy Pumpkins
- 10 Candy Corn Pieces
Directions:
Make the brownies according to the instructions on the box. When the brownies are done, set them out to cool. Beat the pudding mix and milk in large bowl with a whisk for about two minutes. Let stand for 5 minutes. Stir in three cups whipped topping and half the cookie crumbs. Crumble up the brownies into the pudding mixture and spread the entire mixture into a 13 x 9 inch dish; sprinkle with remaining cookie crumbs. Refrigerate for one hour.
Now you have two choices. You can either decorate creme sandwich cookies with decorating gel to resemble tombstones or you can dunk the cookies into melted white chocolate to create ghosts. Insert the decorated cookies into top of the dessert just before serving. Add candy corn and/or pumpkin candies on top of your graveyard. If you’re using the cookies as tombstones, then drop large spoonfuls of the remaining whipped topping onto the graveyard to resemble ghosts.
Makes 18 servings.
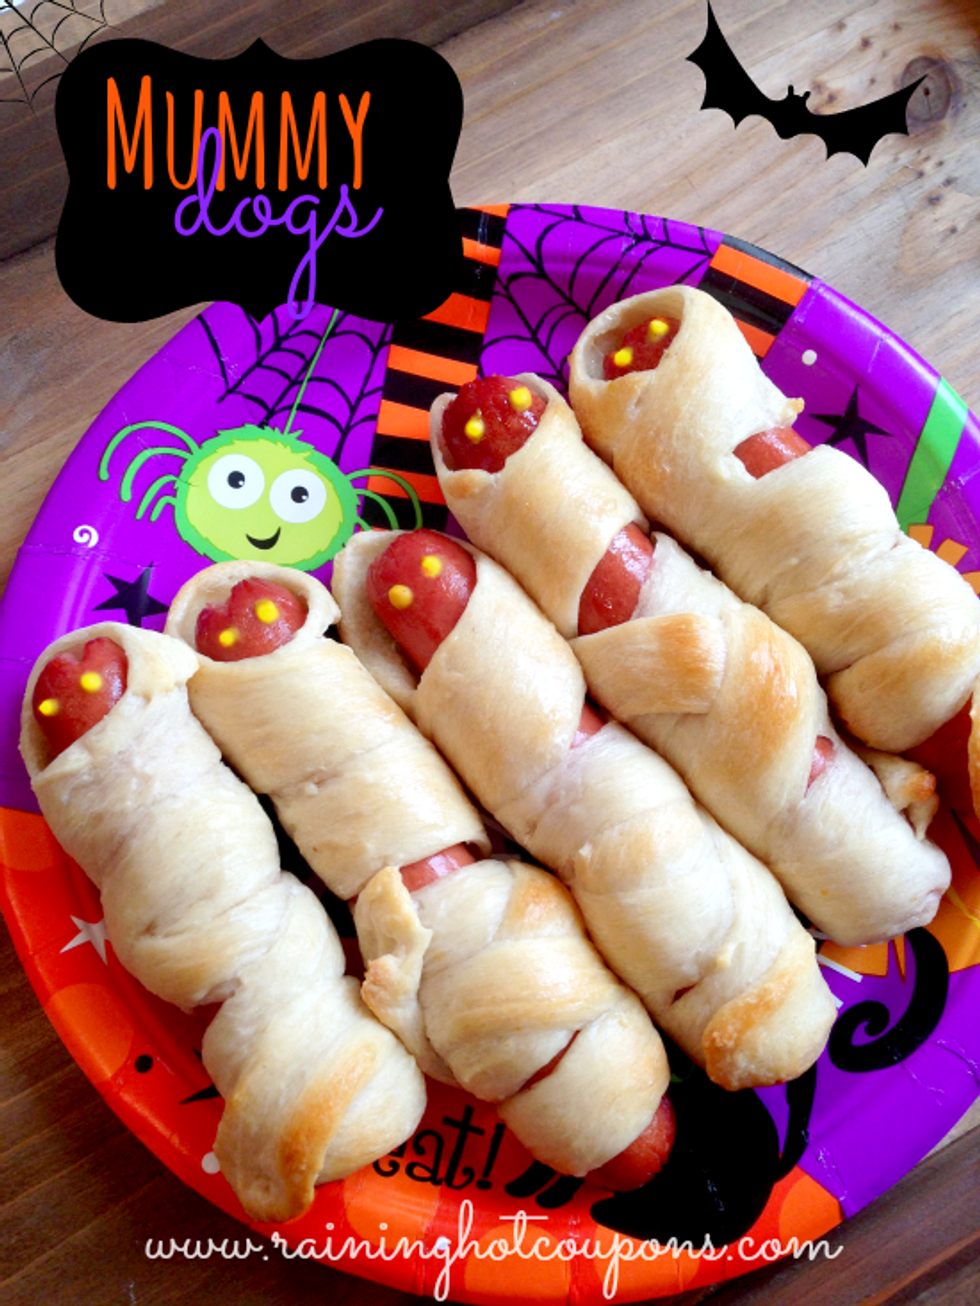
7.Mummy Dogs
Ingredients:
- 12 Hot Dogs
- 1 can of Breadsticks (we use Pillsbury) – you can also use crescent rolls in the can, just roll them out so they are long pieces
- Butter (optional)
- Mustard (just a tiny bit for the eyes)
Directions:
- Pre-heat over to 375 degrees.
- Open can of breadsticks and stretch each piece so it will fit around entire hot dog
- Start at the top and make a little head wrap then continue wrapping all the way down the hot dog (overlapping but leaving small gaps).
- Place on greased baking sheet.
- Bake for 11-12 minutes.
- You can then brush each one with a little butter (this is optional but makes them look yummy and taste even better)!
- Add eyes with the mustard (easiest to use a toothpick).
- Enjoy!
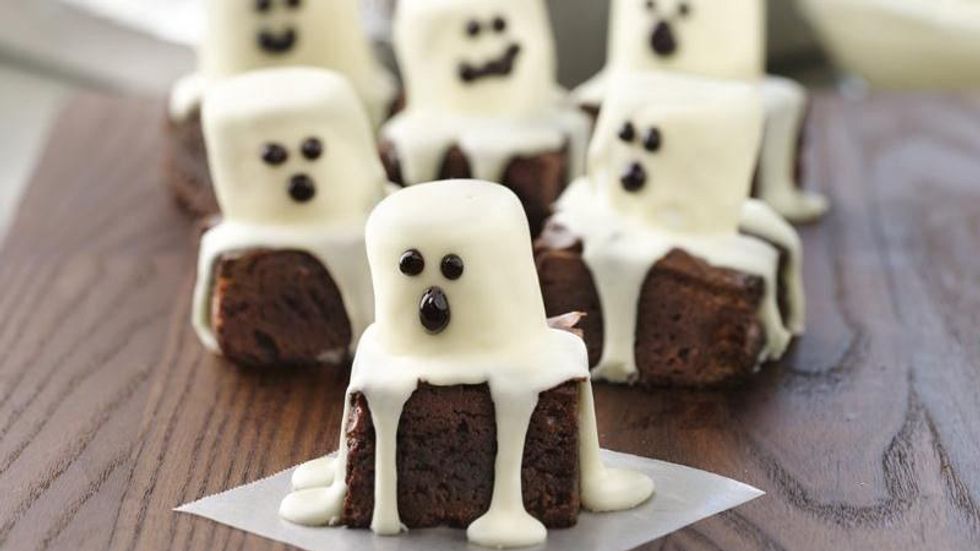
8. Spooky Boo Brownies
Ingredients:
1 box Betty Crocker™ Original Supreme Premium brownie mix
Water, vegetable oil and eggs called for on brownie mix box
1 1/4 cups Betty Crocker™ Rich & Creamy creamy white frosting (from 16-oz container)
16 large marshmallows
Betty Crocker™ black decorating gel (from 0.68-oz tube)
Directions:
- 1. Heat oven to 350°F (325°F for dark or nonstick pan). Line 8- or 9-inch square pan with foil so foil extends about 2 inches over sides of pan. Spray foil with cooking spray. Make brownies as directed on box for 8- or 9-inch square pan. Cool completely, about 1 1/2 hours. Remove brownies from pan by lifting foil; remove foil. For 16 brownies, cut into 4 X 4 rows.
- 2. Heat frosting in microwavable bowl uncovered on High 30 seconds, stirring every 10 seconds, until frosting can be stirred smooth and fluid. If frosting becomes too firm while decorating, microwave 5 seconds; stir.
- 3. Top each brownie with 1 large marshmallow. Spoon 1 tablespoon frosting over each marshmallow to coat. Let stand until frosting is set, about 30 minutes. Use black gel to make eyes and mouths.
If you and your friends are over 21, here are some great cocktails to try:
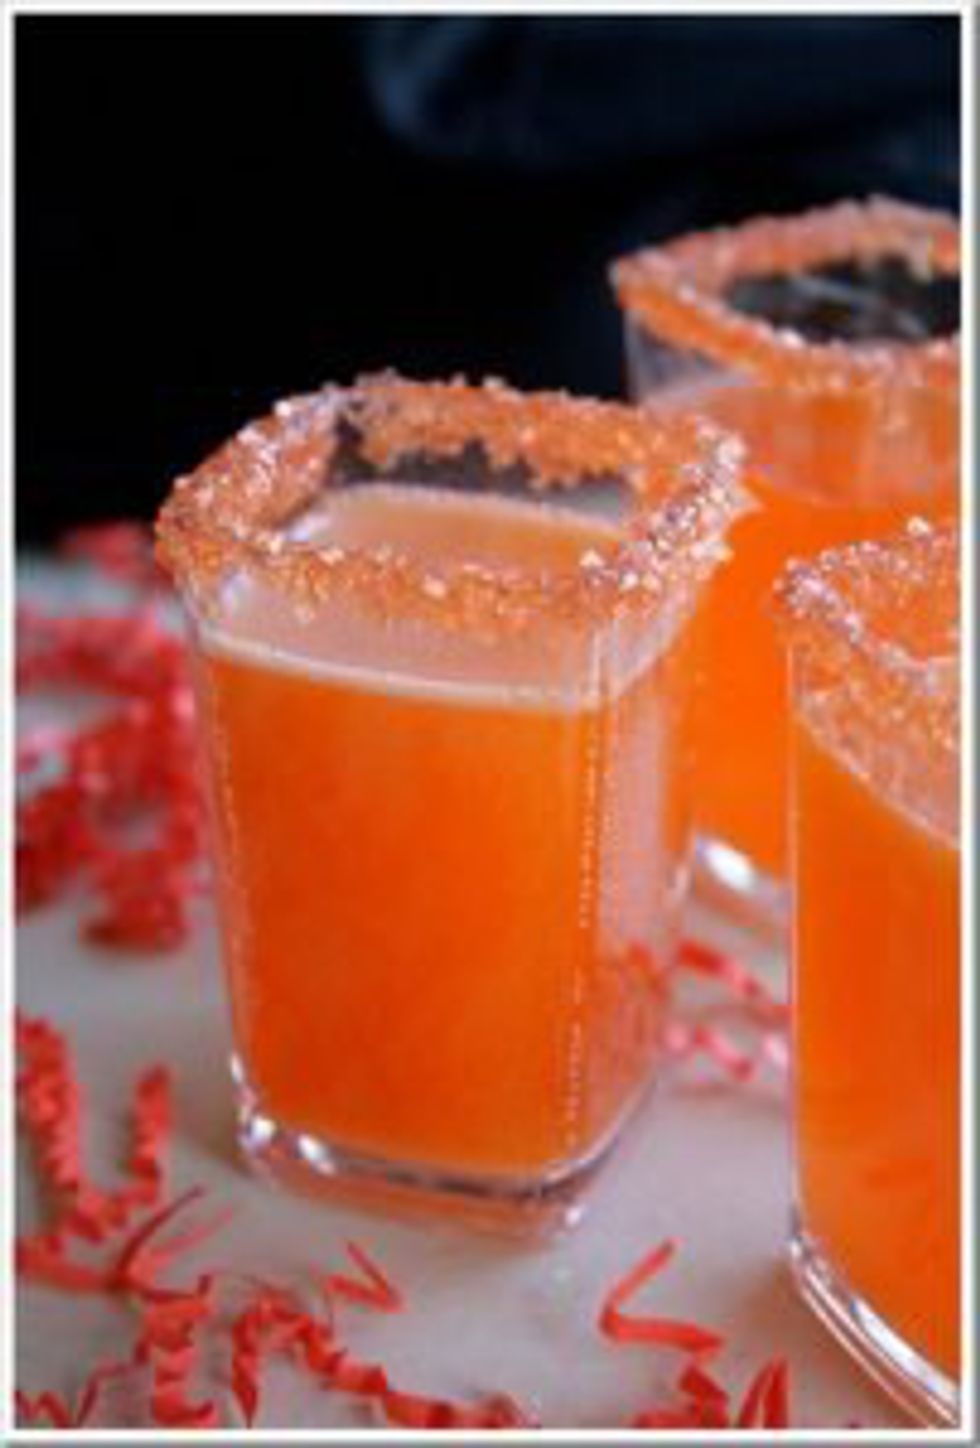
9. Hocus Pocus Fizz
Ingredients:
1 cup pineapple juice
1/2 cup rum
1/4 teaspoon Imitation Coconut Extract
3 drops Red Food Color
2 drops Yellow Food Color
1 bottle (750 ml) sparkling white wine
Directions:
To Rim Glass with Orange-Tinted Sugar: Place two tablespoons sugar in small resealable plastic bag. Add five drops Red Food Color and five drops Yellow Food Coloring. Seal bag. Knead sugar until the color is evenly distributed. Pour out onto shallow plate. Dip rim of beverage glass in water, then into Orange-tinted sugar to lightly coat. Mix pineapple juice, rum, coconut extract and food colors in measuring cup. For each cocktail, pour two ounces pineapple juice mixture into beverage glass. Top with four ounces of sparkling white wine.
Serve.
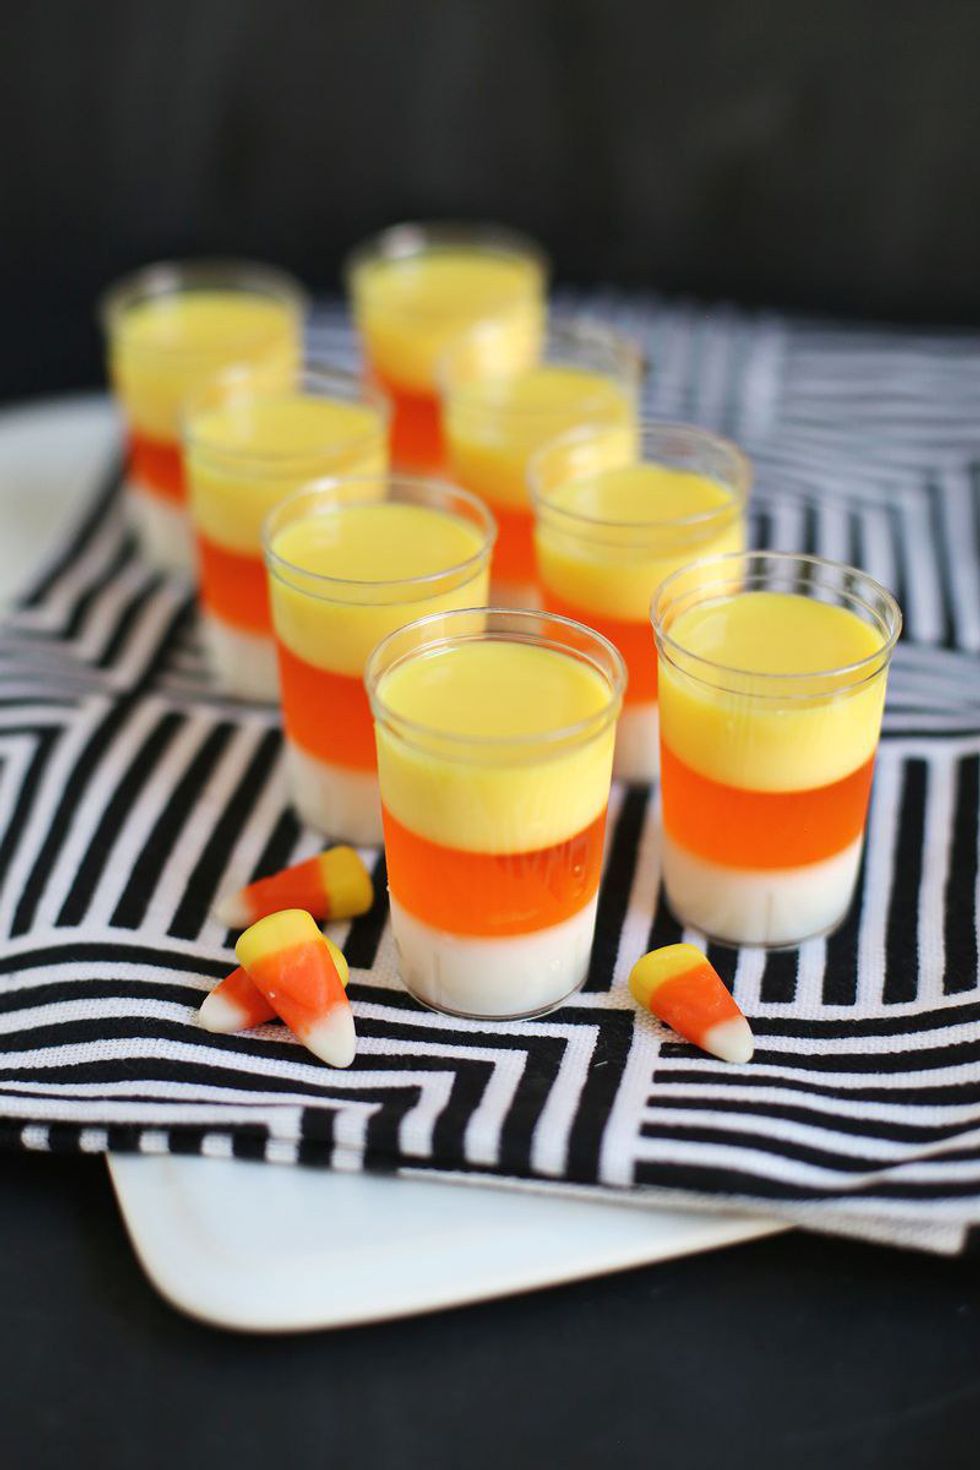
10. Candy Corn Jello Shots
Ingredients:
Candy Corn Jello Shots, makes 20 shots
1 small box orange-flavored Jell-O (3 oz)
3 envelopes Knox unflavored gelatin
7 oz. sweetened condensed milk (1/2 of a 14 oz. can)
2 cups water
1 cup vanilla or cake vodka (add more if you like strong shots)
yellow food coloring
tall shot glasses
Directions:
- This first step will make both your first and last layer, so once it's mixed together, you will save half of this mixture for the end. Pour one cup of water into a small saucepan and pour two packets of the unflavored gelatin into the water. Warm the water and gelatin over a low heat, stirring occasionally, until all the gelatin has dissolved (about five minutes). Remove pan from the heat and add 1/2 your can of condensed milk to the mixture. Stir until the ingredients combine. Add 2/3 cup vanilla vodka. Cover and set aside half of your milk mixture (you'll add food coloring to it and use it as your last layer later). Evenly distribute the first half of your mixture throughout your 20 shots (just don't fill them more than 1/3 of the way full). Refrigerate your shots until firm (30-40 minutes).
- When the first layer is firm, pour another one cup of water into your saucepan and add one packet of gelatin to make your middle layer. Warm the water until the gelatin dissolves, remove from heat, and stir in the box of orange Jell-O until that dissolves as well. Add 1/3 cup vanilla vodka. Evenly distribute orange layer on top of white layer and refrigerate until chilled.
- When your orange layer is solid, retrieve the second half of your milk mixture that you set aside in the first step and add in a few drops of yellow food coloring. If the mixture has already started to set, put it in the microwave until warm and still until the lumps dissolve. Distribute your yellow layer on top of the orange and put it back into the fridge until set.
- Once all your layers are set, you are ready to serve your candy corn creations.
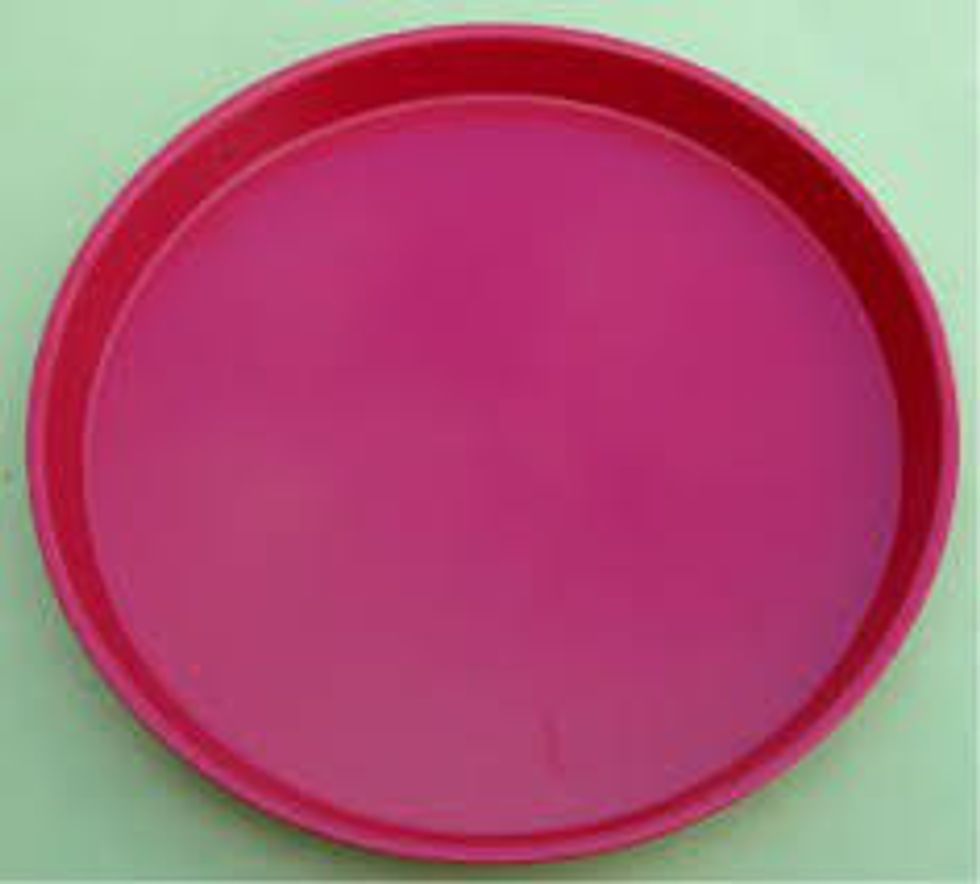
Many of these desserts are small: the cookies, brownies, and pumpkins. I would suggest you use a tray like the one above to transport them. It is actually used for eating crayfish here in Louisiana, but doubles as an effective dessert tray for parties.
I hope you enjoy making these recipes as much as I do!
Have a safe and happy Halloween!