

Although I have never actually been to a fraternity formal myself, I have painted a few coolers for friends who have. Cooler painting is an extremely labor intensive art that you should not go into blindly. Here are my tips and tricks to successfully painting an awesome cooler that will last years! If you read all the tips and still feel like it is too daunting of a task, maybe you should just pay someone.
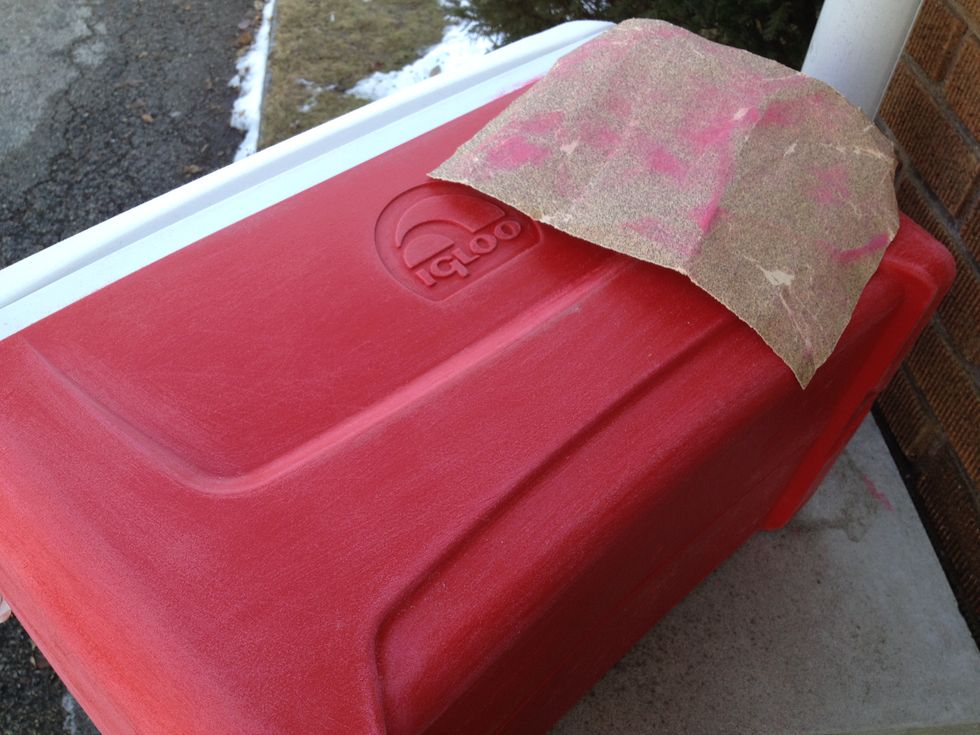
1. Sand it 'till you can't sand it anymore
Grab your laptop and turn on Netflix because sanding the cooler is definitely the longest and most boring part of cooler painting -- but sanding is the most important step to creating a cooler that will last longer than a week. I suggest using two, or better yet, three types of sand paper: course grit, medium grit, and fine grit. Start with course grit and, with a lot of pressure, sand each side of the cooler until you cannot see the original texture of it. With the medium grit and a slightly lighter touch, sand the whole cooler again. Lastly, with the fine grit sandpaper, lightly sand the cooler until the surface is very smooth with no bumps.
2. Wash all the powder off from sanding the cooler
Easily the most forgotten step to cooler painting, it is super necessary that you wash off the gritty powder from the cooler. Wash it with just water and some type of brush and make sure to let it dry before you prime it. If you prime it with all the powder still on it, the cooler is a lot more likely to chip. It only takes a second, so just do it!
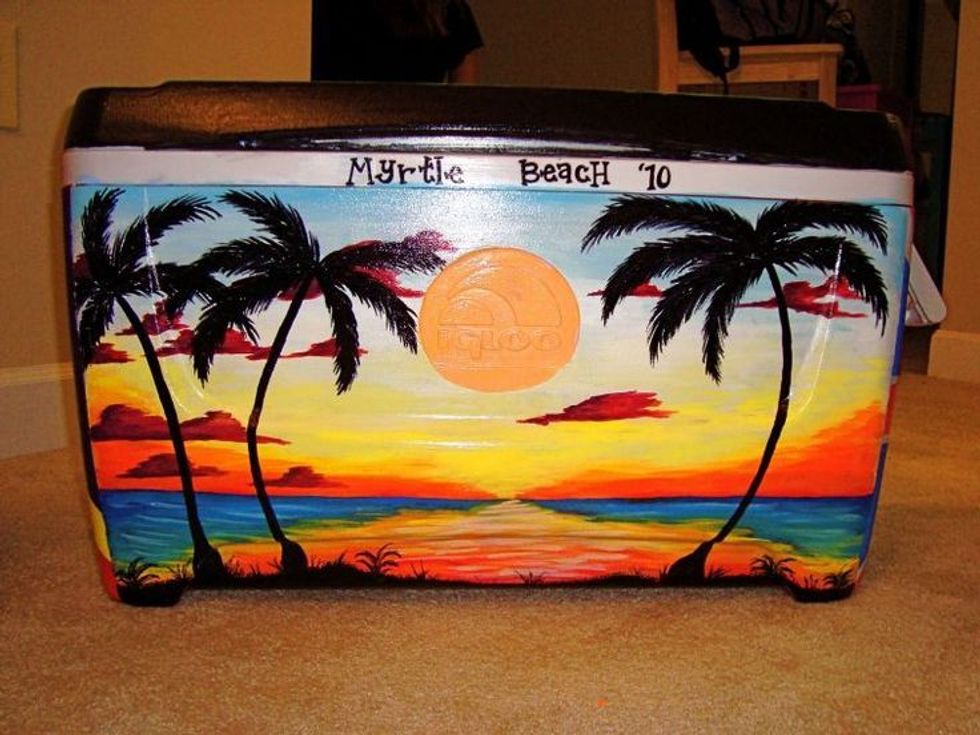
3. Fill in the indented logo
If you feel like going the extra mile, fill in the trademark indented "igloo" or "coleman" logo with Spackle or Modge Podge. Beware: while Spackle does create the best looking cover up, it smells HORRIBLE, so if you are going to do it, make sure to do it outside. An easier, but less professional approach is to fill it in with Modge Podge. Turn the cooler on the side so that the logo it on the top and poor Modge Podge into it until its full. Let it dry overnight, then repeat. You might have to repeat this a few times as the Modge Podge tends to shrink when it dries.

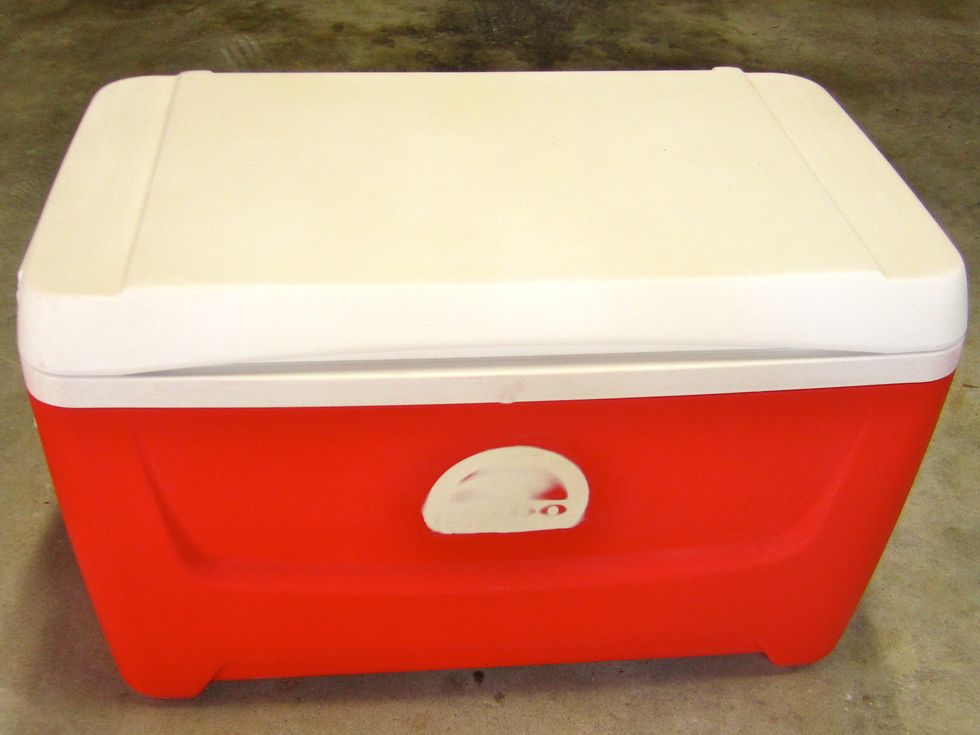
4. Prime it...good
Priming the cooler is a step that cannot be overlooked because acrylic paint will not stick to the bare surface of the cooler. With painters tape, tape off any parts you do not plan on painting (e.g. the handles and wheels). Use a plastic spray primer like Krylon Fusion or Valspar Plastic Primer and apply two to three coats to each side. Wait at least 15 minutes between each coat. Make sure to do this step outside and on a surface you are okay with ruining. Wait a day before painting on the cooler.

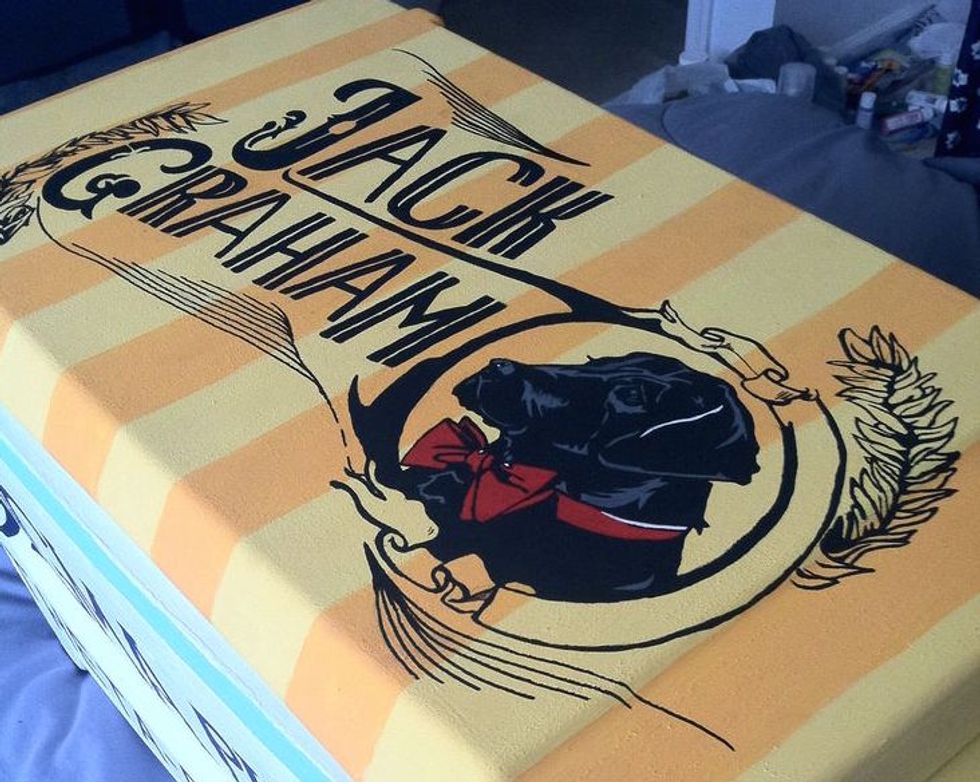
5. Decide what to paint and on what side to paint it
There are SO MANY things you can paint on a cooler, the ideas are truly limitless. Try to find out what your date's favorite brand names are or sports teams. He will appreciate it much more if it is personalized. I would suggest having the top incorporate his name some way (e.g. southern tide logo, but instead of "Southern Tide" write his name in the same font style). On one of the larger sides, make it themed the place the formal will be held (e.g. NOLA). On the other sides, be creative and maybe plug your srat in there somewhere in the style of "DG loves KA"; they will never notice.
6. Paint the background colors first
Get excited, this part's hard to mess up. Whether you have decided to paint the traditional Patagonia logo or the fraternity's crest, figure out what the background colors of each side will be. Tape a strip of tape down each side and around each edge to ensure sharp lines. With acrylic paint of your choice, paint the background colors of each side. Tip: It doesn't have to be one solid color; it can be ombre from red to yellow for a beach scene (get creative). Use a larger brush for this part. Two coats is ideal.
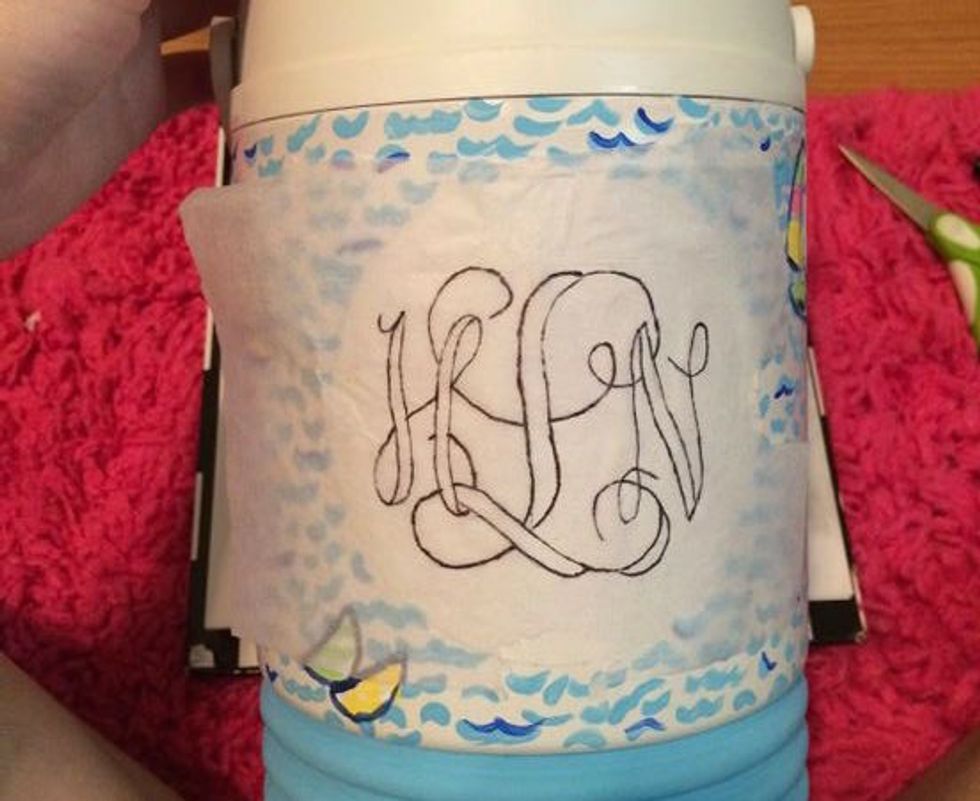
7. Transfer the designs onto the cooler
This part is easier than you think. For inexperienced painters, I would suggest printing the design out, then tracing it onto tissue paper. Take the tissue paper and tape it onto the cooler and with a Sharpie, draw over the tissue design to transfer it to the cooler. It might take a while, but it is totally worth it for an awesome looking cooler. If you are a good freehand artist, then just go for it and draw it on the cooler with a pencil. Or if you have an artist friend, bake them cookies and I promise they will draw the designs on your cooler for you (trust me).
8. Paint!
This part should be fun, relaxing, and easy because your design is already on there. Remember your 1st grade coloring lessons and "Stay in the lines!". If your hand is just not steady enough for the small detailed lines with a paintbrush, try using paint pens-- they are a lifesaver for straight lines. But be careful not to use a paint pen to paint a large area of the cooler because it is noticeable and can make it look tacky. Have fun with this part!
9. Last but not least, Modge Podge that bad boy
After all your hard work, it is only necessary to prevent your cooler from scratching by sealing it. After you are done painting your cooler and it is COMPLETELY dry, grab a large, CLEAN paintbrush and a tub of Modge Podge. Shake the Modge Podge to mix it then softly hit it on the ground several times to get the bubbles out. With nice, even strokes in one direction, coat all parts of the cooler you painted. TIP: Modge Podge goes on white but dries clear, so do not worry. Wait until the first coat dries then paint a second coat. If you have the time and some Modge Podge left, paint a third to really ensure no chipping.
Voila! You now have a spring break-worthy and frat party proof cooler that any guy should feel happy to own. Although it seems like a lot of work, it is very rewarding knowing your date has the best cooler there. If it just seems like too much for you, there are so many crafty girls who would love to paint a cooler for you (it might not be cheap though), but you can save yourself a lot of money if you do all the prep work (e.g. sanding and priming) first. Either way, I hope these tips and tricks help you to create your one of a kind cooler.


