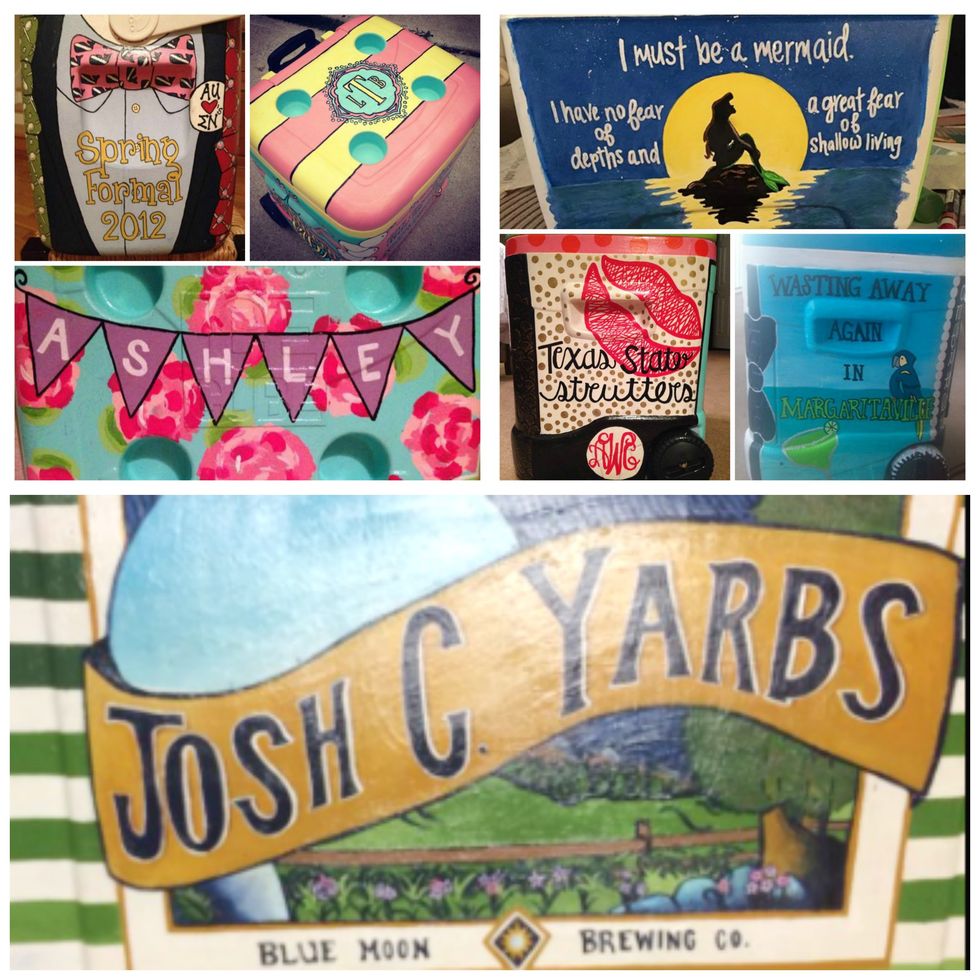
Painted coolers in the college realm are typically known as the perfect gift for your frat guy. However, they’re also perfect for your big, little, best friend, or even your own dingy cooler that needs a bit of rejuvenation! They’re personalized, super cute, and all of the time you invest painting five full masterpieces on each side shows the gift recipient how much you care. Here's a little survival guide starring Etsy's own, AshleysGiftShop.
Step 1: Buy a cooler.
Sydney: Igloo, Yeti, Coleman, with wheels, without wheels, with cup holders, without cup holders, there are plenty of options for types of cooler to paint. It all really depends on your intended use for said cooler!
Ashley: The best ones to paint are ones that don't have very many ridges or logos on them. I typically use the Igloo Breeze 48 quart cooler, because for the most part it’s completely flat.
Step 2: Plan, plan, plan.
Sydney: Fail to plan, plan to fail, right? Planning is SO vital to painting the perfect cooler. Pull out a notebook and sketch out your designs, so you have your own little blueprint. This will prevent you from going into Hobby Lobby completely blind when it’s time to stock up on supplies. Keep the person your painting the cooler for in mind; their letters, name, favorite brands, prints, monograms, sayings, sports teams, drinks, etc. Is this cooler for a specific event? If so, consider doing a side dedicated to the special day! Do you want a certain image/font that you can't freehand? Have no fear! You can just trace and transfer it onto a side! (We’ll touch more on that later.) If you’re still coming up short on ideas, Pinterest will always be there for you.
Things you’ll need:
- A Cooler
- Design Blueprint
- Sandpaper or Electric Sander
- Painter’s Tape
- Pencil(s)
- Paint
- PAINT PENS WILL SAVE YOUR LIFE
- Paintbrushes
- Primer
- Polycrilic Sealer
- Time
Optional (but recommended):
- Sharpie
- Mod-Podge
Step 3: Sand, sand, sand.
Ashley: SANDING IS SO IMPORTANT. I cannot stress that enough. If you don't sand your cooler and get all of the cooler's original clear outer coating off, all of your hard work will literally peel right off – it’ll be a disaster. Personally, I paint so many coolers that I ended up getting a power sander, which is a life saver. Otherwise, grab a block of sandpaper and get to sanding! The point is to get ALL of the clear coating and rough ridges off of the cooler. (Also, it won’t look pretty after sanding. DO NOT FRET YET.)
Step 4: Painter’s tape and priming.
Sydney: Put painters tape around the inside edge, handles, and corners of the cooler. You don’t want to paint the inside shut – I recommend you do the handles separately and taping off the corners will prevent the designs running together. Also, this is great for sectioning off an area for edge designs.
Ashley: Next, I prime my coolers with any white primer that says it will bond to plastic! Typically two coats of primer gets the job done, but I've heard a lot of people say that they mod-podge after they prime. Personally, I've never done it (and don't really find it necessary), buy hey, whatever floats your boat! Also, if you run a lint roller over the primer after it’s dry, it will pick up any bits of dust or fuzz that may have stuck to your cooler in the process. Again, we’re going for smooth here!
Step 5: Paint that cooler!
Ashley: I usually paint all five base coats first, and then skip around from side to side when putting the actual designs on! Let me just say: PAINT PENS, PAINT PENS, PAINT PENS. Paint pens are God's gift to sorority girls everywhere. They help SO much and are perfect for lettering or smaller designs with thin lines and what not. Another tip for the more complex designs is to print out your design and trace it. All you have to do is print out said image, trace it on to a piece of tissue paper, and then tape your new stencil to the cooler! Then, just trace the pencil lines with a sharpie (maybe one or two times) and the sharpie will bleed through, leaving your design on the cooler. Next, you just retrace and/or paint in the lines!
Now, if you find your design is too complex and would rather print it out, as opposed to painting it, you can do that as well! Just print and cut out the design, wait overnight for the ink to dry completely, put a thin layer of mod-podge on the cooler wherever you want it and then put a thin layer on the back of whatever you're sticking on there and stick it on the cooler! If you choose to do this make sure you smooth it out!
Sydney: It’s important to wait for ALL coats (primer, paint, etc.) to dry before moving onto the next step. Painting coolers is a tedious task and with that waiting a few hours, or even a day, or so before moving on to the next step would be ideal. Throughout painting your cooler, you should also apply coats of mod-podge to seal your work as you go! As with basically every other crafting situation you get mixed up in, mod-podge is your BFF. Also, keep the BIG picture in mind and then focus on the little details when painting. I’d recommend doing the background colors first before going in for the more intricate aspects of your design, including the corners. This is why planning before you start painting is so important!
Step 6: Sign, sealed, delivered.
Ashley: When I’m done painting, I do a single coat of mod-podge and then hit it with a couple coats of spray on polycrylic! (Again, waiting in between each coat.) I've heard a lot of people put up to four coats of mod-podge and around six coats of polycrylic, but I think that's a little over kill! As long as you’ve been putting a few coats of mod-podge throughout your painting process, you’ll be golden.
Sydney: Now that you’ve slaved over this wonderful piece of artwork for hours, it is finally time to part ways! CONGRATS YOU DID IT!

Finally, get creative with your gift giving! You've executed a museum worthy piece. Now fill that bad boy up! Various items including, but not limited to, their favorite drinks, koozies, bottle openers, ping pong balls, croakies, towels, sunglasses, jandals, etc. are perfect for filling coolers! Whatever fills your little cooler-giving-heart with satisfaction. You know, you may want to consider including some tissues because someone is sure going to be moved to tears when they receive this one-of-a-kind cooler.
Hopefully after this little guide, you’ll find yourself creating the Mona Lisa of coolers. However, if you find yourself in a bind, our very own Ashley would be more than happy to help you herself. Check out her etsy here!