
Growing your own pineapples takes some patience, but the payoff is well worth it! The indoor-to-outdoor process it quick, as in, "chop-chop" quick, Simply remove the crown of the pineapple fruit that you're about to cut up and consume and get to planting.
I'll be a little more specific:

I just walked outside and picked my own organically grown pineapple!

 Want to learn how to do the same?
Then check out this article I wrote for breaking it down into the no-fail basics.
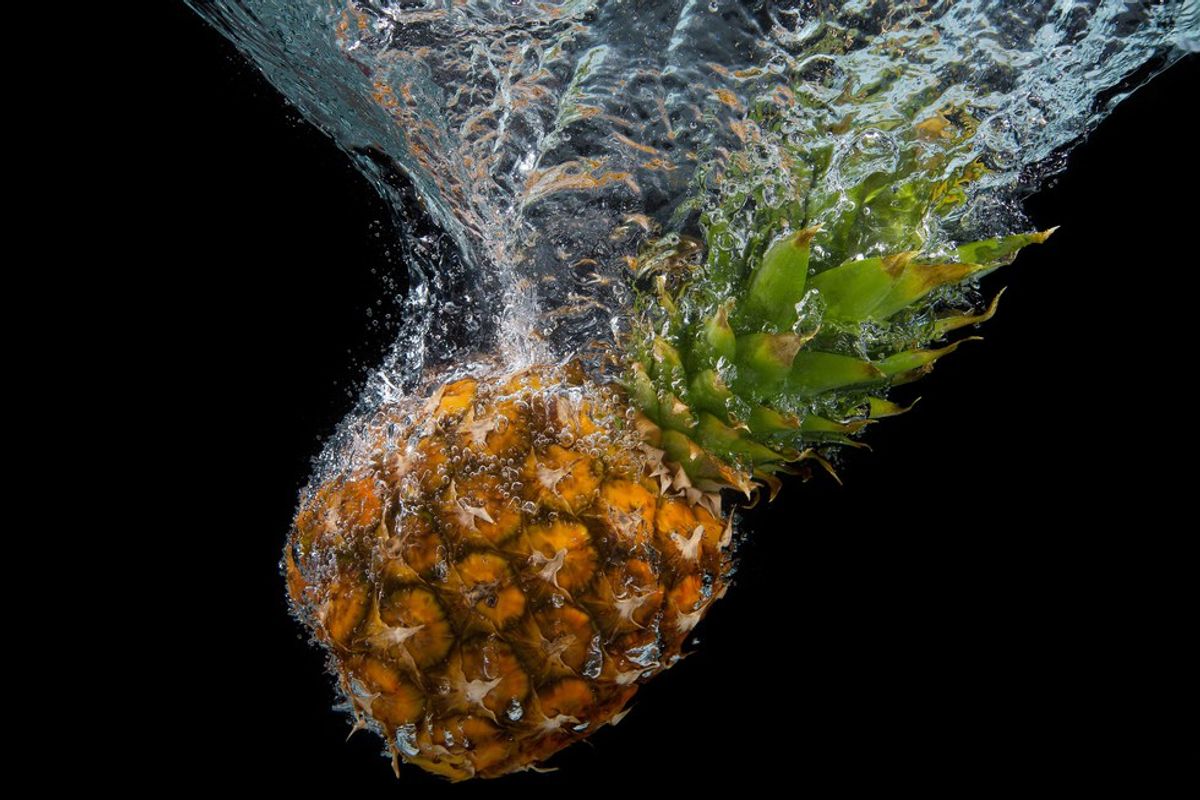
I've got a total of six pineapple plants which produced this summer. So far, two of them have ripened enough to eat and enjoy. This one is the second in line.
The very first one had a great big bite in the side by a rather discerning squirrel or bird...or it could have been a vegan feral cat, but I doubt it. Because a portion of the first one got eaten, I learned my lesson and wrapped netting around the other five to prevent future uninvited dinner guests. Check it out:


I used tomato cages and small-knit netting that I had on hand from last year's berries. So far, it's worked well. I only had this
After picking this one today, I'm now waiting on four more to ripen. They should be ready by August's end, maybe even earlier by the way the Florida sun is baking us this summer!


To further discourage birds and squirrels, homemade foil squares tied near the fruit make loud, crinkly noises and flash in the sunlight when an animal lays its paws or claws on its quarry. This really helped with the figs that I was having trouble hanging onto:


The pineapples do take a while before they produce. Patience is required! But they require such little maintenance once you plant them, they pretty much take care of themselves. I encourage you to give it a try, especially if you are here in Florida or a similar climate.


Another type of fruit plant which takes a bit of patience (but not much maintenance) is an avocado tree. Sprouting an avocado pit takes time and persistence. I began this little Haas avocado tree by first germinating the pit in a container of water on my kitchen counter forever about a month.
I followed up with the next one I consumed to ensure cross-pollination between the three Haas plants in my yard because I'd started with just the large Florida avocado tree which started out as a homegrown avocado pit itself!


The avocado pit progress takes about six weeks. The avocado pit begins to split on its own in the water. Be sure to change the water regularly. (It will evaporate and also get gross and moldy if you don't change it.) I just use room temperature tap water. Make sure the entire pit is submerged in the water.
As the germination progresses, the roots will begin to emerge and a miniature tree will actually sprout up on the other end!
Remember, I have a super detailed step-by-step guide here if you want more specific instructions.
It's always good to have a plan. :-)
So if you are thinking of one last project as we delve into this semester, how about a small gardening project? It can be done in containers, on your patio, porch, or balcony, even your rooftop! Or you could go the traditional route and plant right in your backyard!

And remember, you can plant ANYTIME OF YEAR. I put together an article that is just perfect for novice gardeners and children. Anyone can grow stuff! Promise! Check it out: Here!


 Going to the cinema alone is good for your mental health, says science


 women in street dancing
Photo by
women in street dancing
Photo by  man and woman standing in front of louver door
Photo by
man and woman standing in front of louver door
Photo by  man in black t-shirt holding coca cola bottle
Photo by
man in black t-shirt holding coca cola bottle
Photo by  red and white coca cola signage
Photo by
red and white coca cola signage
Photo by  man holding luggage photo
Photo by
man holding luggage photo
Photo by  topless boy in blue denim jeans riding red bicycle during daytime
Photo by
topless boy in blue denim jeans riding red bicycle during daytime
Photo by  trust spelled with wooden letter blocks on a table
Photo by
trust spelled with wooden letter blocks on a table
Photo by  Everyone is Welcome signage
Photo by
Everyone is Welcome signage
Photo by  man with cap and background with red and pink wall l
Photo by
man with cap and background with red and pink wall l
Photo by  difficult roads lead to beautiful destinations desk decor
Photo by
difficult roads lead to beautiful destinations desk decor
Photo by  photography of woman pointing her finger near an man
Photo by
photography of woman pointing her finger near an man
Photo by  closeup photography of woman smiling
Photo by
closeup photography of woman smiling
Photo by  a man doing a trick on a skateboard
Photo by
a man doing a trick on a skateboard
Photo by  two men
  running man on bridge
Photo by
running man on bridge
Photo by  orange white and black bag
Photo by
orange white and black bag
Photo by  girl sitting on gray rocks
Photo by
girl sitting on gray rocks
Photo by  assorted-color painted wall with painting materials
Photo by
assorted-color painted wall with painting materials
Photo by  three women sitting on brown wooden bench
Photo by
three women sitting on brown wooden bench
Photo by 
 Photo by
  Photo by
  Photo by
  Photo by


 people sitting on chair in front of computer


