
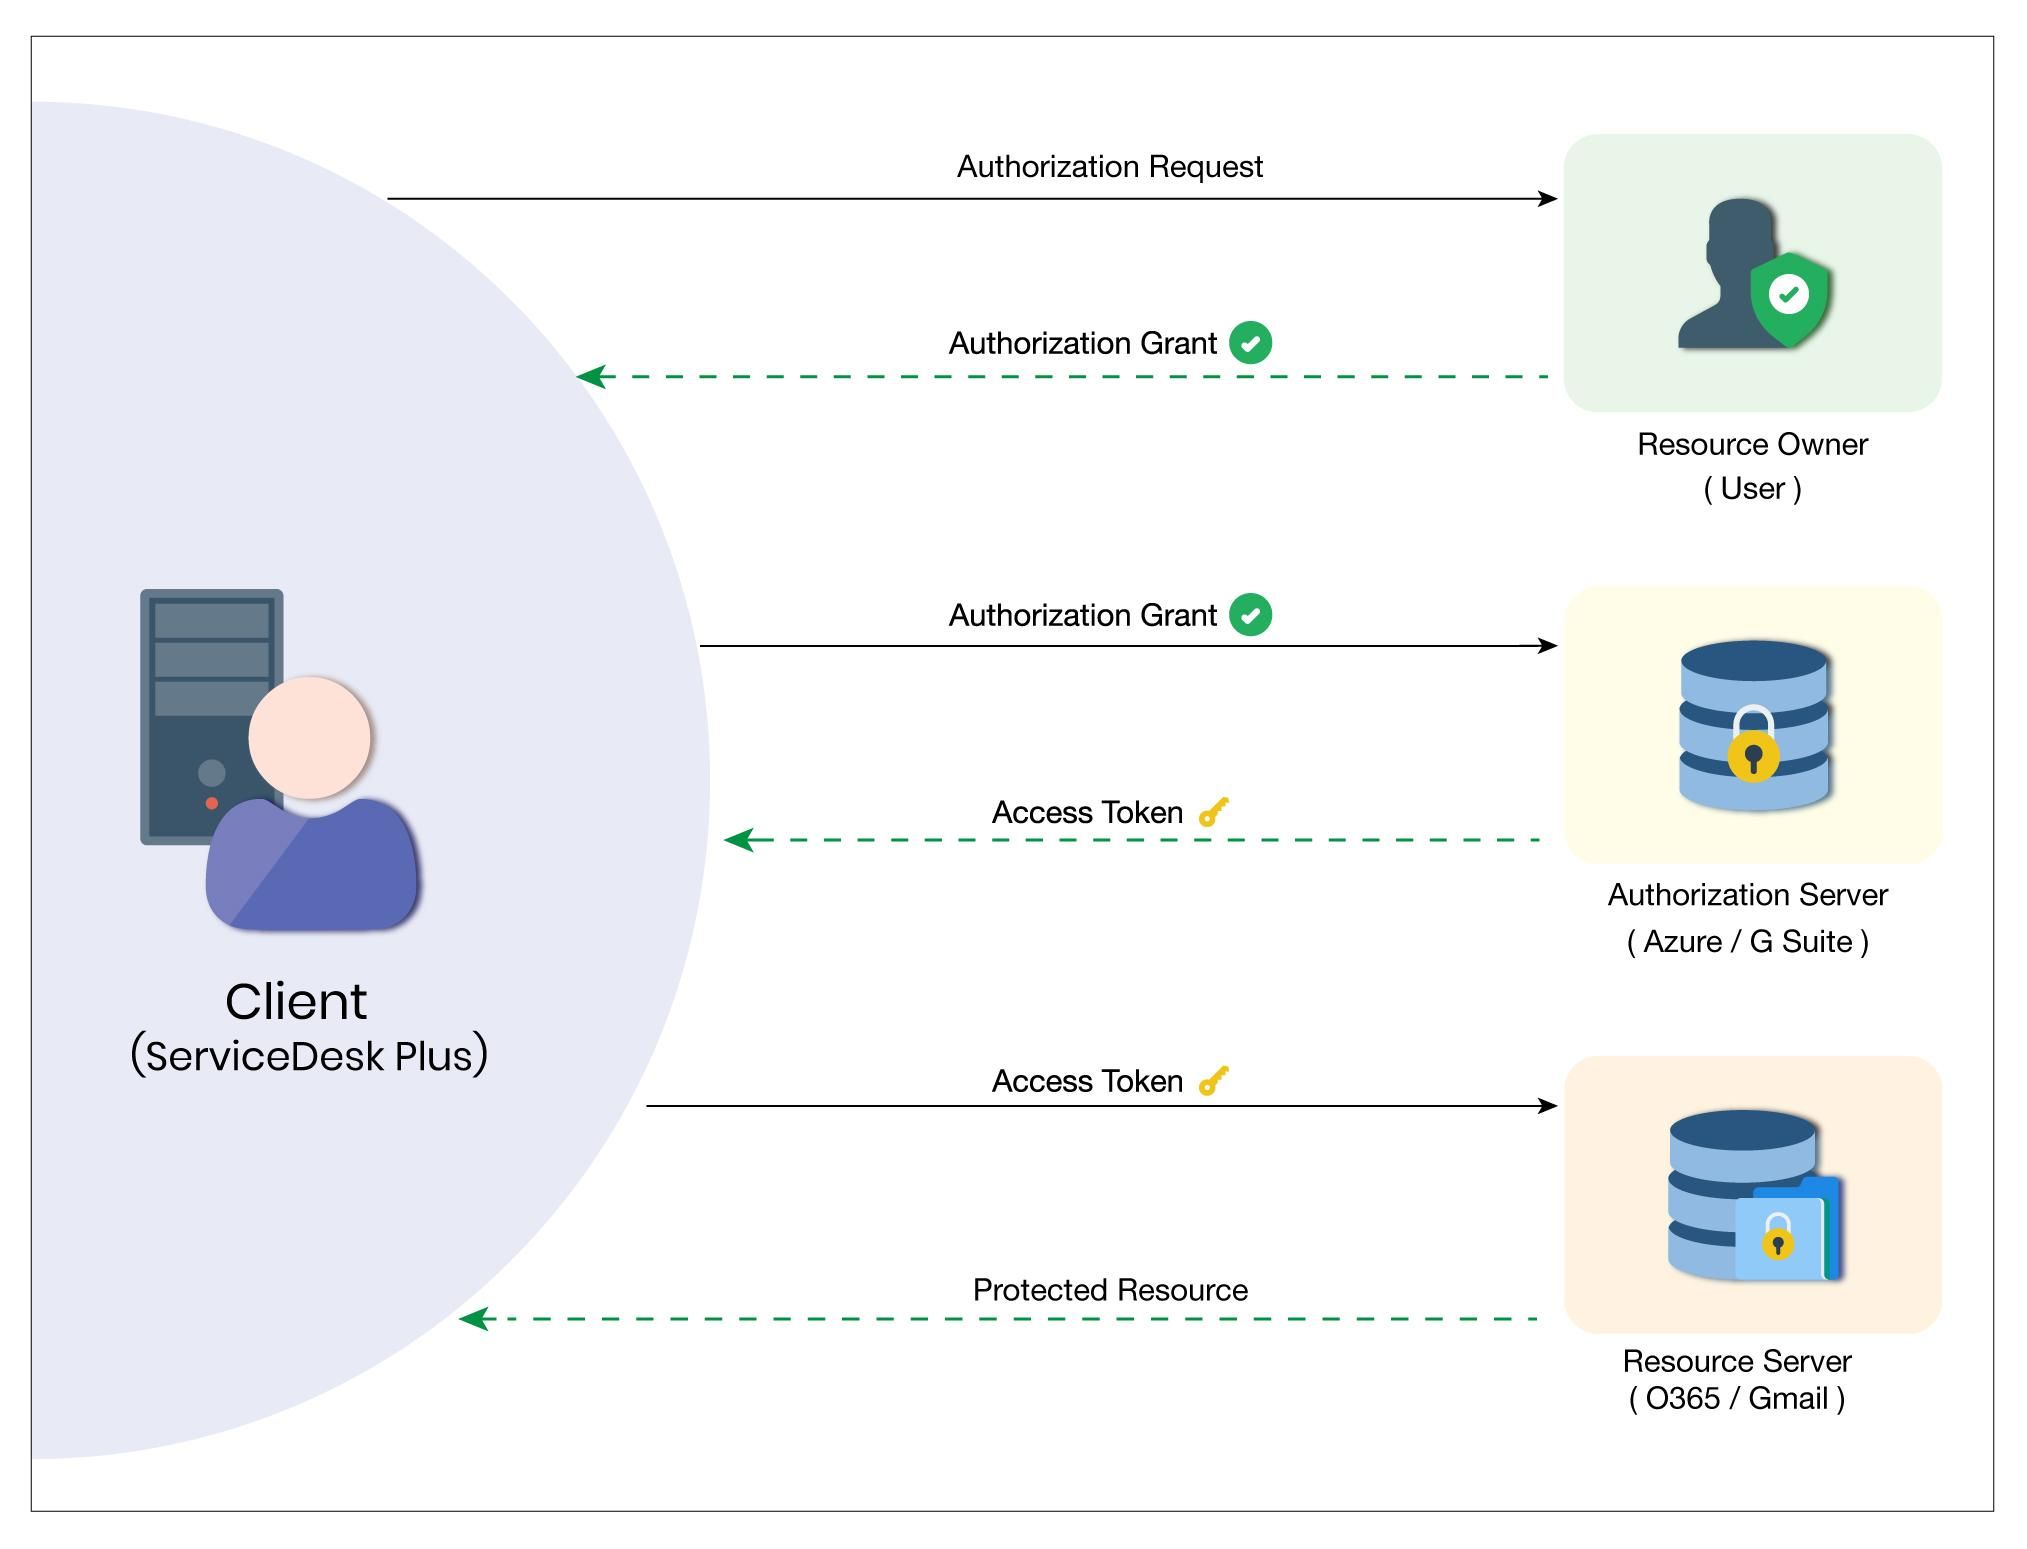
With OAuth, resource owners have the ability to create distinct permissions for each client that is requesting access to the same resource, and they also have the ability to alter or cancel access at any moment.
How does OAuth actually function?
The following entities OAuth Configuration are involved in the OAuth authentication process:
- The user who is in possession of the protected resource is referred to as the Resource Owner.
- The server that is hosting the resource that is being protected is called the resource server.
- In order to configure OAuth for the settings of incoming mail,
- To configure incoming mail, navigate to Admin >> Helpdesk >> Mail Server Settings >> Incoming.
- Select the Protocol for the Connection.
In the event that you go with POP/IMAP/POPS/IMAPS:
Select OAuth from the list of Authentication Types, and then enter the mail server's hostname and IP address in the corresponding fields.
The protocol used is IMAPS, and it cannot be edited because OAuth authentication is only supported for the IMAPS protocol.
The appropriate Port will be filled in automatically.
Go to Admin >> Helpdesk >> Mail Server Settings >> Outgoing.
Select the Protocol for the Connection.
If you decide to go with SMPT or SMPTS:
Select OAuth from the drop-down menu under Authentication Type, and then input the Server Name/IP Address as well as an Alternate Server Name/IP Address.
- Please provide the Sender Name and the Email Address to Reply to.
- Enter the Username of the mailbox that is associated with your account, and then select the Protocol.
- OAuth for the Configuration of Outgoing Email
- Incoming mail must first be configured for OAuth.
- Go to Admin >> Helpdesk >> Mail Server Settings >> Outgoing.
- Select the Protocol for the Connection.
If you decide to go with SMPT or SMPTS:
Select OAuth from the drop-down menu under Authentication Type, and then input the Server Name/IP Address as well as an Alternate Server Name/IP Address.
Please provide the Sender Name and the Email Address to Reply to.
Enter the Username of the mailbox that is associated with your account, and then select the Protocol.
If it is required, enable TLS.
The appropriate Port will be filled in automatically. If necessary, you are able to change the port.
Using the Redirect URL, get the following information from the authorization server: Client ID, Client Secret, Authorize URL, Access Token URL, and Scope. Both the Java Mail API with Gsuite and the EWS mail sending service have been put through their paces in our testing.
The configuration is finished when a message indicating success is displayed to the user.


 people sitting on chair in front of computer

 all stars lol GIF by Lifetime
 two women talking while looking at laptop computerPhoto by
  shallow focus photography of two boys doing wacky facesPhoto by
  happy birthday balloons with happy birthday textPhoto by
  itty-bitty living space." | The Genie shows Aladdin how… | Flickr
 shallow focus photography of dog and catPhoto by
  yellow Volkswagen van on roadPhoto by
  orange i have a crush on you neon light signagePhoto by
  5 Tattoos Artist That Will Make You Want A Tattoo
 woman biting pencil while sitting on chair in front of computer during daytimePhoto by
  a scrabbled wooden block spelling the word prizePhoto by
 StableDiffusion
 StableDiffusion
 StableDiffusion

 women sitting on rock near body of waterPhoto by
 Photo by
  Photo by
  Photo by
  Photo by
  Photo by
  Photo by
  Photo by
  Photo by
  Photo by
  Photo by


